Are you looking to improve the aesthetics and visibility of your 2014+ Toyota 4Runner? Upgrading to Morimoto XB LED Headlights can provide a better view of the road and its obstacles, as well as enhance the overall appearance of your vehicle In this blog, we'll walk you through a step-by-step installation guide to help you upgrade your headlights with ease.


Why Choose Morimoto XB LED Headlights?
Morimoto XB LED Headlights are a popular choice for 4Runner owners due to their sleek design, improved visibility, and easy installation process. These headlights offer a significant upgrade over the stock headlights, providing better illumination and a more modern look.
What You'll Need
To install Morimoto XB LED Headlights on your 2014+ Toyota 4Runner, you'll need the following items:
- 2x Morimoto XB LED Headlight Assemblies
- 1x Fuse Tap / DRL Harness
- A set of basic hand tools, including a 10mm socket and a flathead screwdriver

Installation Process
Follow these steps to install your new Morimoto XB LED Headlights:
1. Remove the front bumper screws and clips: Start by removing the three 10mm screws on the back of the front bumper from each wheel well. Then, remove the two two-piece push clips from the corner of the top of the grille, one on each side.
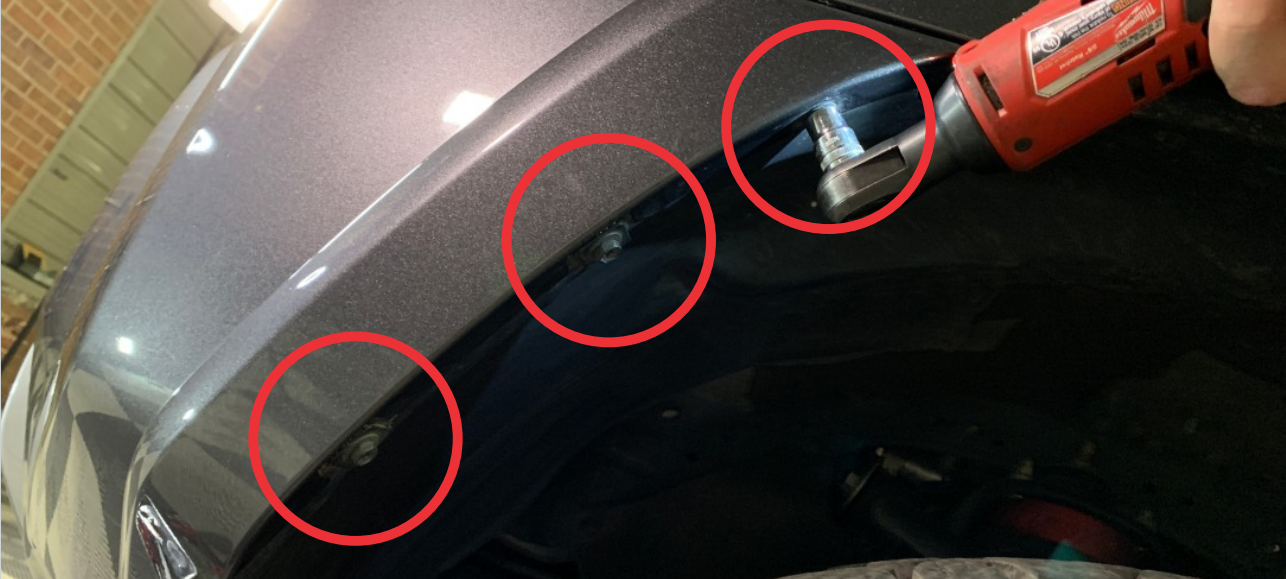
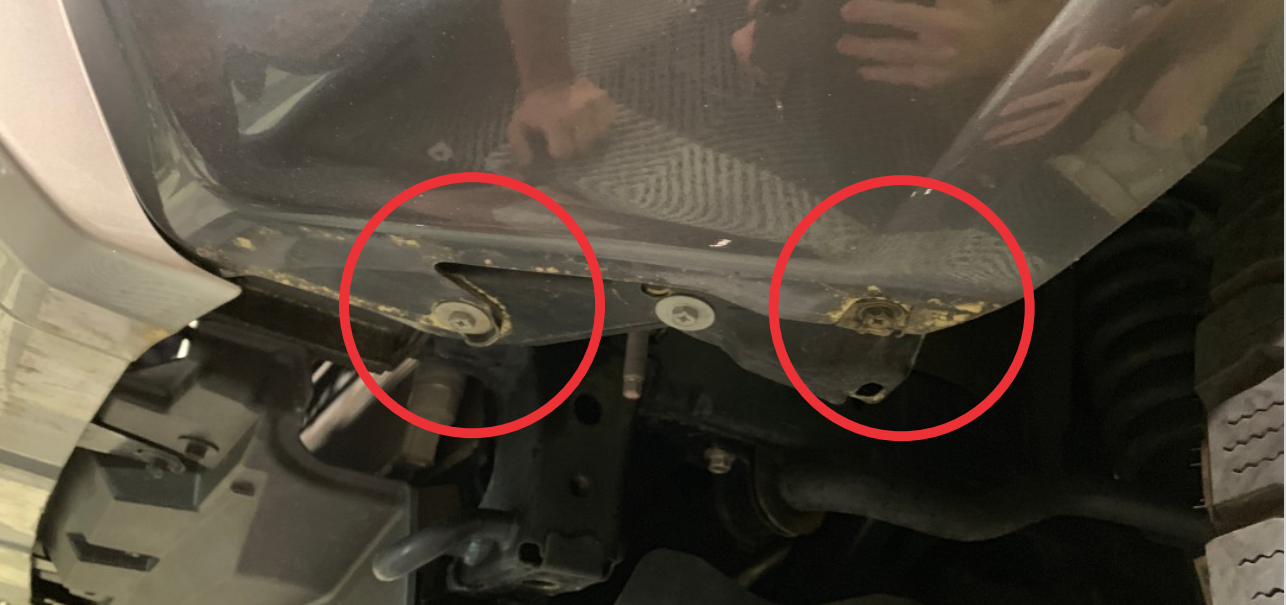
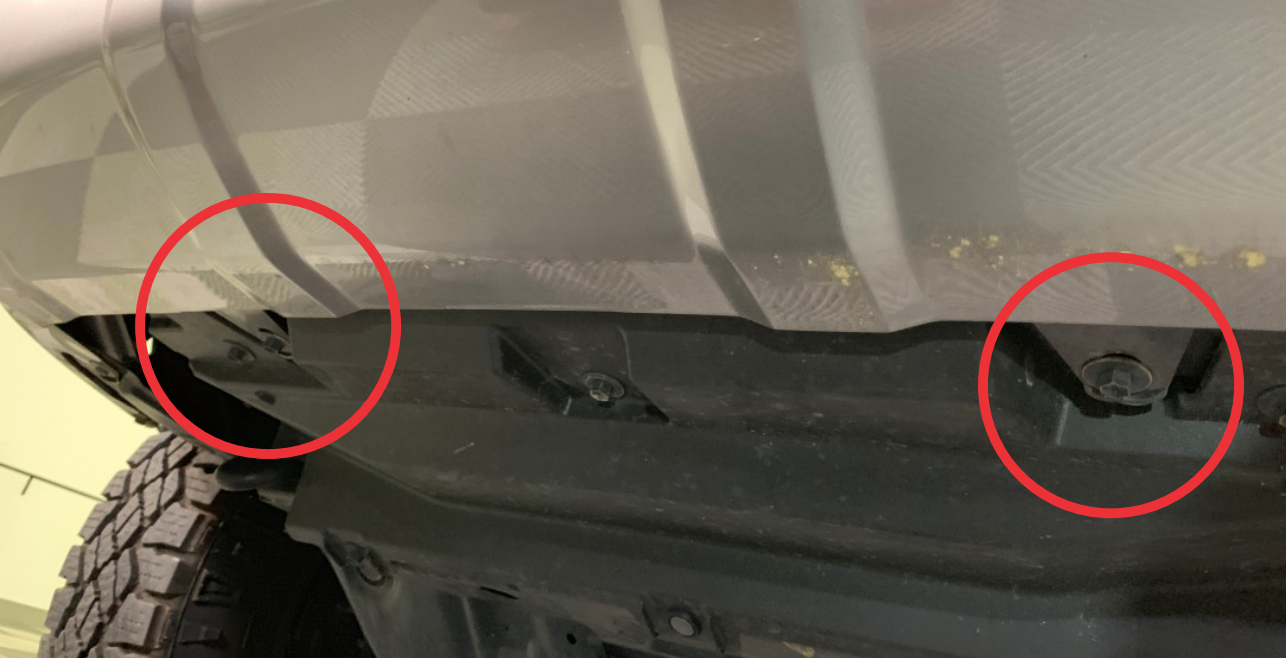
2. Remove bumper cover screws: Remove the two 10mm screws from under each side of the bumper cover, as well as the two 10mm screws from under the center of the bumper cover.
3. Remove radiator shroud clips: Remove the push clips along the top of the radiator shroud by pushing in the center of the clip and then prying the clip out of the hole.
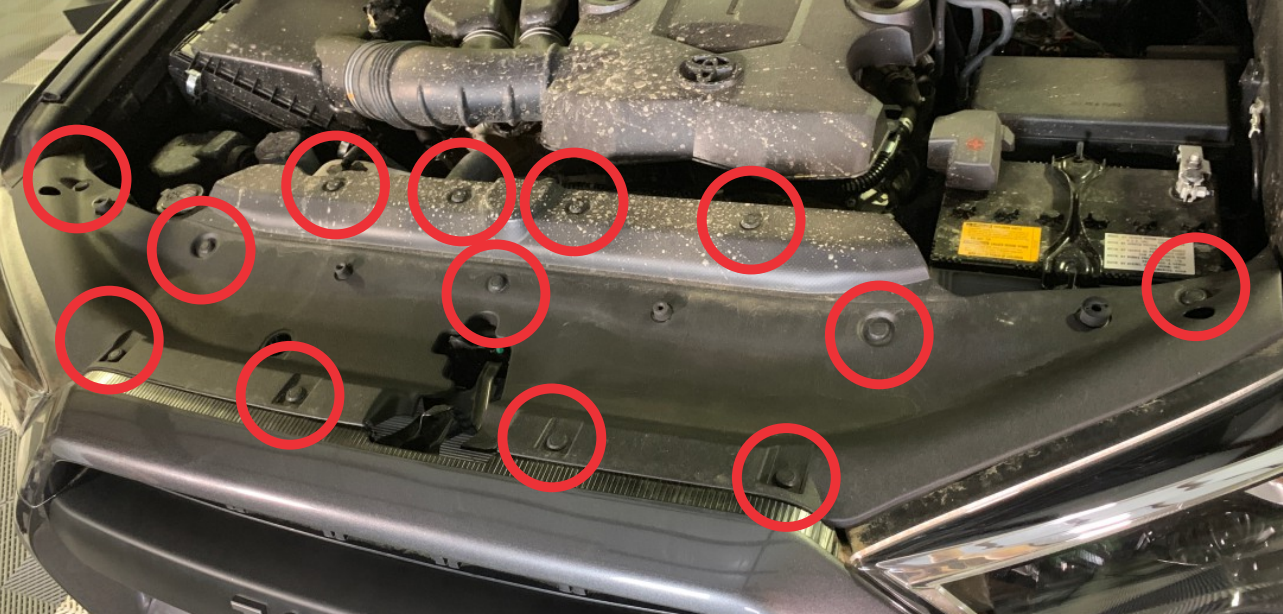
4. Remove grille assembly clips and bolt: Remove the two push clips and 10mm bolt from the grille assembly as indicated in the installation guide.
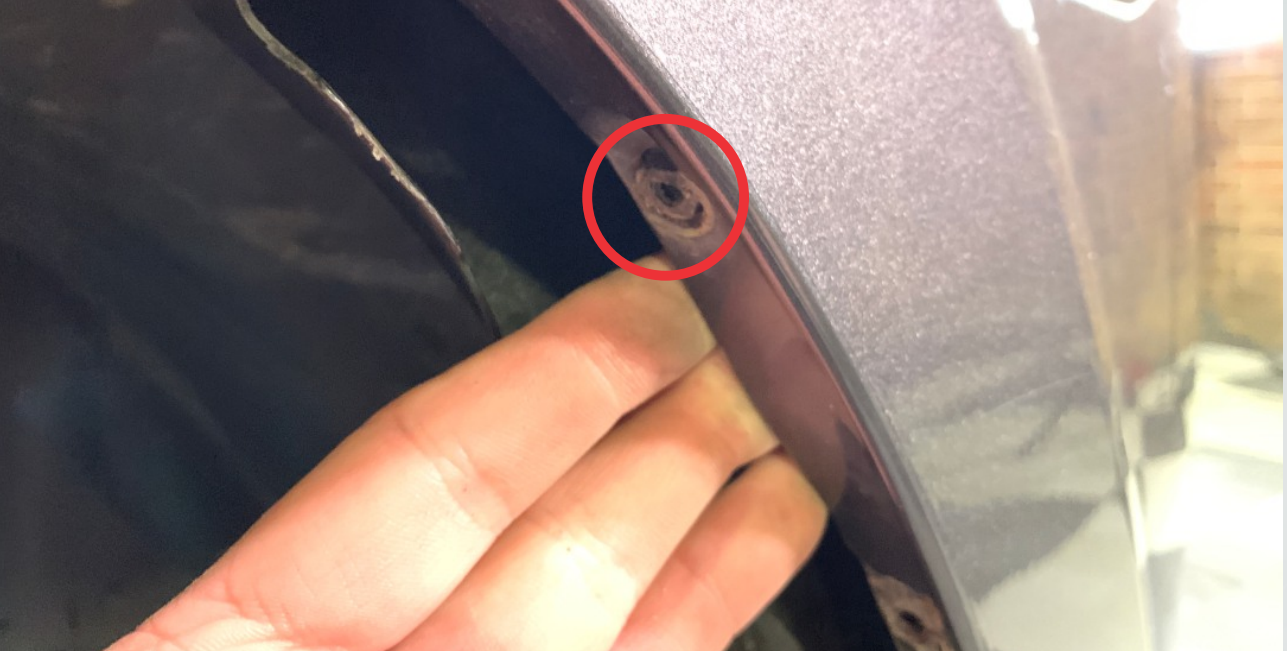
5. Unplug fog light bulbs: Reach in behind the fender liner and unplug the fog light bulbs. The bumper cover is now ready to remove.

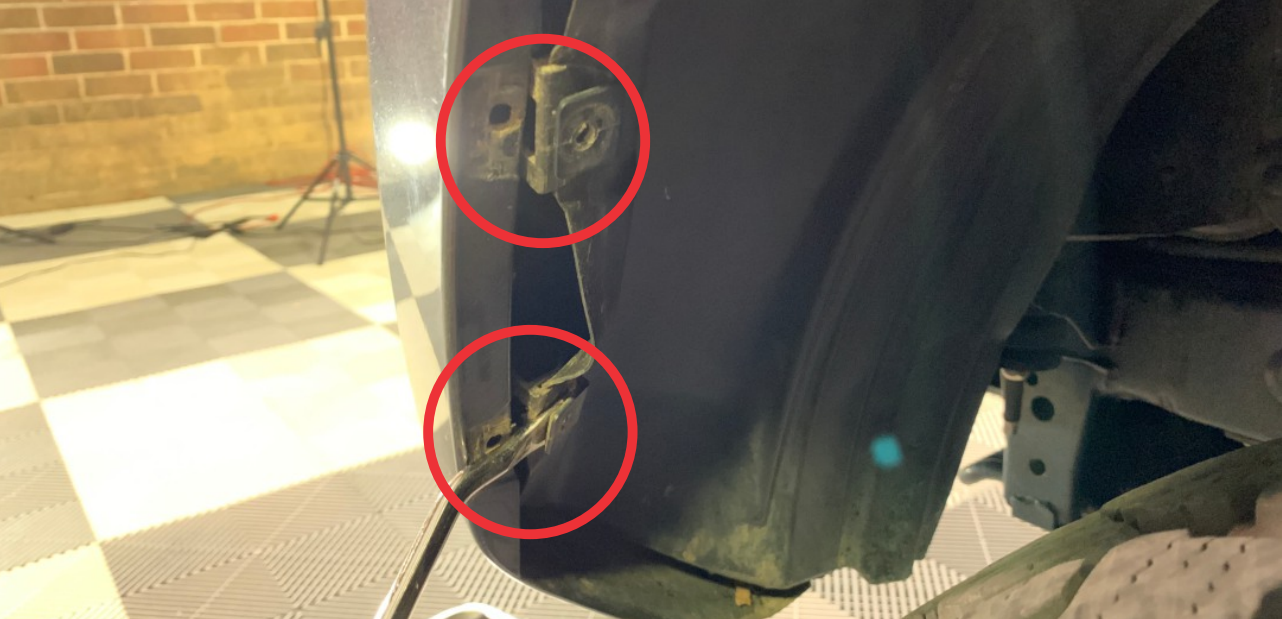
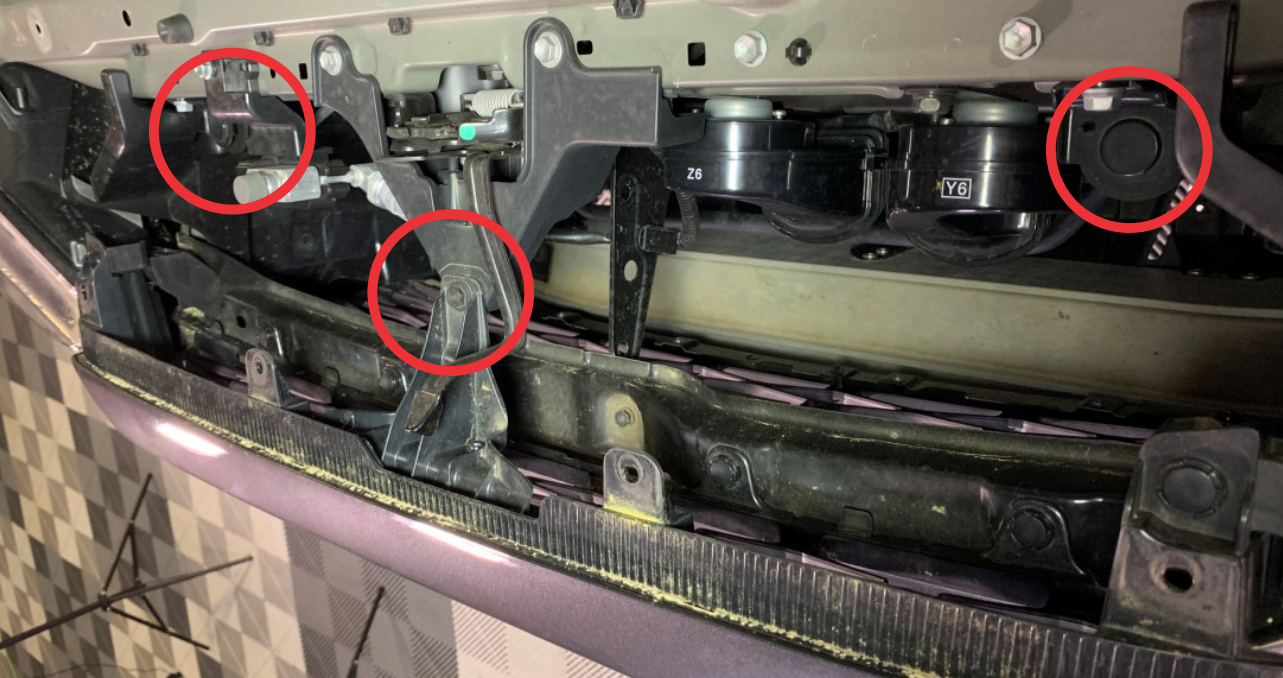
6. Remove the bumper cover: Pull the bumper cover over each stud on the sides, then work your way around the bumper cover to remove it.
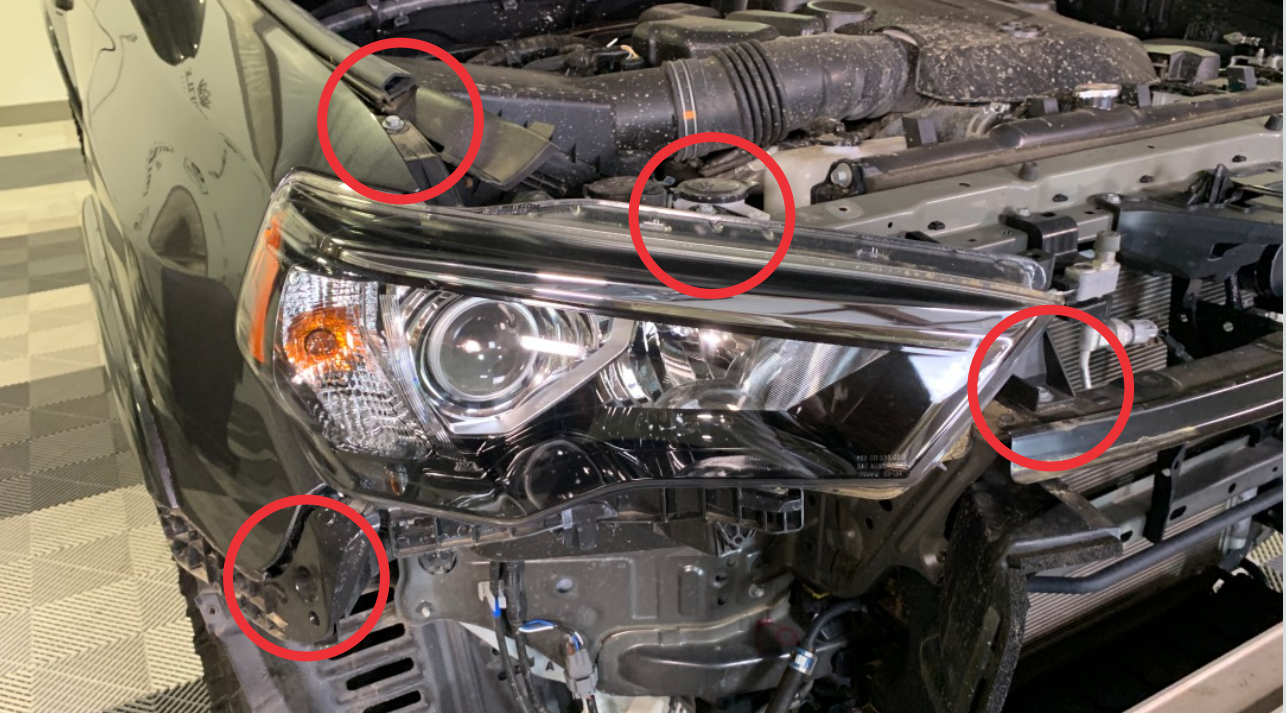
7. Remove the stock headlights: Remove the four 10mm screws holding the headlight on the truck. Lift the plastic tabs over the white screw clips. Unscrew the bottom headlight bracket from the headlight (2 screws) and fit it to the Morimoto headlights.
8. Route the DRL fuse tap harness: Route the DRL fuse tap harness across the radiator support panel.
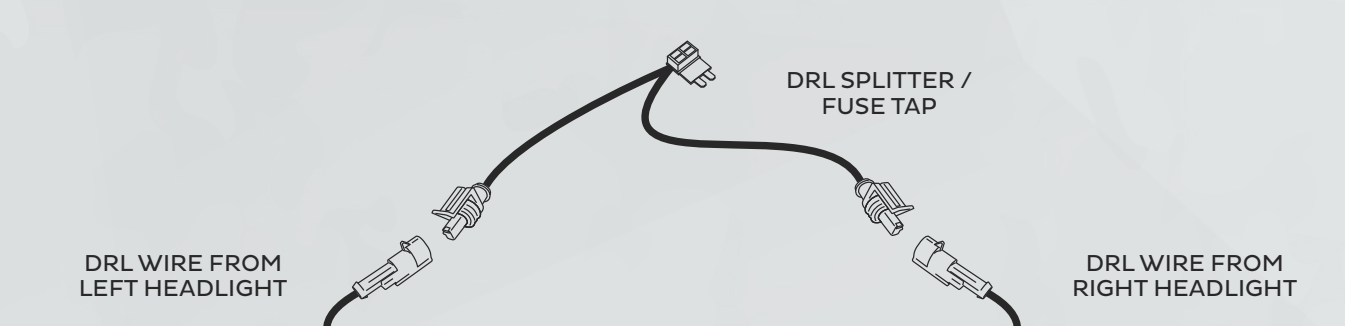
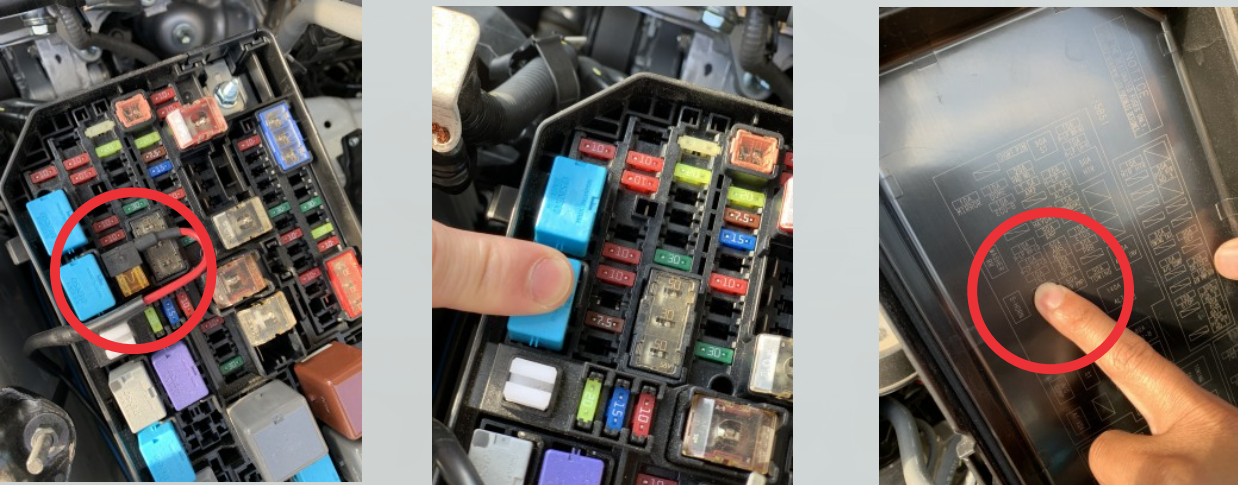
9. Connect the fuse tap: Connect the fuse tap to the injector fuse indicated in the installation guide. Note that if you have a 2020+ 4Runner, use the EFI 2 fuse slot instead.
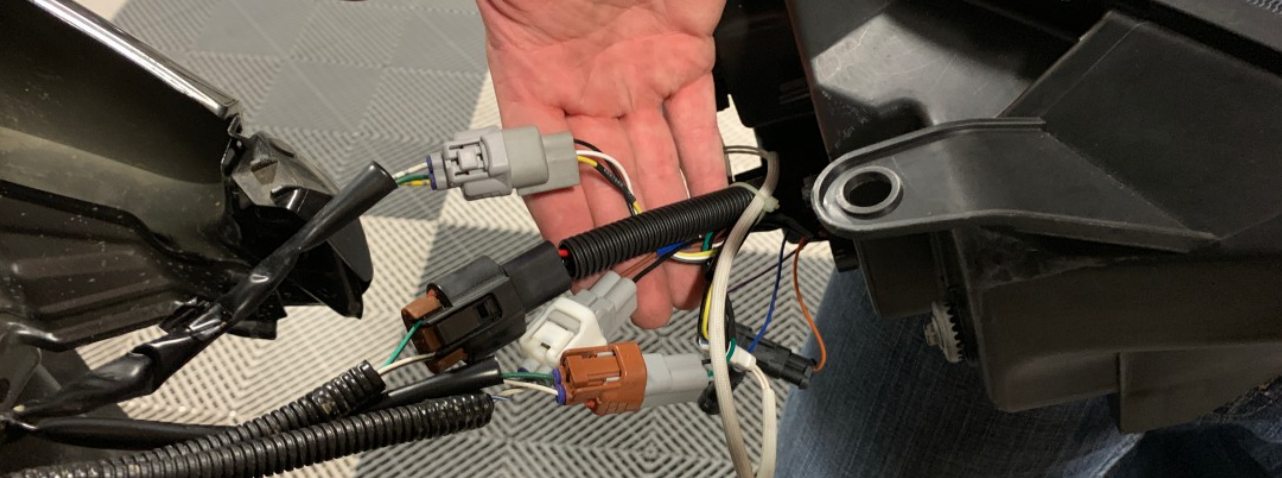
10. Connect the XB LED headlight: Connect the XB LED headlight to the factory headlight connectors.
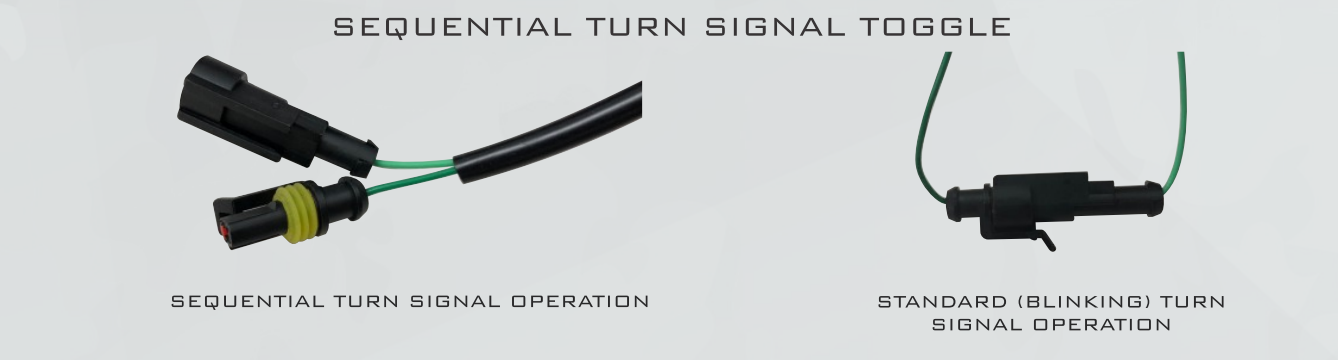
11. Configure the turn signal function: Configure the turn signal function to your preference.
12. Reassemble: Installation of the XB LED headlights is the reverse of the removal process.
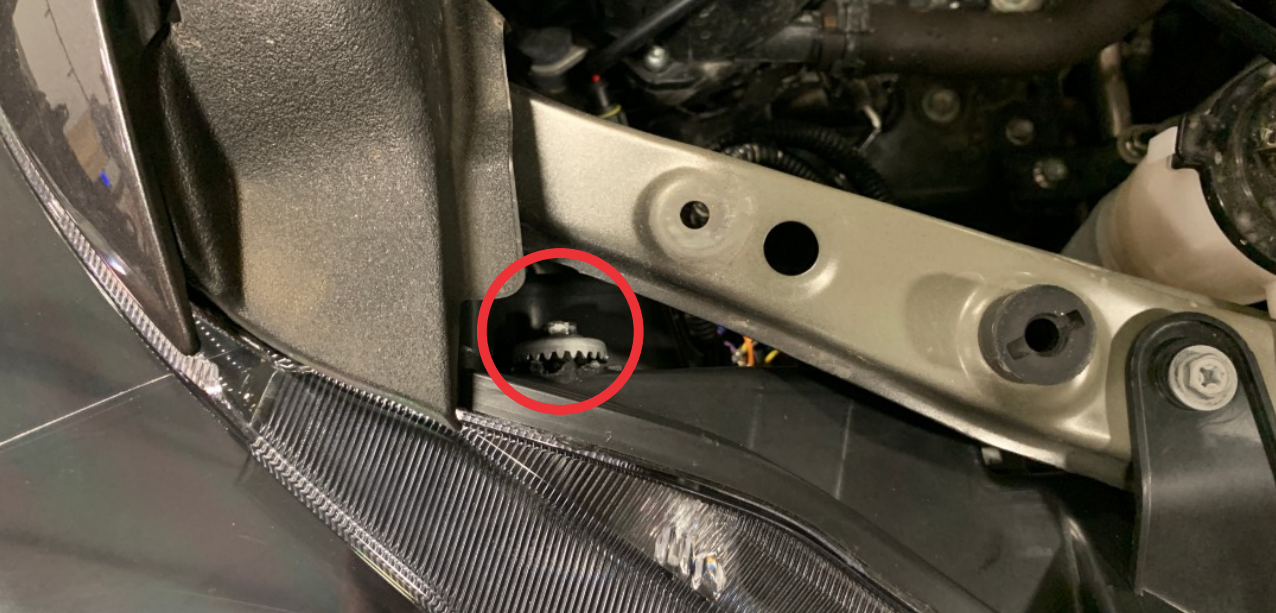
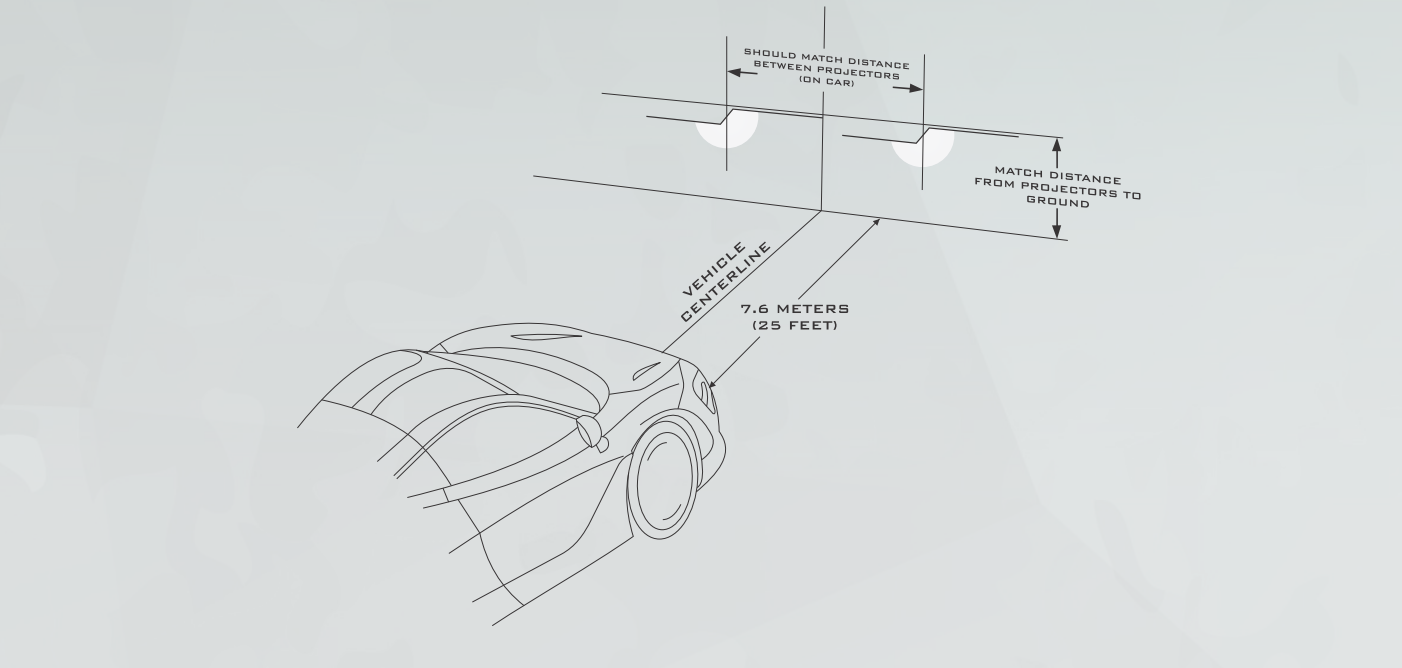
13. Adjust the Headlights: Refer to the aiming standards in the installation guide when adjusting your lights. The vertical adjuster can be accessed from the top with the headlight installed.
For a visual guide, you can also check out the complete installation video. Remember that professional installation is recommended if you are unable to clearly understand and adapt the information provided in the guide.

TOYOTA 4RUNNER (14-24): XB LED HEADLIGHTS
Starting at $1,325

Final Thoughts
Upgrading your 2014+ Toyota 4Runner with Morimoto XB LED Headlights is a great way to enhance the appearance and visibility of your vehicle. By following this step-by-step installation guide, you can easily upgrade your headlights and enjoy the benefits of improved illumination and a more modern look.