How to Align your LED Bulbs During Install
Have you just installed your brand new led headlight bulbs, and noticed that the beam pattern is absolutely terrible? Well, today I'm going to demonstrate how to adjust the top brand bulbs on the market. I'm also going to talk about the importance of having a proper beam pattern. Let's go ahead and get to work.
DISCLAIMER: In the United States, lamps, reflective devices, and associated equipment are regulated by the US Department of Transportation (DOT). Even though these types of LED lights can be used in place of an original halogen light bulb, it is not legal to use on vehicles registered for on-street use. This type of modification can only be done when used in a fog lamp application, dedicated off-road application, or in jurisdiction outside the USA where this is allowed. For more information on how to determine if this type of product is safe to use, and legal to use on public roadways in the USA, Click Here for a more detailed breakdown of compliance.
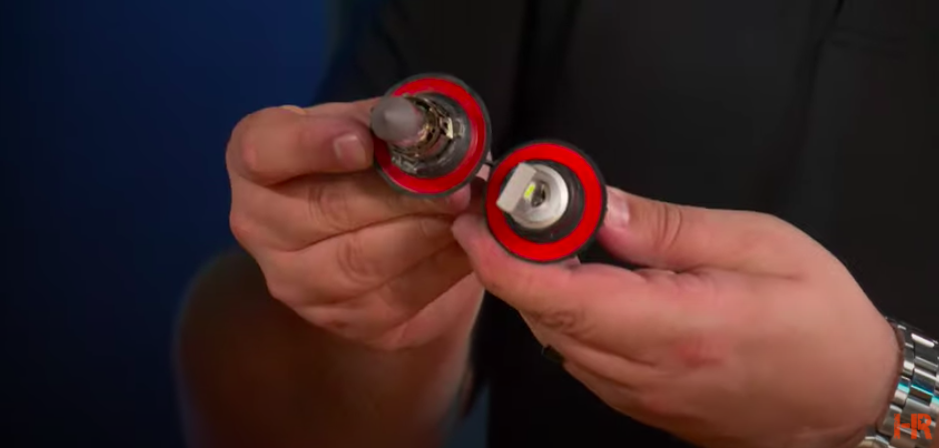
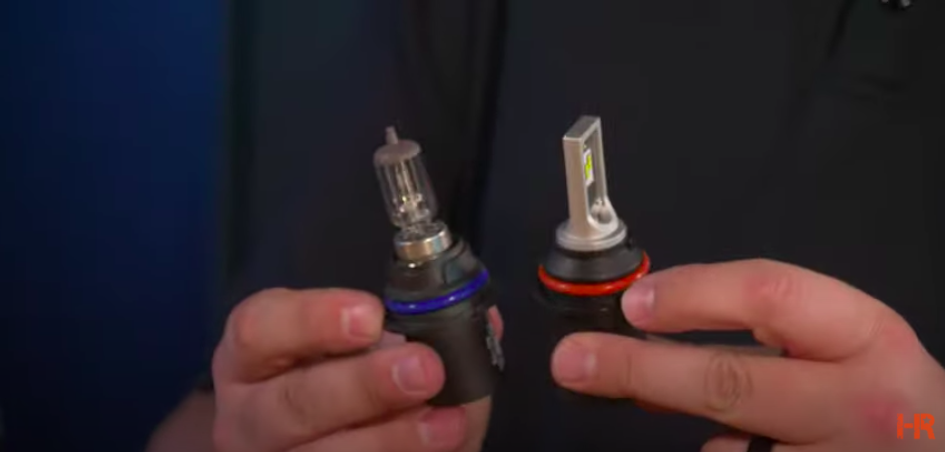
Let's first start with a halogen bulb. As you might notice here, on the inside, there is a wire-wound filament, and this bulb also has the ability to produce 360 degrees of light. If you notice one thing in particular about all of these LED bulbs is they only have the LED chips on two sides. So whenever you get it installed, you'll want to install the LED chips at nine and three o'clock.
Learn more about what we offer here!
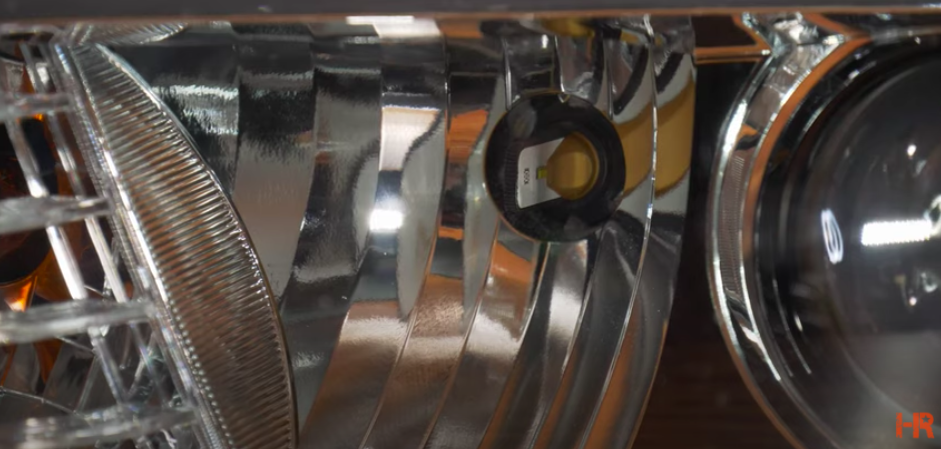
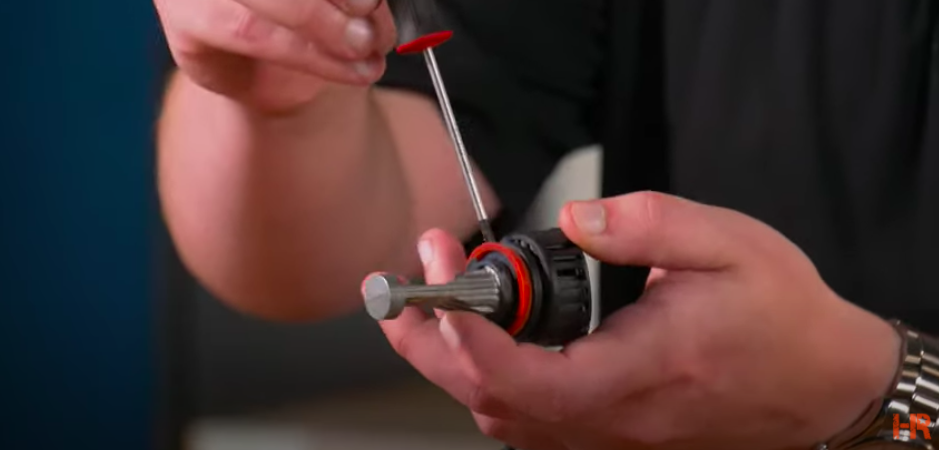
You might notice that the reflectors inside of there on the low beam, which is right here, are more prevalent going horizontally. If you install the bulb up and down, instead of that light shining off of all of those reflectors, it's going to be shining off the chrome inside there, and it's going to produce a terrible beam pattern. That's why it's so important. Now I'm going to show you how to adjust these LED headlight bulbs. Let's go ahead and start with the SV4. With the SV4, it'll come with an Allen key right out of the box, and then there's also an Allen screw right here on the bulb. All you gotta do is loosen it up. Then you can twist the collar to wherever it needs to go.
The Diode Dynamics SL1 is very similar. Instead of using the Allen key, you'll need a Phillips head screwdriver. The process is the exact same though. You find the hole, you loosen the screw, you loosen the collar. But don't forget to tighten it back down. The Xenon Depot bulb is the same way. The GTR Lighting CSP mini bulb is slightly different. Still, we'll be using an Allen key, but instead of adjusting the collar, you'll be adjusting the bulb itself.
It's fully 360 degrees clockable. Now, my personal favorite is the Morimoto 2Stroke 2.0. No tools needed. All you'll need are your two bare hands. Now what you do is you go ahead and install the bulb right away, and then from there, it's all pressure fit. So you simply just rotate the bulb until it's at its optimal location, which will be that nine and three o'clock. As you can see here, we have the Morimoto 2Stroke bulb fully properly installed.
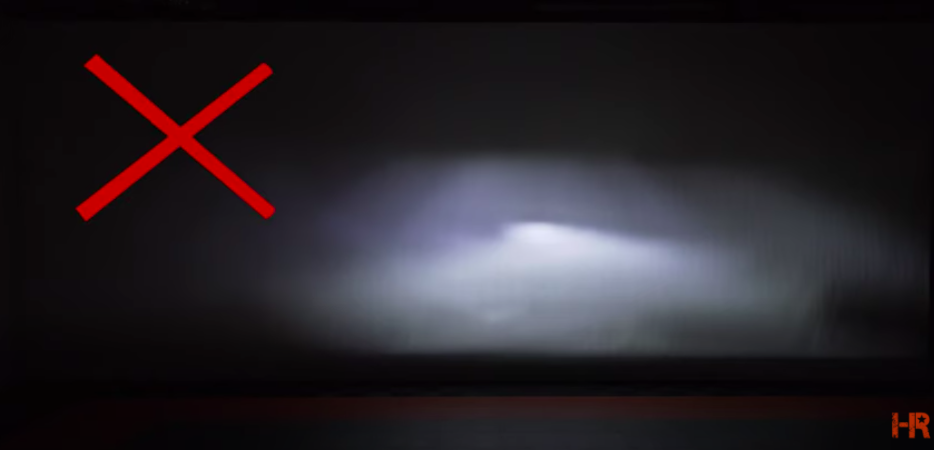
Now, I want to show you what it will look like if it's installed improperly. The beam pattern might not be too terrible, but it's still not going to be usable. Let's go and demonstrate what it'll look like when it looks up and down. As you can see, this beam pattern is absolutely terrible, and this is actually a very common way to install a LED headlight bulb, and you absolutely do not want to do this.
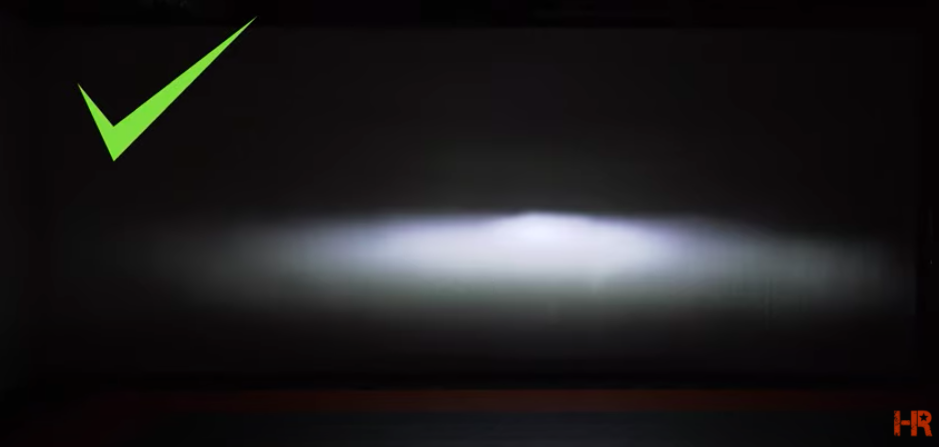
So, let's go ahead and kick this back to the proper nine and three degrees. This is how a good beam pattern should look. As you can see, it's a very nice, crisp, condensed beam pattern, and this is exactly what you're looking for. So, now you know how to adjust your led headlight bulb. Thank you so much for watching. And if you would like to see more installation videos or tech tips, don't forget to like or subscribe to our channel. Thank you so much.