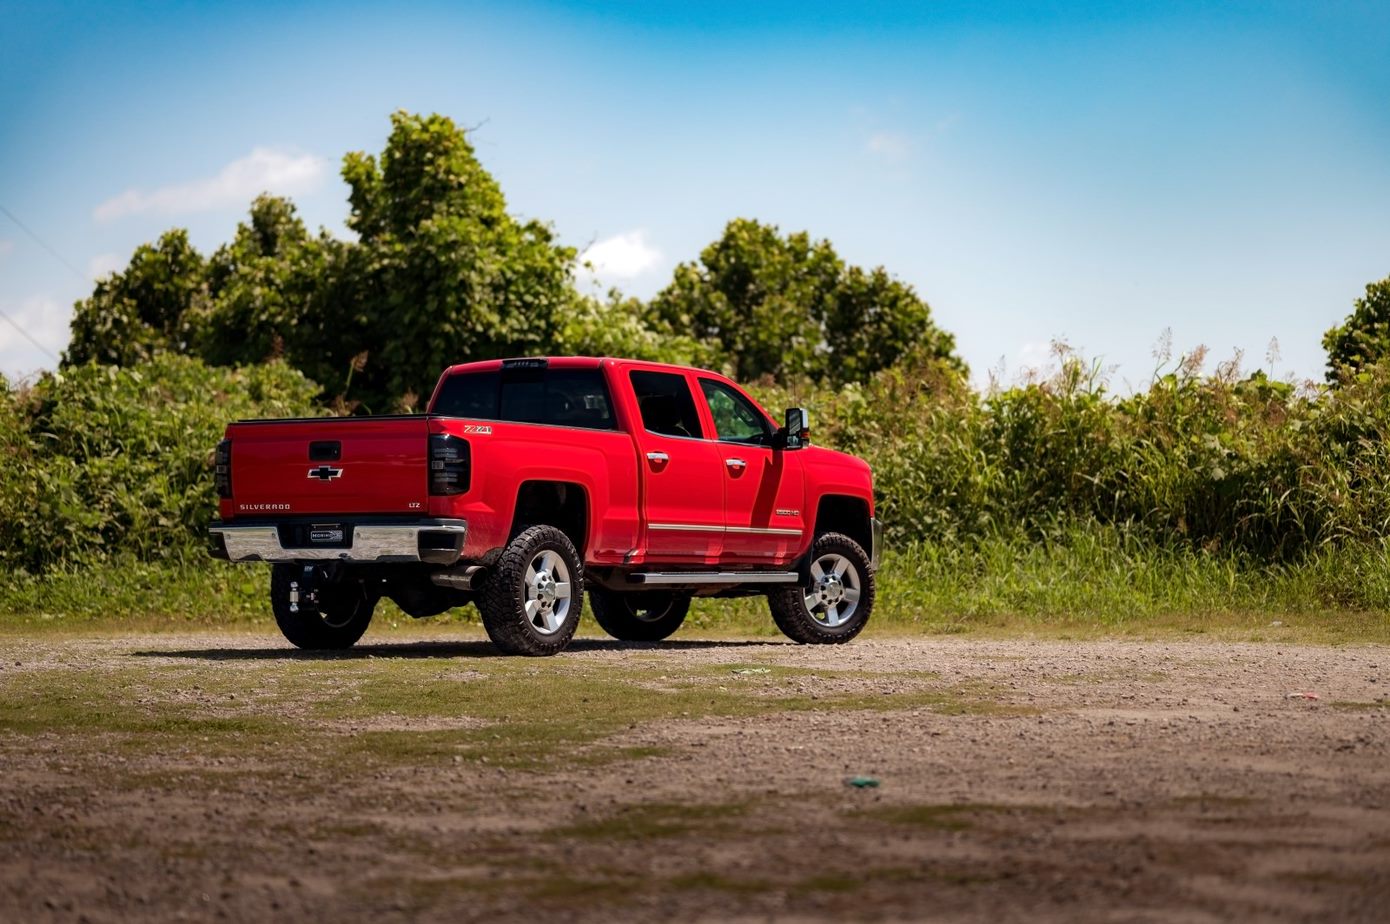
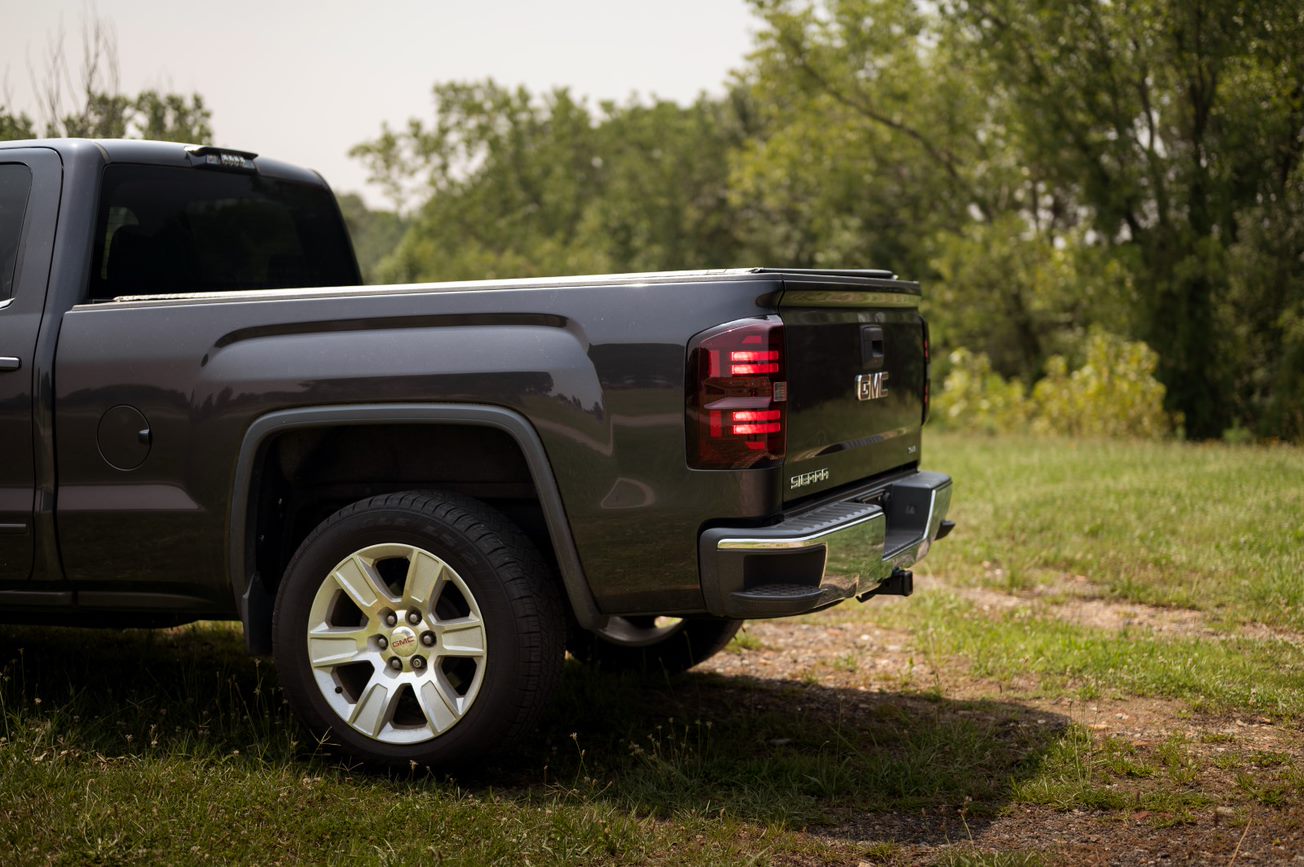
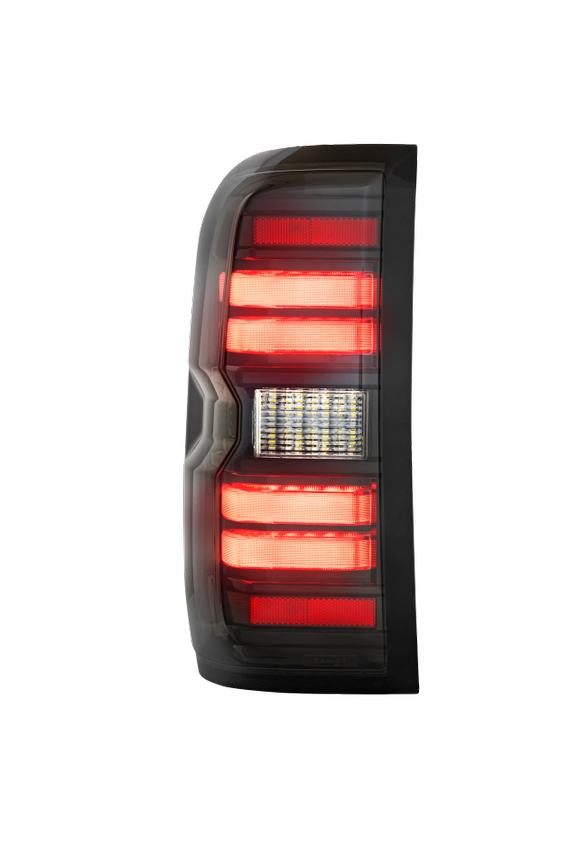
Every detail matters when it comes to the GMC Sierra, a truck that's as tough and reliable as they come. And while there's a sea of aftermarket products for these trucks, finding a worthy set of tail lights can be a challenge. But not anymore! The Morimoto XB LED tail lights are the game-changer every 14-18 Sierra owner has been waiting for.
Reverse Lights: More Than Just an Afterthought
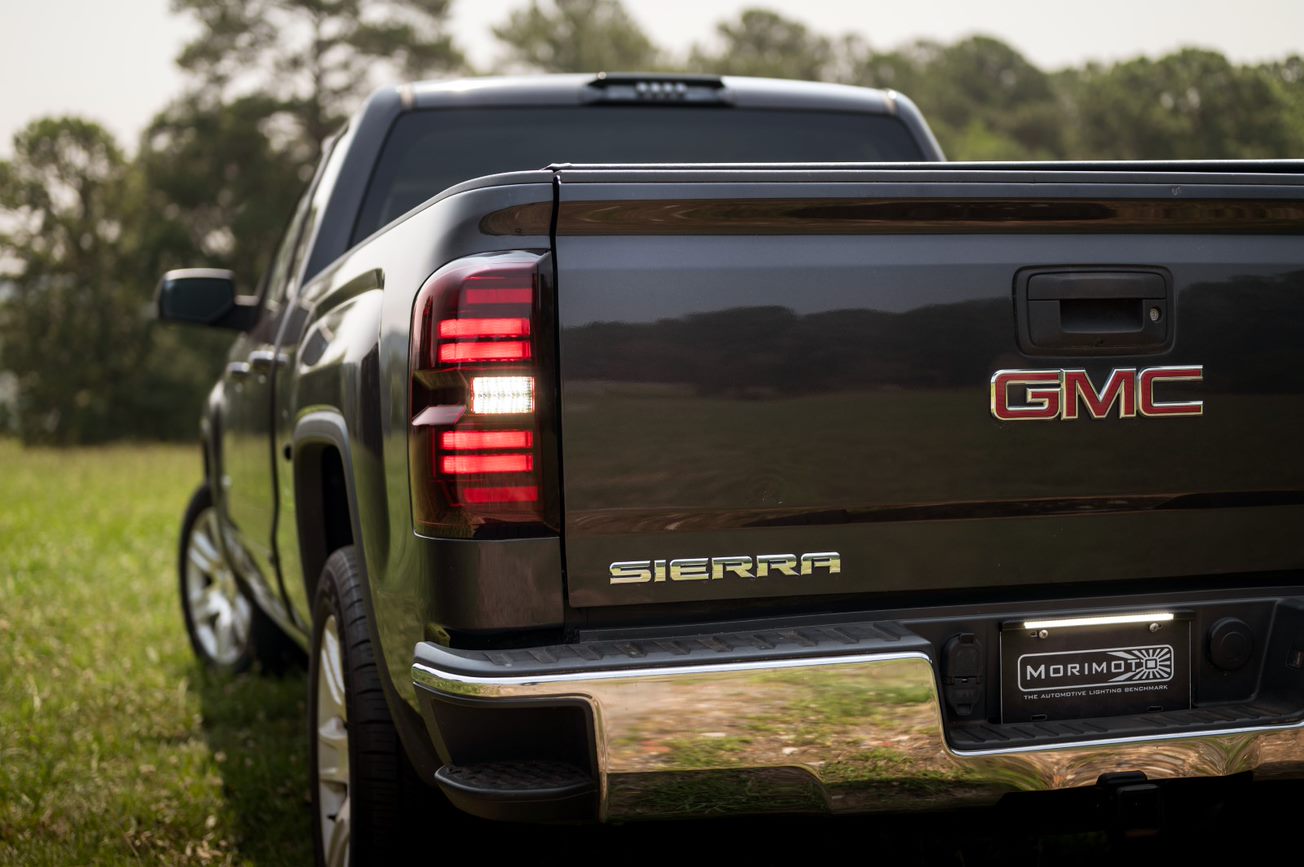
Reverse lights are often overlooked, but not with the Morimoto XB tail lights for the Sierra. They come standard with powerful LED reverse lights. But wait, there's more! Morimoto's Backup-Boost system allows you to plug n play with the optional LED Reverse Light Bar. This mounts to the top of your license plate frame and provides an extra 2700 lumens of controlled light output when backing up. Yeah, Morimoto customers like to see where they're going…no matter the direction!
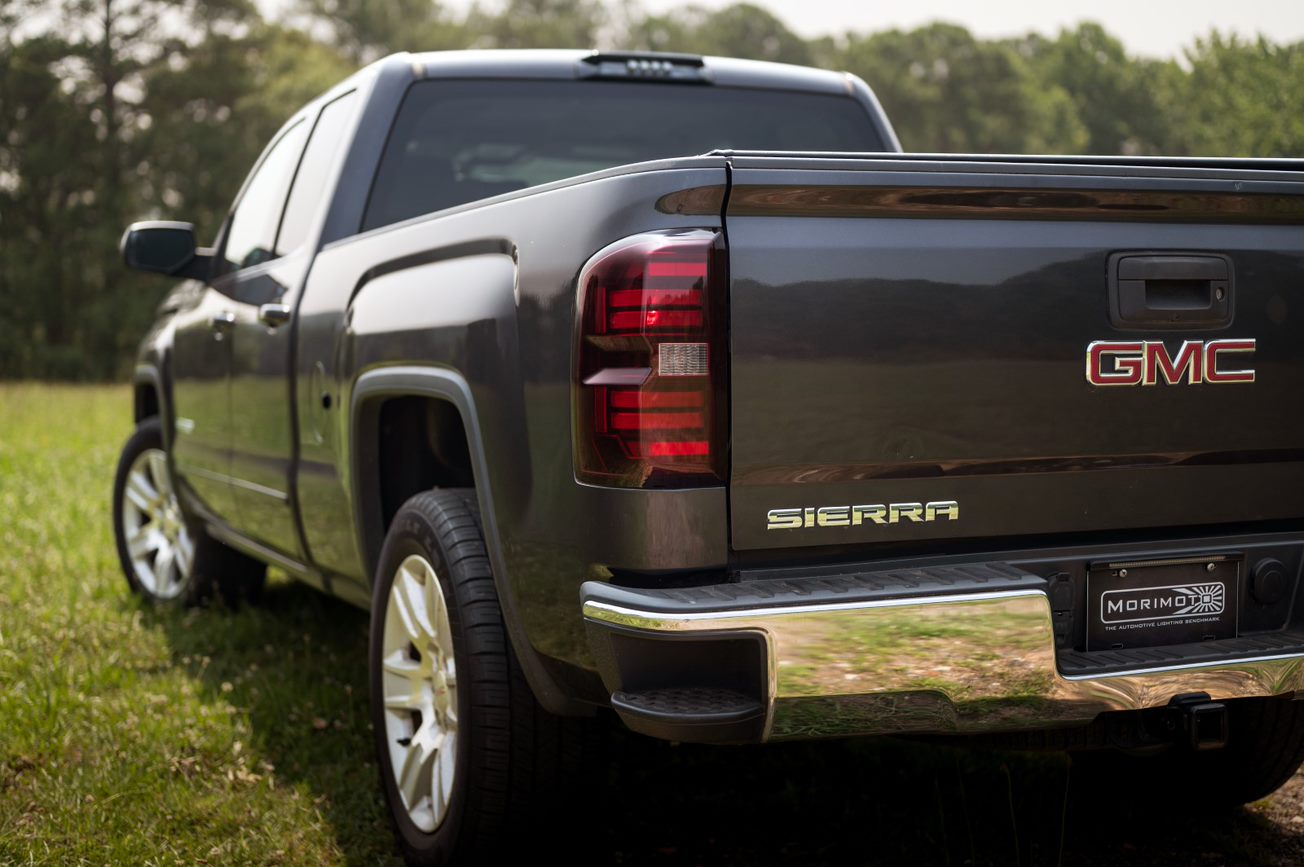
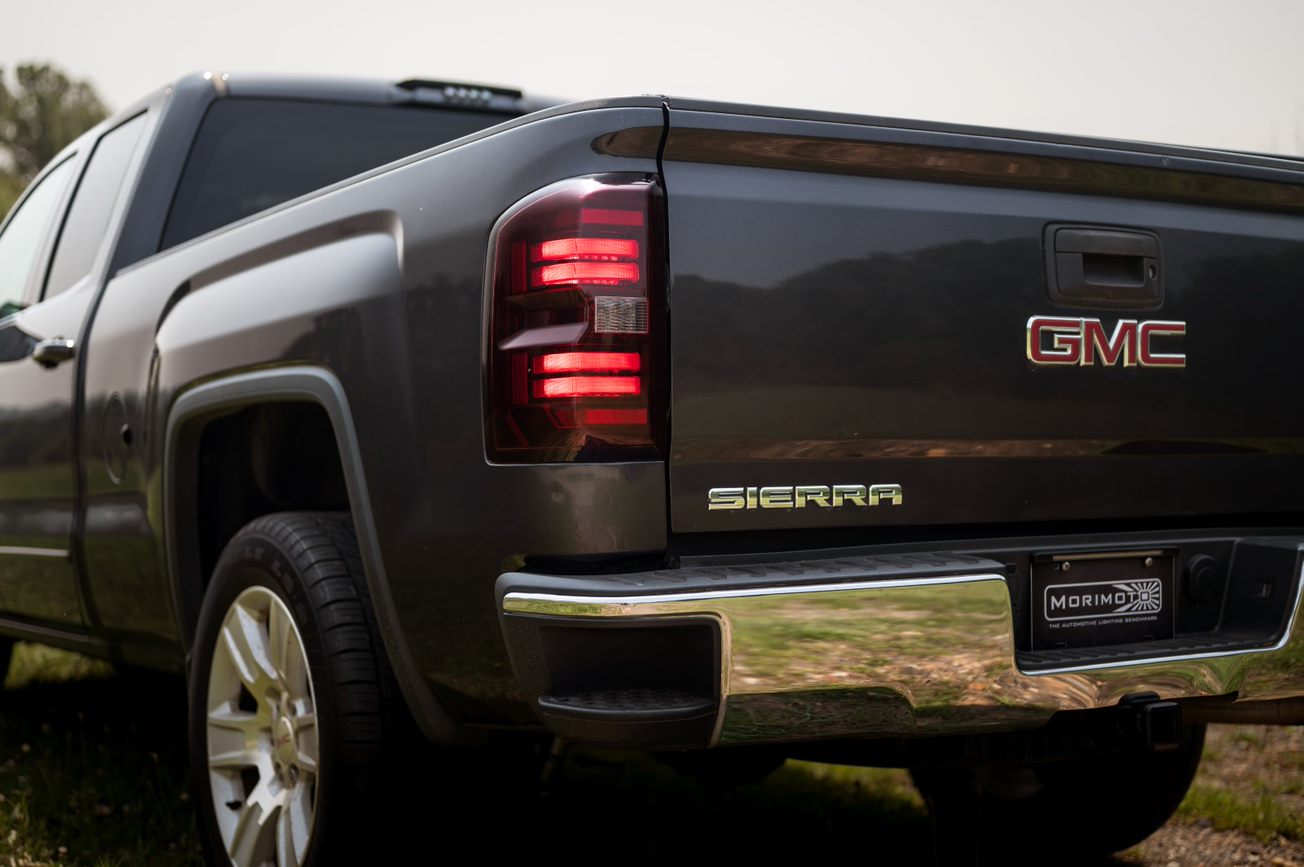
Style: A Cut Above the Rest
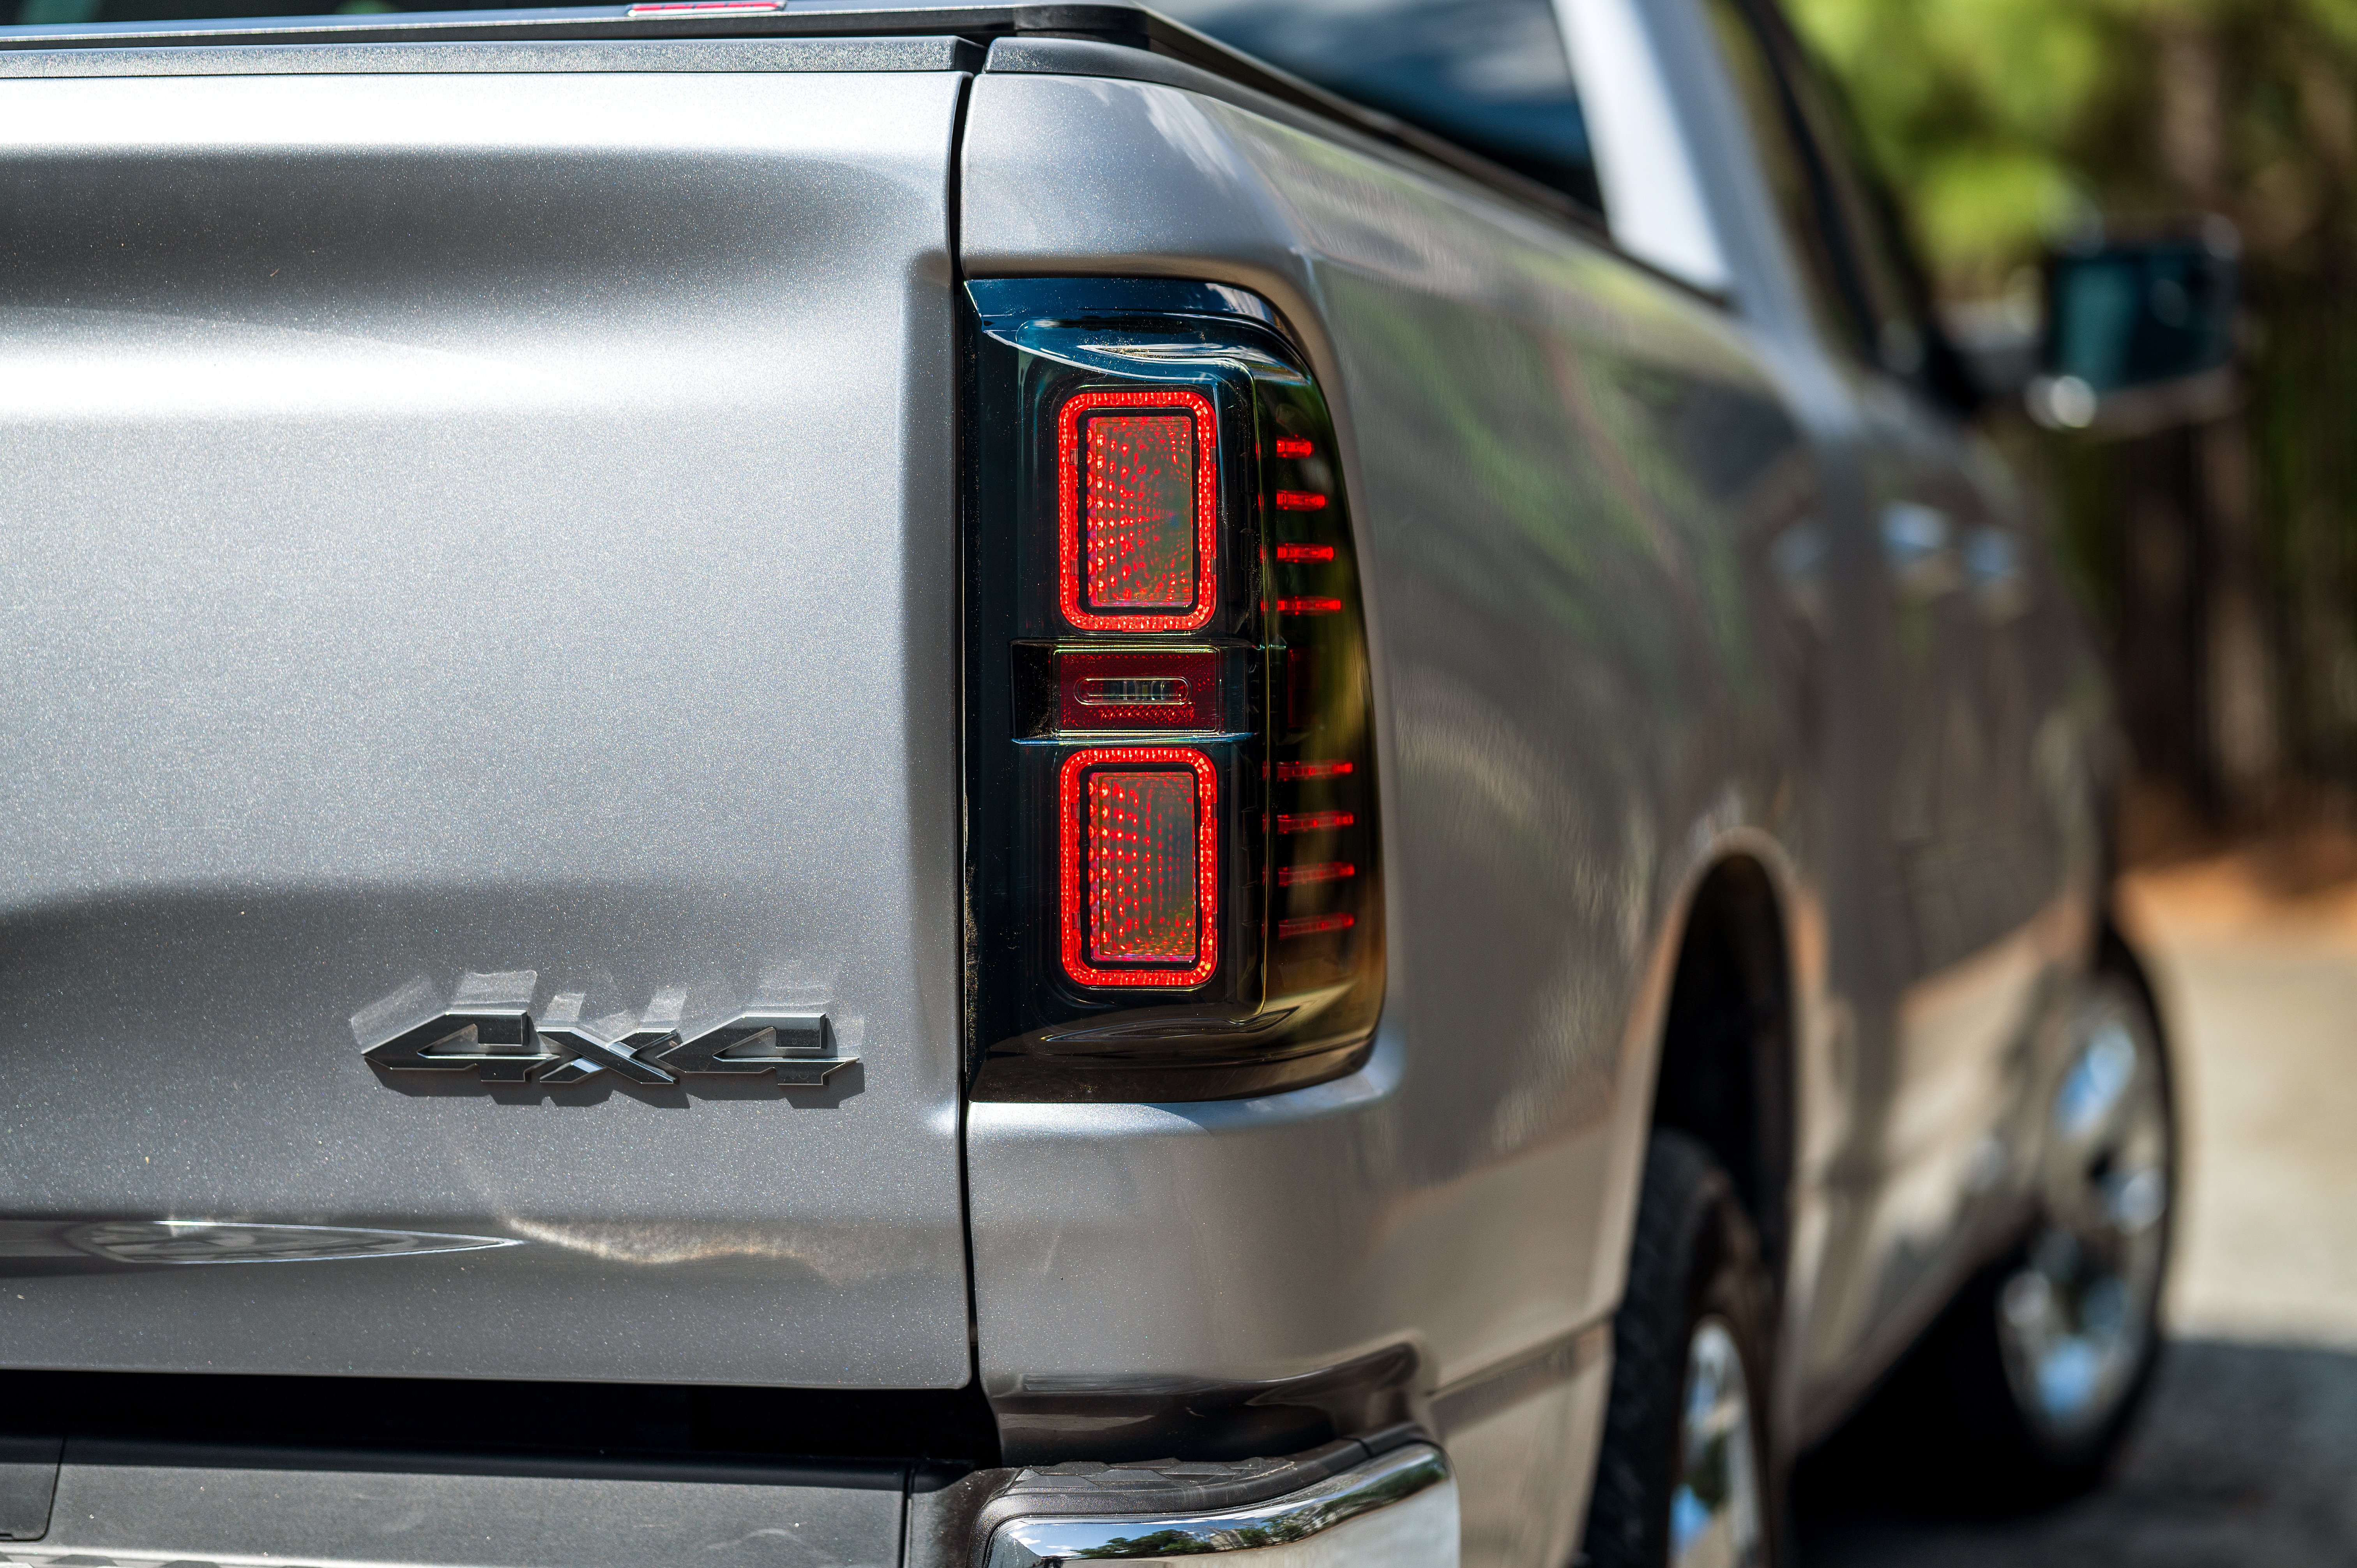
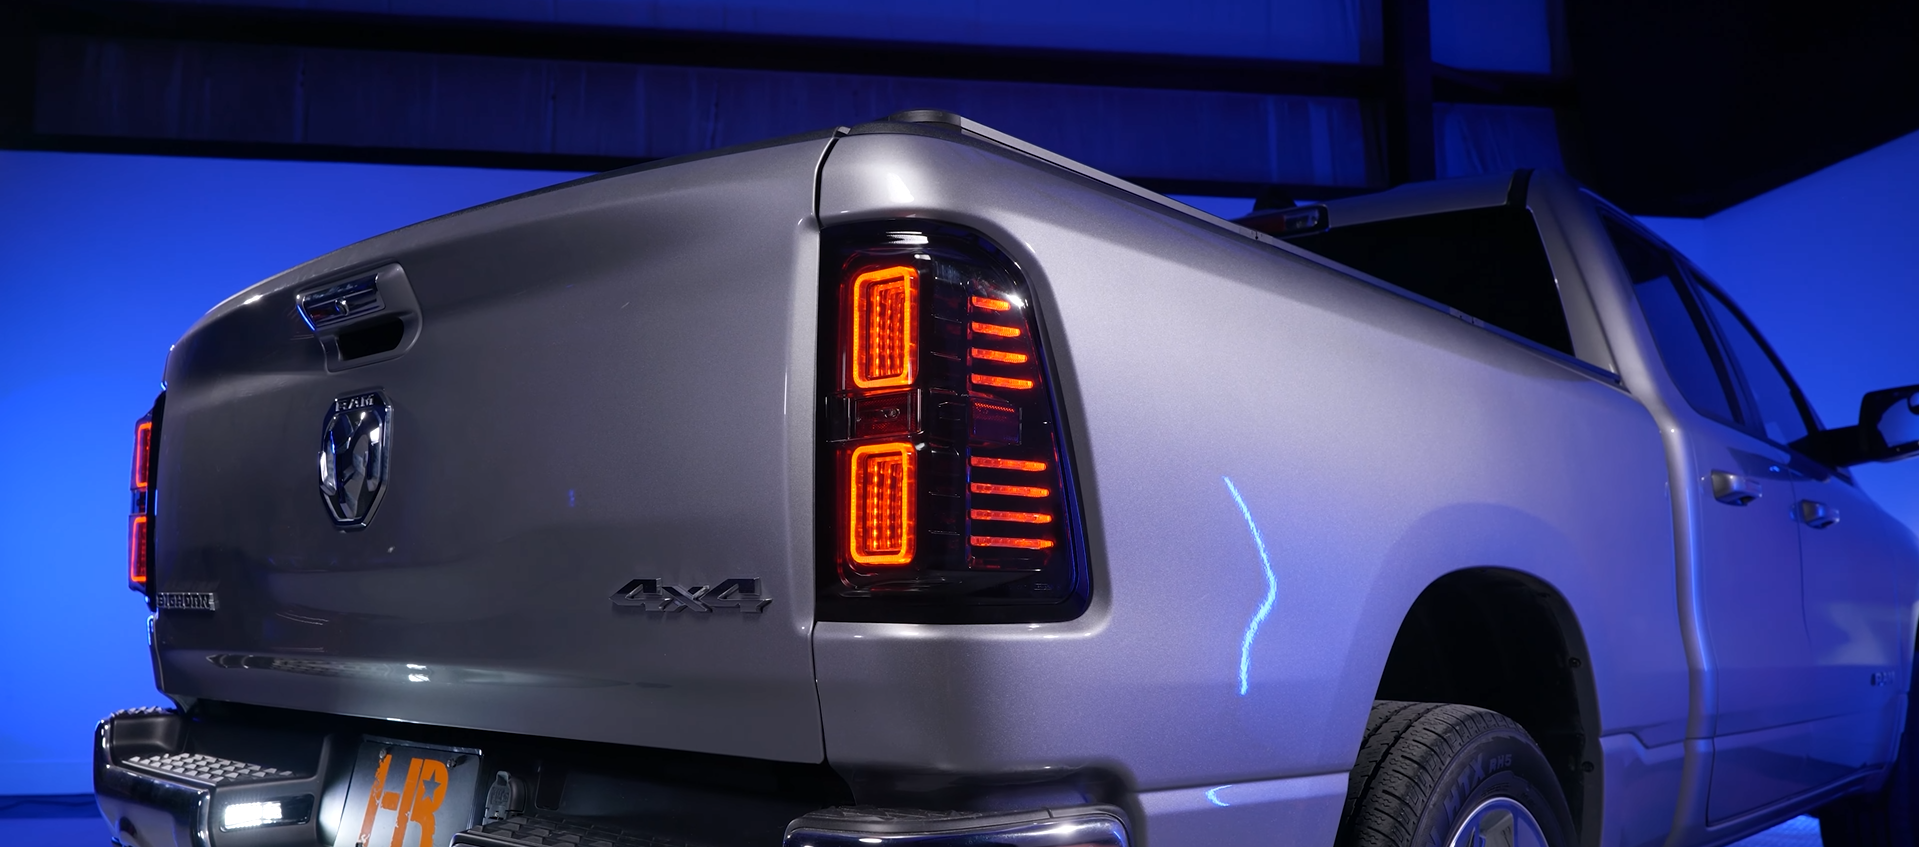
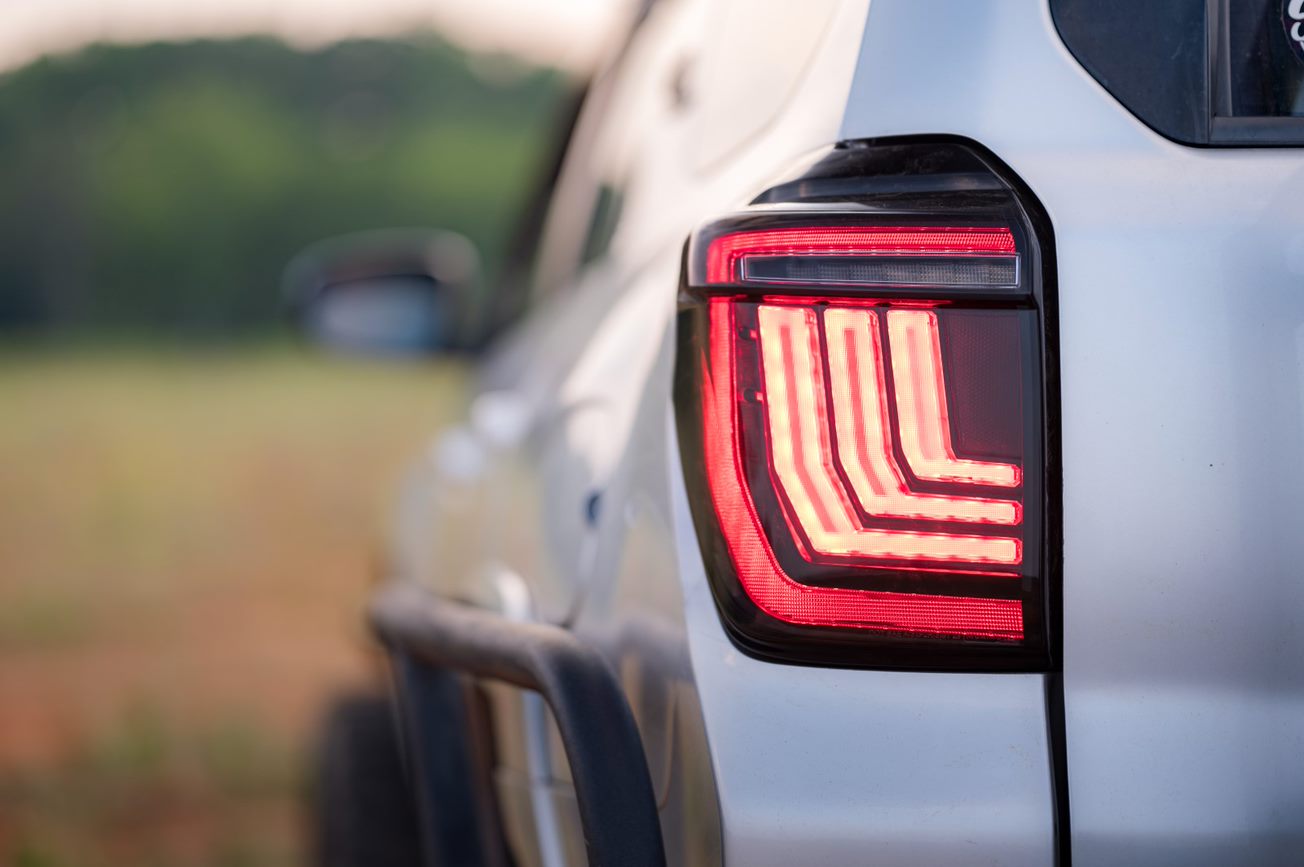
Dropping in some rear-facing LED Chips would have been much easier and far less expensive to produce. But that's not how we roll at Headlight Revolution. Instead, these tail lights have a much more modern look found on the latest generation Sierra trucks. Two horizontal rows of TIR-Optics illuminate the 3D light blades that float across the front of the lenses. These serve as the brake light and turn signal, and they're extremely bright – easily visible both day and night. Pair that with the surrounding muscular trim, optional smoked or red outer lens, and we've easily got what is the best-looking set tail lights on the road for the Sierra!
Style and Safety: A Winning Combination
All Morimoto tail lights are designed to comply with all DOT, SAE regulations for rear-facing lamps. We pride ourselves on offering stylish, high-performance and safe products for serious enthusiasts. That's why all new Morimoto products are verified by trusted third-party labs for compliance and are backed with an industry-leading five-year warranty.
The Morimoto Advantage: A No-Brainer
The new XBs are a category-killer, making other tail lights for the 14-18 Sierra 1500 and 15-18 Sierra HD no longer relevant. They're unbeatably bright, thanks to modern TIR and reflector-based LED optics. The optional Backup light bar will plug n play and boosts output in reverse by over 300%. These tail lights are a no-compromise solution, produced from the best materials, backed with a five-year warranty, and designed to comply with all standards. And the best part? They're completely designed, engineered, tested and distributed by Morimoto, right here in the USA.
What's Included:
- Tail Lights: 2x (One Pair) 14-18 Chevy Sierra XB LED Tail Lights
- Wiring: Plug and Play Adapter Harness (Compatible with all versions)
- Warranty: Five Years
Compatibility:
- GMC Sierra 1500: 2014-2018 (all)
- GMC Sierra 2500HD / 3500HD: 2015-2018 (w/o Dually)
- 2014 GMC Sierra 1500 Old Body Style: Not Compatible
- Dually Trucks: Not Compatible
Tech Specs:
- Input: GM Multi-Pin OEM
- Material: ABS Plastic (Housing), UV-Resistant Polycarbonate (Lens)
- Light Source: SSC LED
- Reverse Light: White
- Brake Light: Red
- Parking Light: Red
- Turn Signal: Red
Getting Started: Essential Tools and Step-by-Step Installation Guide for Your Morimoto XB LED Tails
Ready to upgrade your GMC Sierra with Morimoto XB LED Tails? Let's get started! First, let's gather the necessary tools for a successful installation.
Tools You'll Need
To install your new Morimoto XB LED Tails, you'll need the following tools:
- Ratchet
- T15 Torx Bit
- T20 Torx Bit
Step-by-Step Installation Process
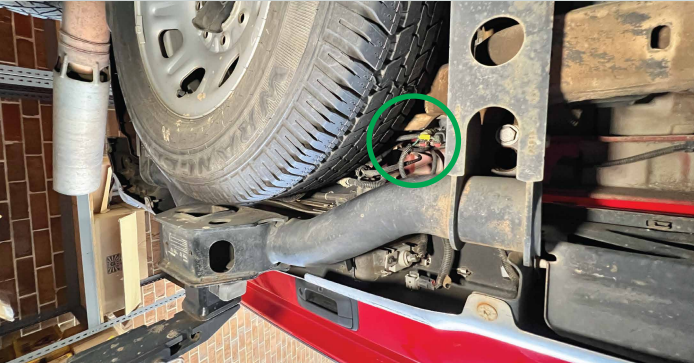
Step 1: Disconnect the Tail Light Harness
Start by crawling under your truck and locating the tail light connectors by the spare tire. Disconnect the tail light harness connectors by pulling the red locking tab away from the connector and pushing down on the release tab to then separate the connectors.
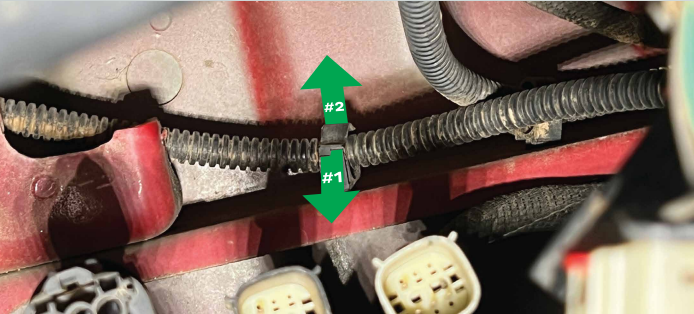
Step 2: Release the Harness Holders
Next, release the harness holders holding the driver side harness in place. To release it, pull the locking tab out, then pull the holding mechanism out. There should only be 1-2 of these holding the harness. Repeat this process on the passenger side harness.
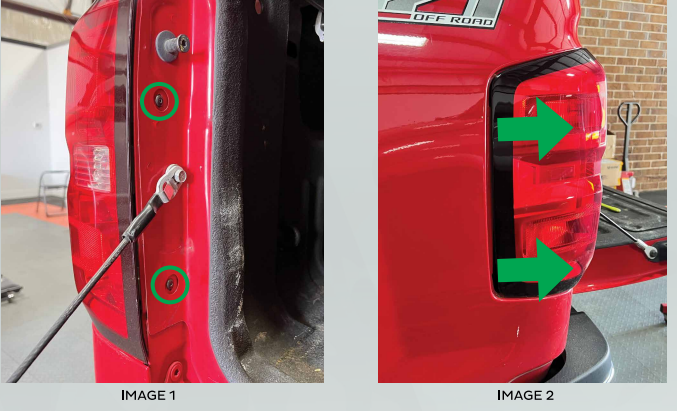
Step 3: Remove the OEM Tail Lights
Remove the two T15 Torx screws holding in the OEM tail lights. Note: these screws will not get reused. Slide the tail light backwards away from the truck with some force. Remove the tail light and harness off of the truck. Repeat this on the other tail light.
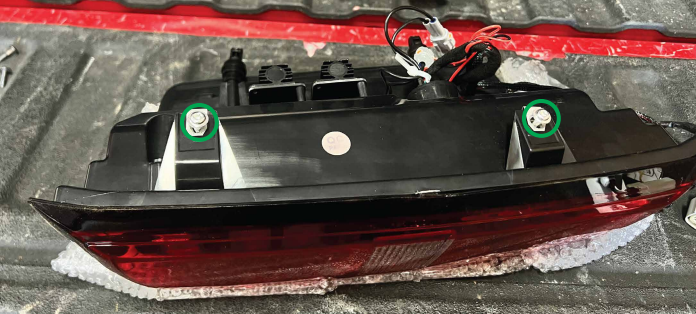
Step 4: Prepare the Morimoto Tail Lights
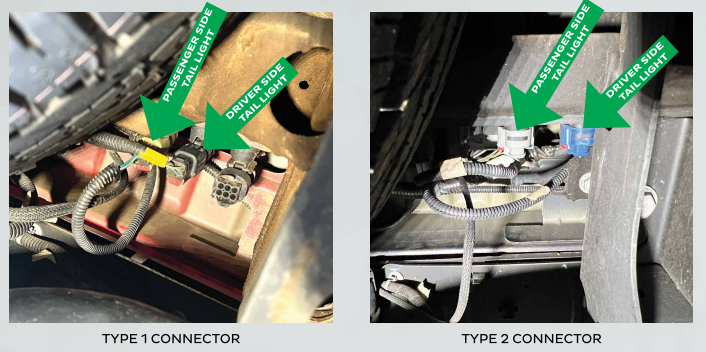
Take your new Morimoto tail lights and remove the two T20 Torx bolts that are installed. If your truck has the type 1 connector, then remove the Type 2 Adaptors off of your Morimoto tail light's.
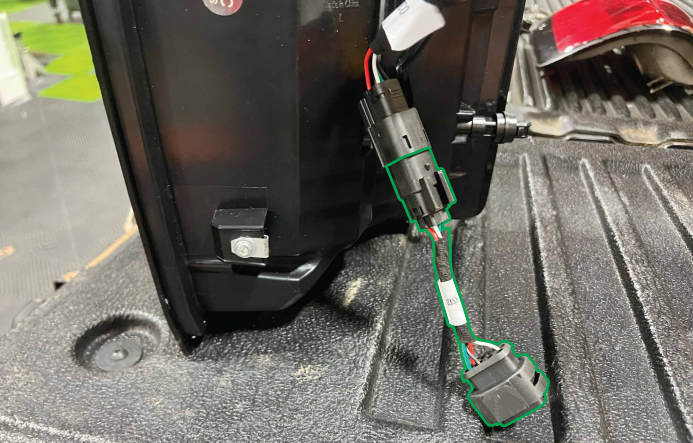
Step 5: Install the Morimoto Tail Lights
Take one of the Morimoto tail lights and route the harness down and under the truck, like the OEM harness was routed. Plug the Morimoto harness connectors into your OEM connector. Repeat this step on the other tail light.
Step 6: Test the Lights
Turn on the truck and go through all modes to confirm that all tail light functions work.
Step 7: Secure the Tail Lights
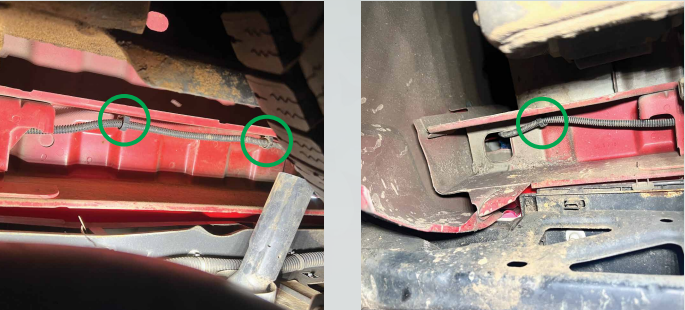
Snap tail light into its place on the truck and bolt it into place with the supplied bolts. Repeat on the other side. Under the truck, snap the Morimoto wiring harness into the OEM harness clips to clean up the wiring.
And there you have it! Your new Morimoto XB LED Tails are now installed and ready to light up the road. Enjoy your new tail lights and the enhanced visibility they provide.
Optional: Installing the Boost Bar
If you've also purchased the optional Boost Bar, you can install it by following these steps:
- Remove your license plate and bolt in the Boost Bar. Mark on the bumper where the wire needs to go through.
- Drill a 1/4" hole in your bumper and pass the wiring through, and reinstall your license plate with Boost Bar.
- Run the wiring behind the bumper along the top, and secure using zip ties.
- Run the wiring up through the tail light hole and plug into your Passenger Morimoto tail light. Secure remaining wiring with zip ties.
By following these steps, you can ensure a smooth and successful installation of your new Morimoto XB LED Tails. Remember, if you're not comfortable performing this installation yourself, it's always best to seek help from a professional. Happy driving!
Please note: This guide is intended for educational purposes only. Morimoto Lighting and its dealers do not make guarantees on any finished results, nor are they to be held responsible for any damage, misuse, or personal injuries. If you are unable to clearly understand and adapt the information in this guide, professional installation is recommended.
Upgrade your GMC Sierra with the Morimoto XB LED tail lights today and experience the difference for yourself!
Starting at $525

Upgrade Your Ride Today with Morimoto XB LED Tail Lights!
Ready to transform your GMC Sierra with the game-changing Morimoto XB LED tail lights? Don't wait! Head over to HeadlightRevolution.com now and experience the difference for yourself. With unbeatable brightness, modern design, and easy installation, it's time to light up the road like never before. Take the first step towards a safer and more stylish ride. Shop Now at Headlight Revolution!