4x6 LED Headlights Holley X Morimoto for Classic Cars | HR Tested
Depending on what wheels of yesteryear you are rolling around in, finding parts can be difficult. One maintenance many classic owners often forgo is that of their headlights. Finding headlights that fit, perform, and maintain the period correct look of your car is difficult. Until now. Introducing the brand-new Holley RetroBright LED headlights.
Bringing to the market of sealed beam users, Holley has introduced a game-changer of an LED headlight. Built in a compact, reliable, and period-correct way, these RetroBright Headlights are tailored to your classic vehicle. And with their range of sizes, you can be sure to find one that fits your vintage ride.
PERIOD CORRECT
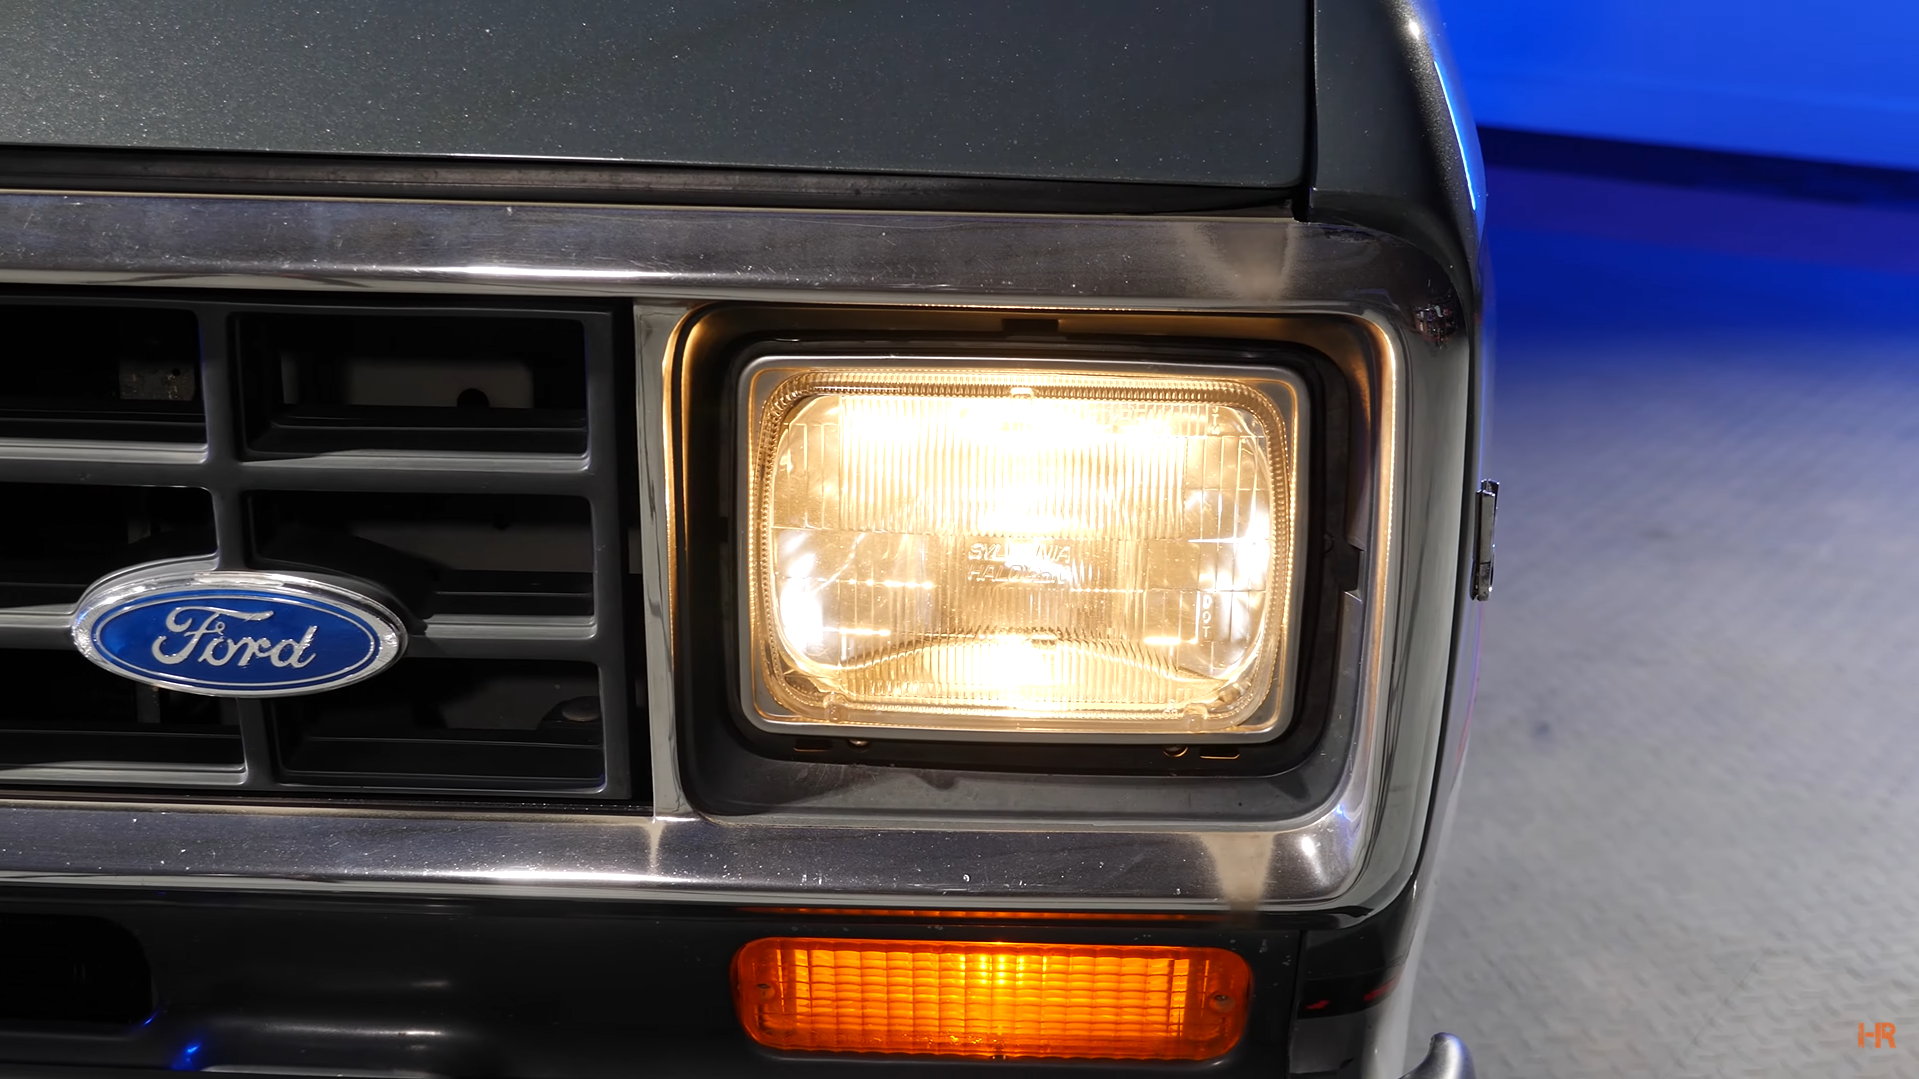
Modern headlights are filled with a sort of technology that adds to the weight and size of the housing. These are just not made to fit inside your vintage car’s bucket. Not to mention, that the futuristic and space-age designs will look out of place on your classy pickup from the Kodachrome days.
Unlike Kodachrome, Holley has brought back that classic styling but reinvented it with modern LED technology. With Holley’s new addition to the market, they have taken the power and output of those fancy modern headlights and utilized it in a classic way.
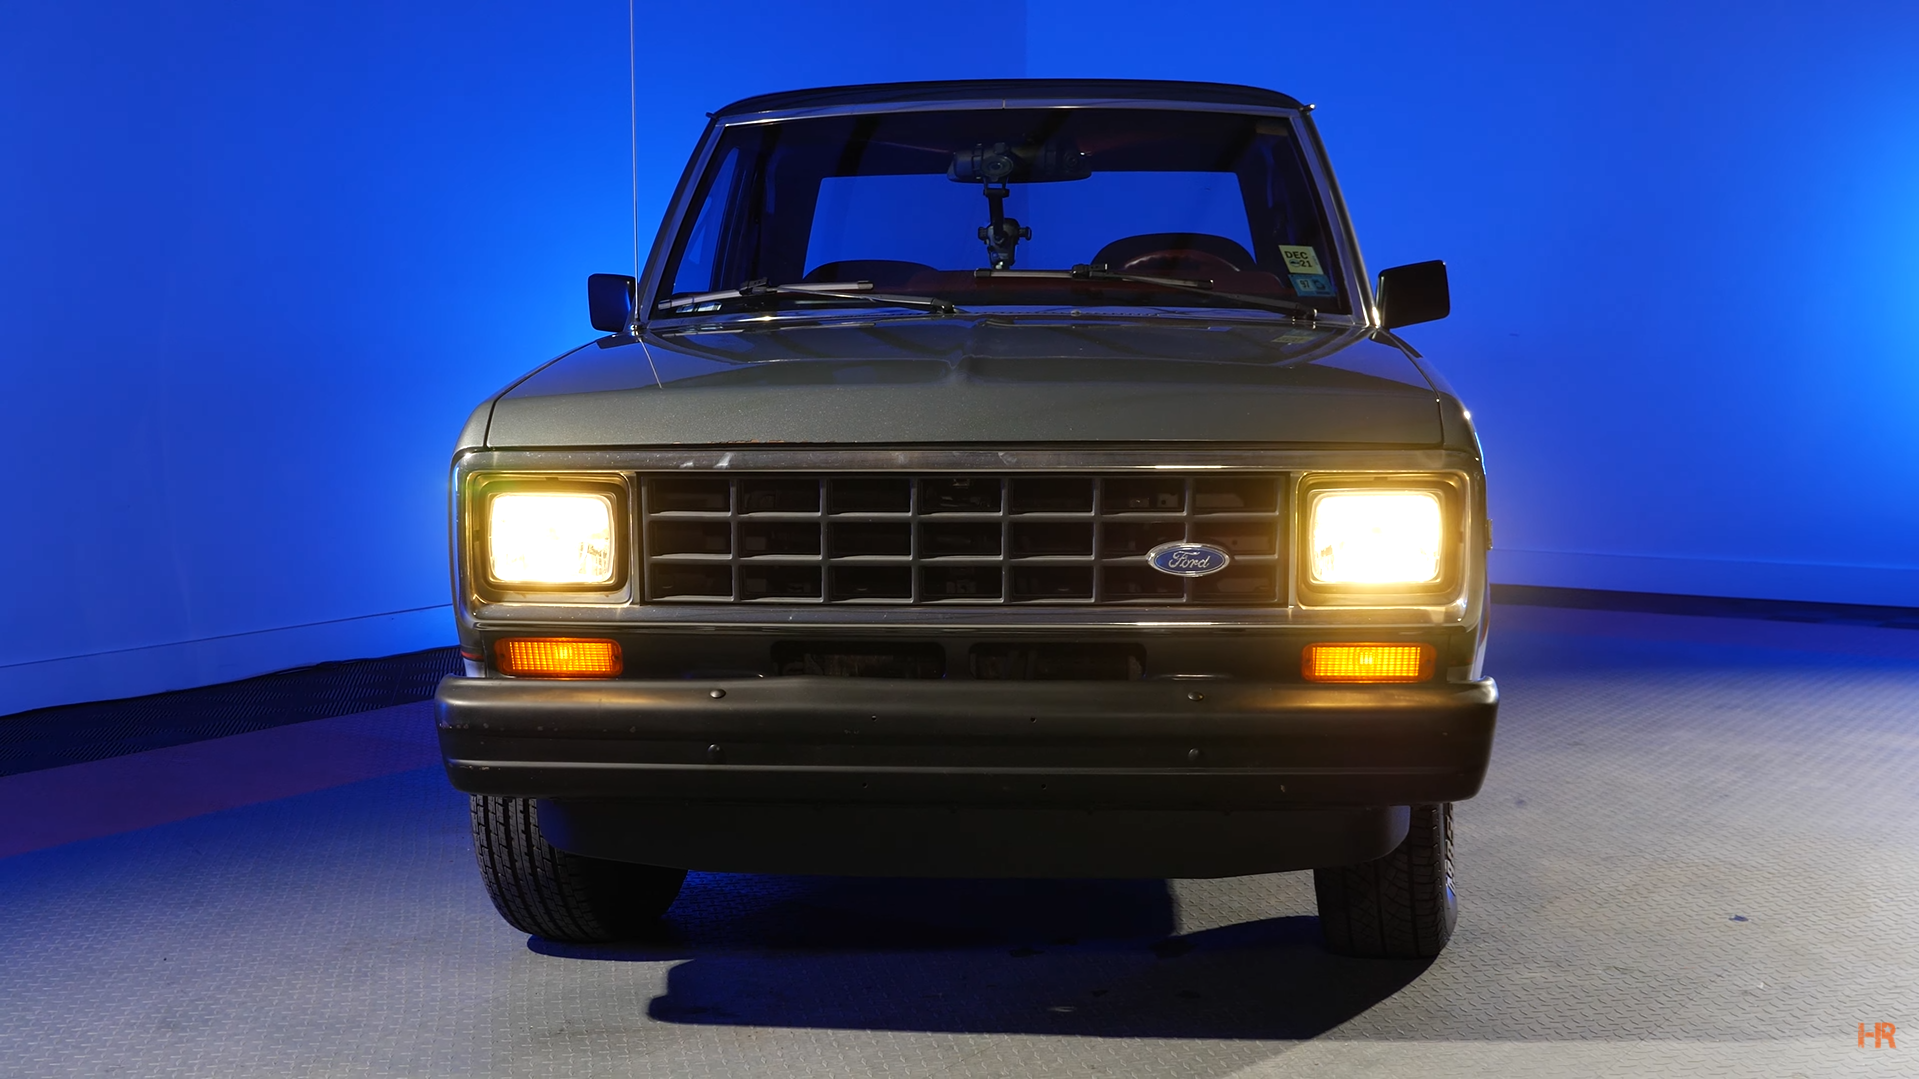
It gets better from there. Not only do the RetroBright headlights look and fit like the OEM lights they are meant to replace, but they also come in two color options. First, is the 3000K color temperature classic white headlight. This is for those of you who want to fully commit to that period-correct look. Second, there is a 5700K modern-white color that also gives you a boost in light output over the 3000K lights.
 |
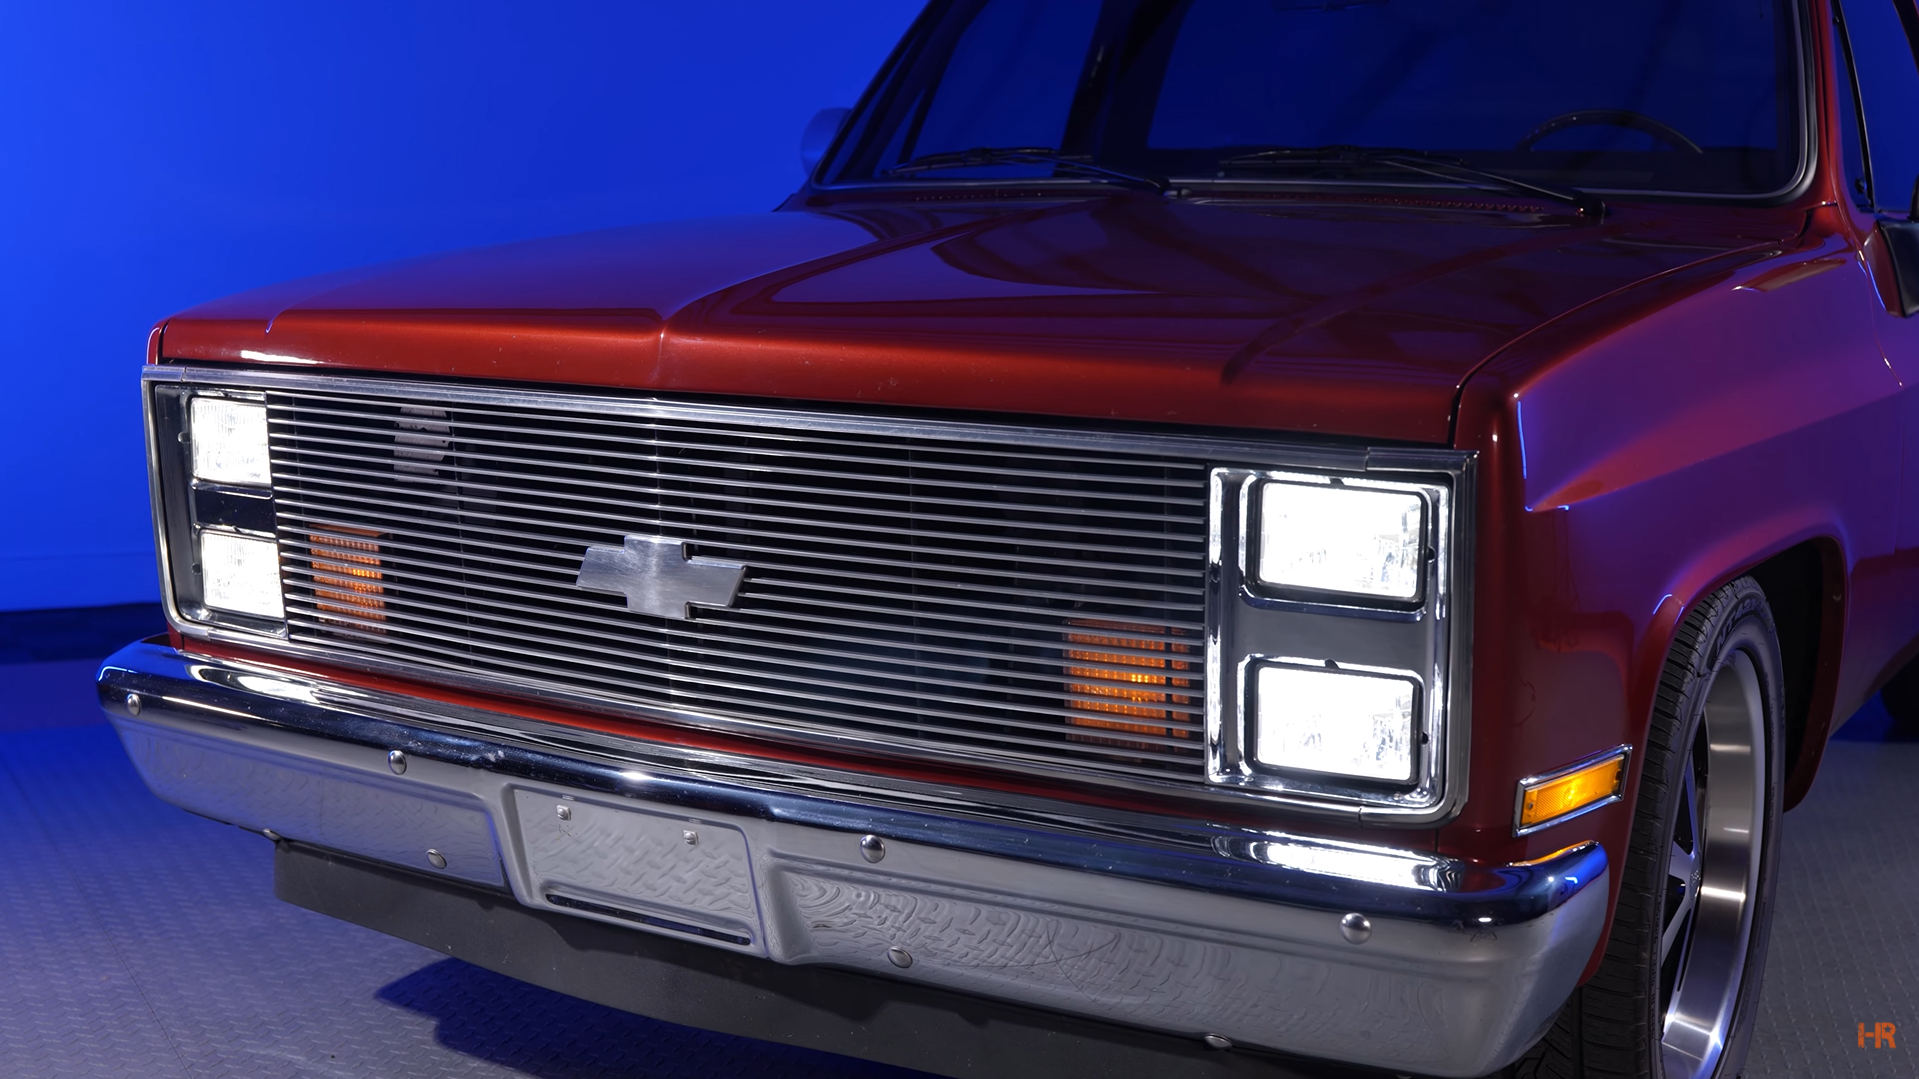 |
These LED headlights will fit any vehicle with a power source of 9-18 Volts and they are 25 Watts. Lastly, we would also like to note that these headlights are SAE compliant.
We would also like to point out that these come in 5.75in round, 7in round, and 5x7in rectangle housings.
OUTPUT
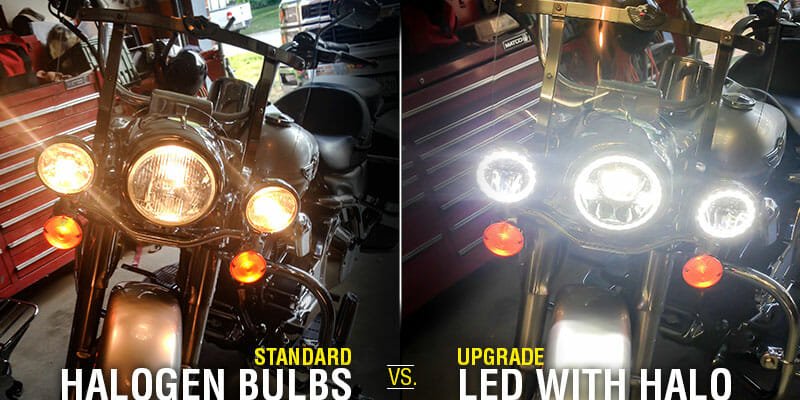
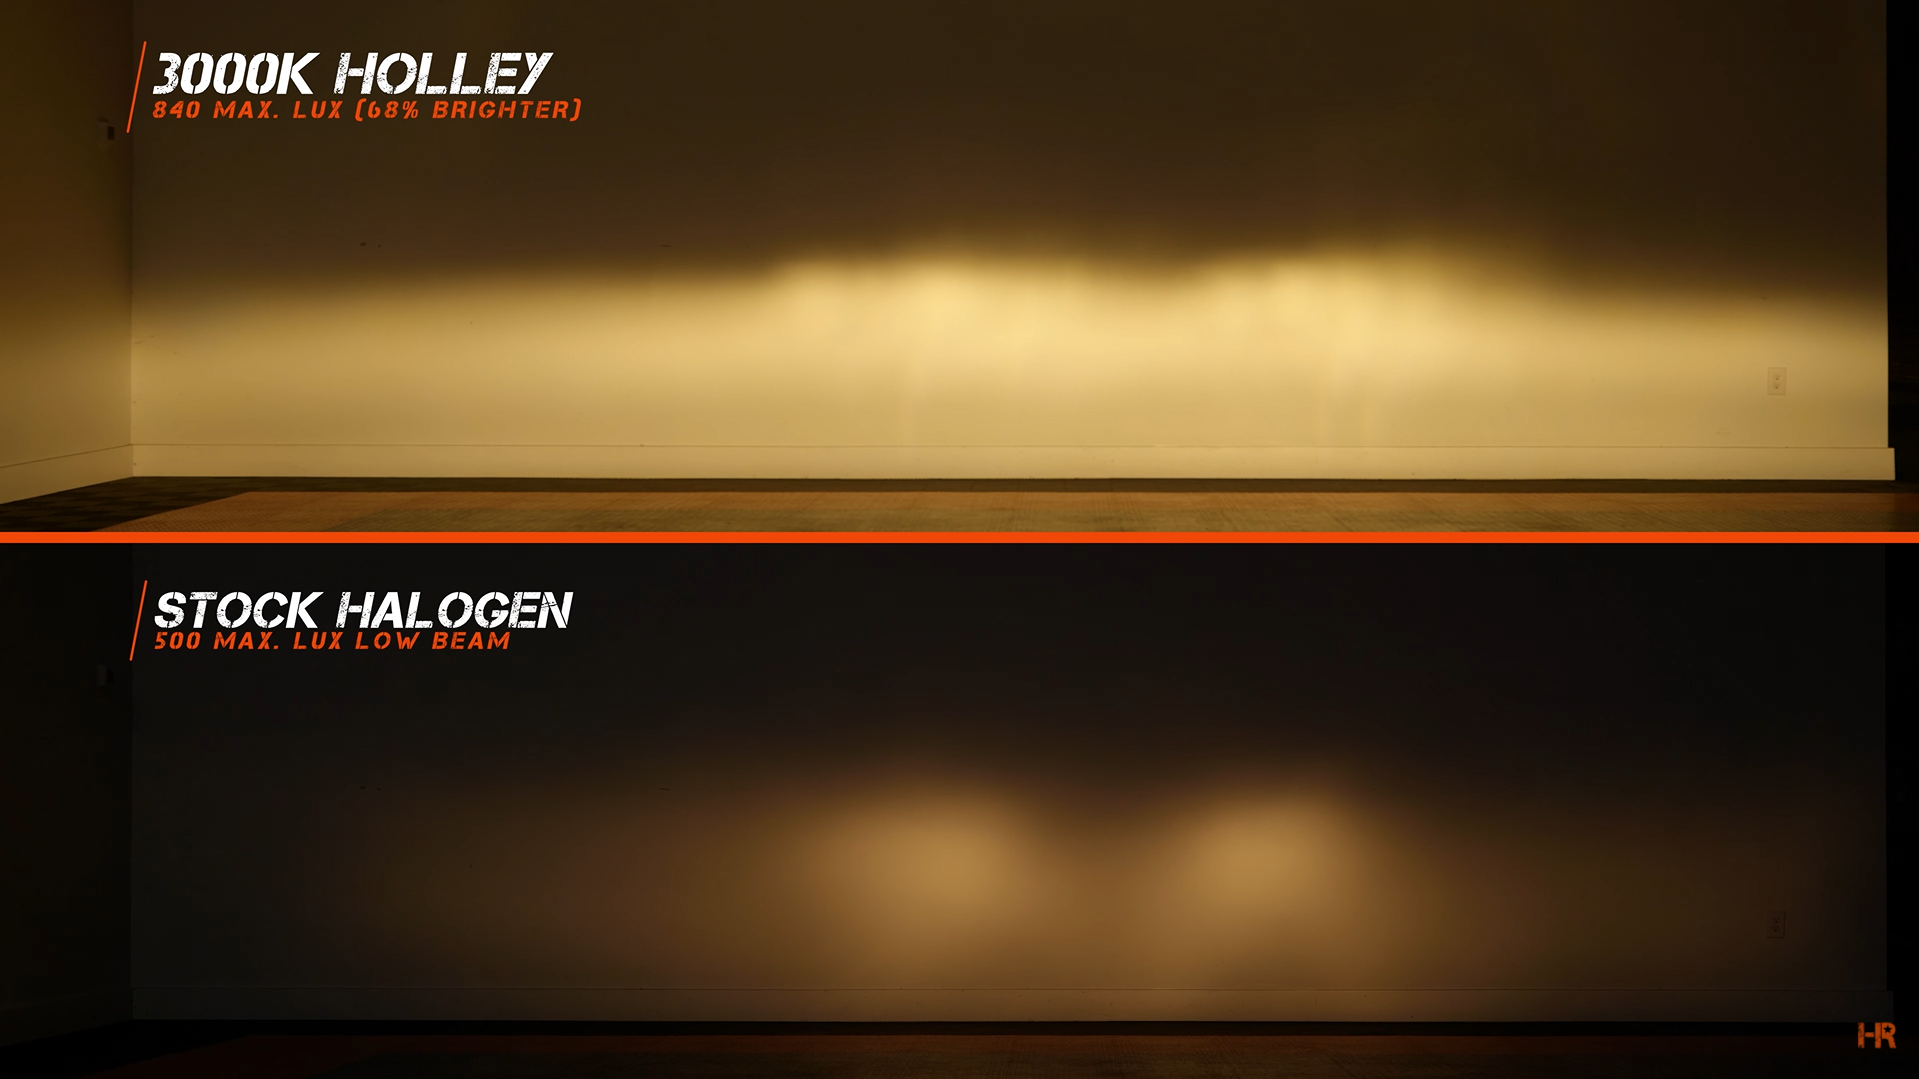
Do not be fooled by the size of this retro LED headlight. Holley and Morimoto have created a monster of a headlight with respect to its packaging. When looking at the 3000K light, it produces 1280 max. Lux on low beam. This is 141 percent brighter than stock. The biggest improvement is the beam pattern. The stock light barely gives you any width in its beam pattern.
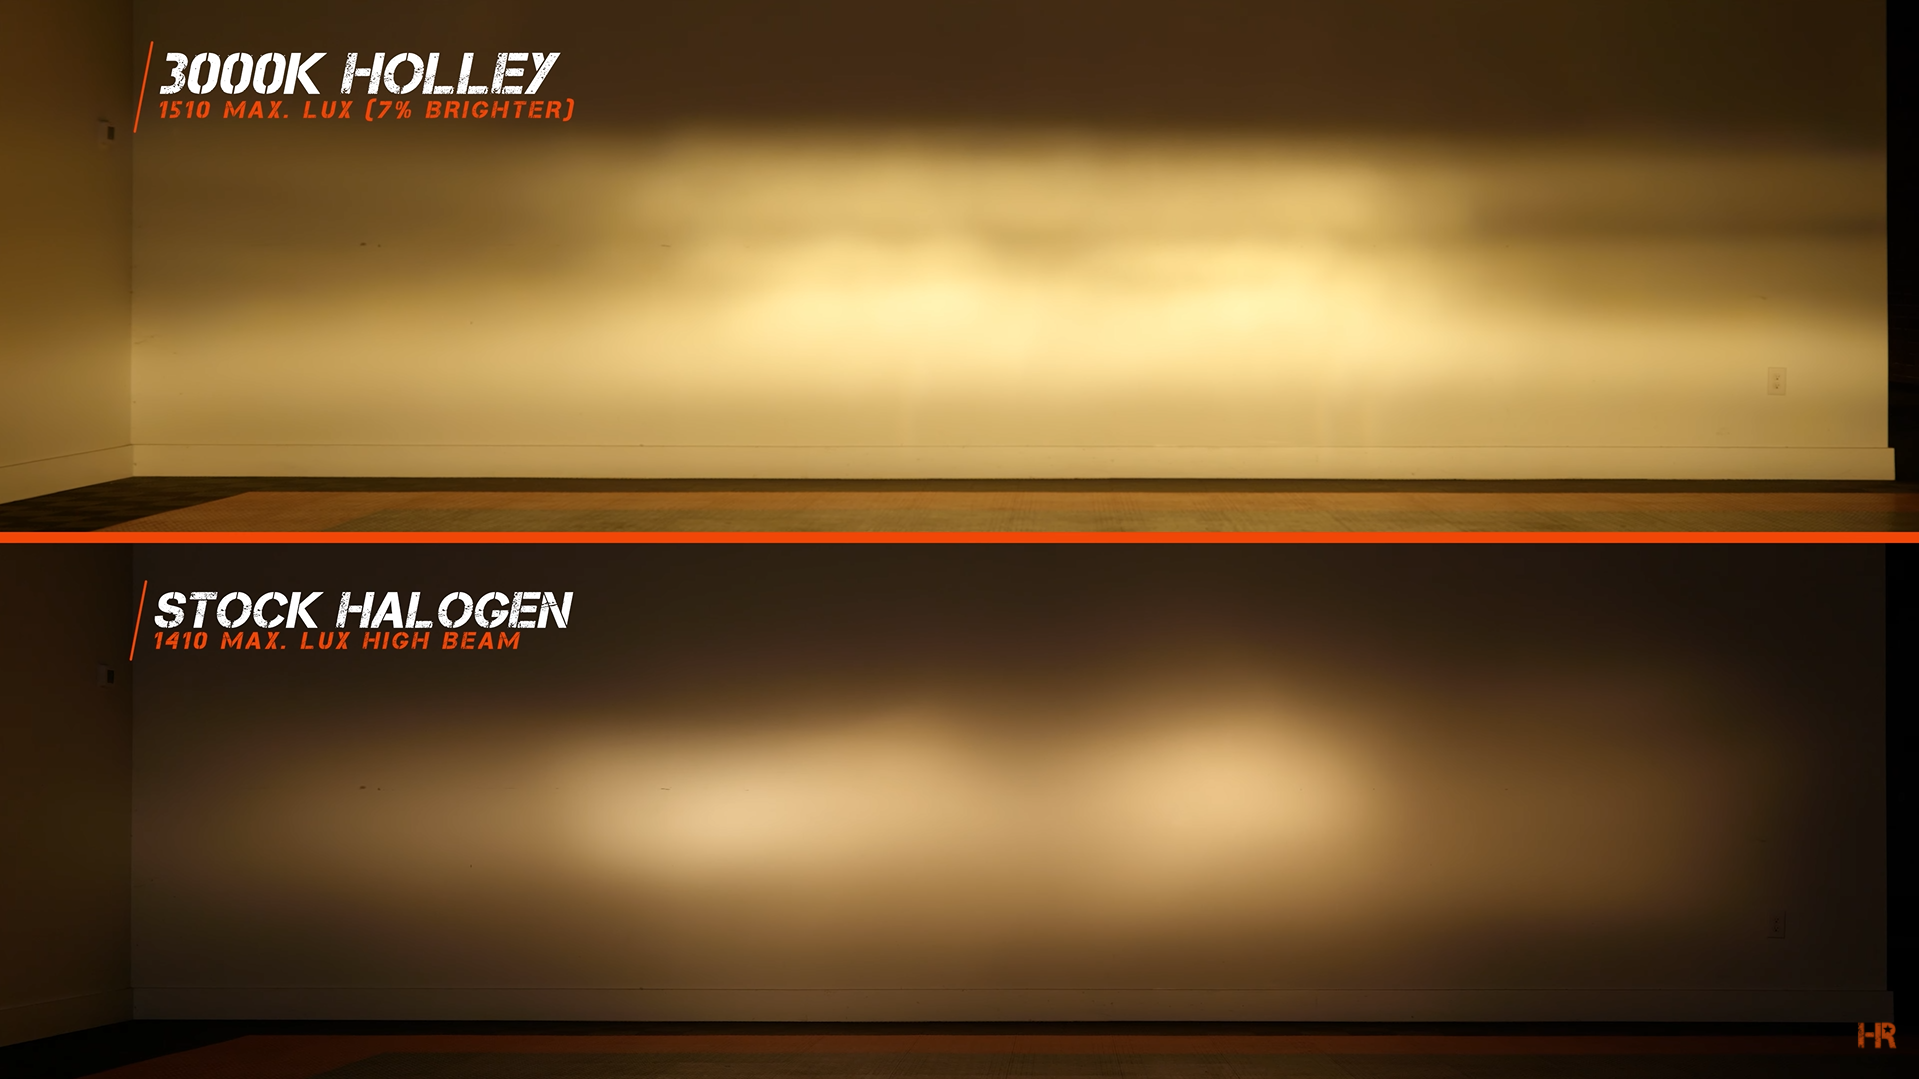
Once you flip the high beams on, the 3000K Holley RetroBright LED headlight puts out 1580 max. Lux. While it is only 43 percent brighter than the stock 1100 max. Lux, the coverage is incredible. The depth and width of the beam is far better than the OEM halogen headlight.
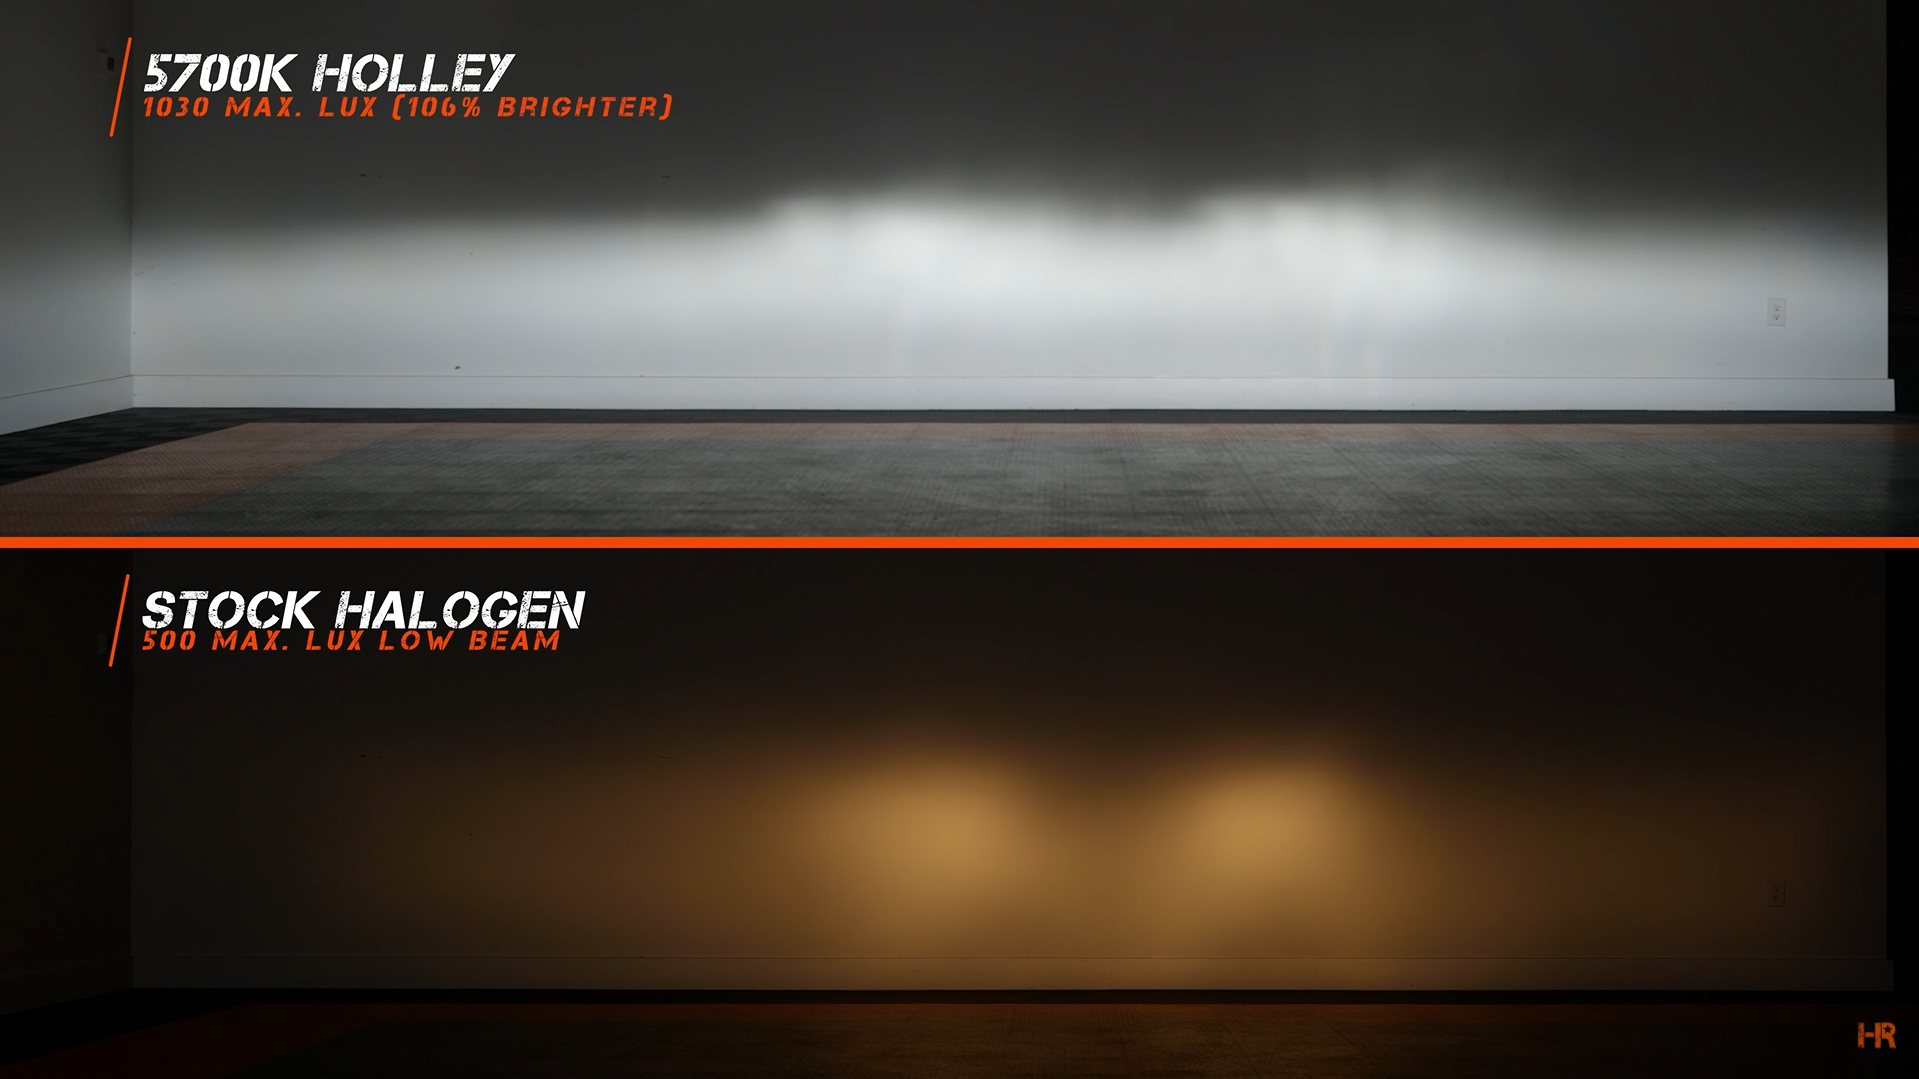
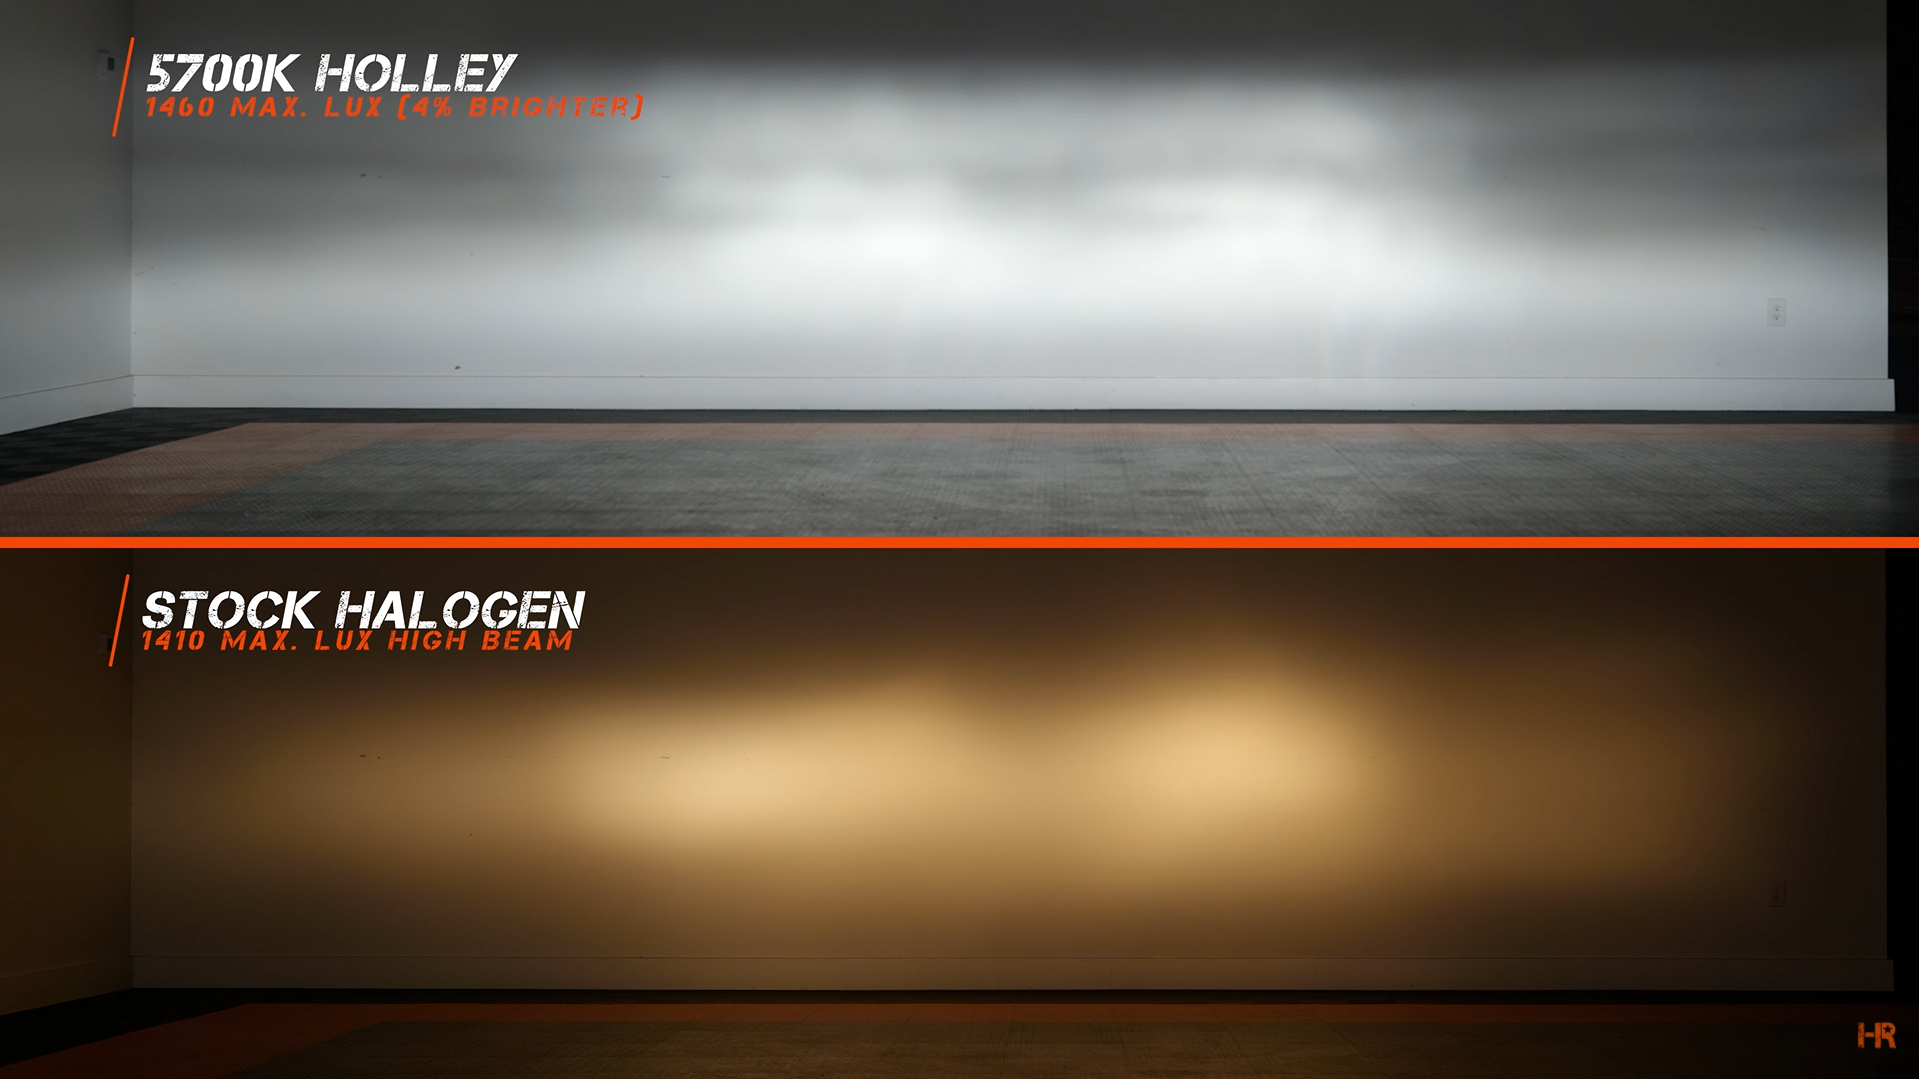
The 5700K RetroBright headlights perform even better than the 3000K version. You get 1460 max. Lux in the 5700K LED bulb, this is 175 percent brighter than stock. In high beams, this LED headlight emits 1890 max. Lux where the stock halogen headlight puts out 1100 max. Lux. That is a 71% difference.
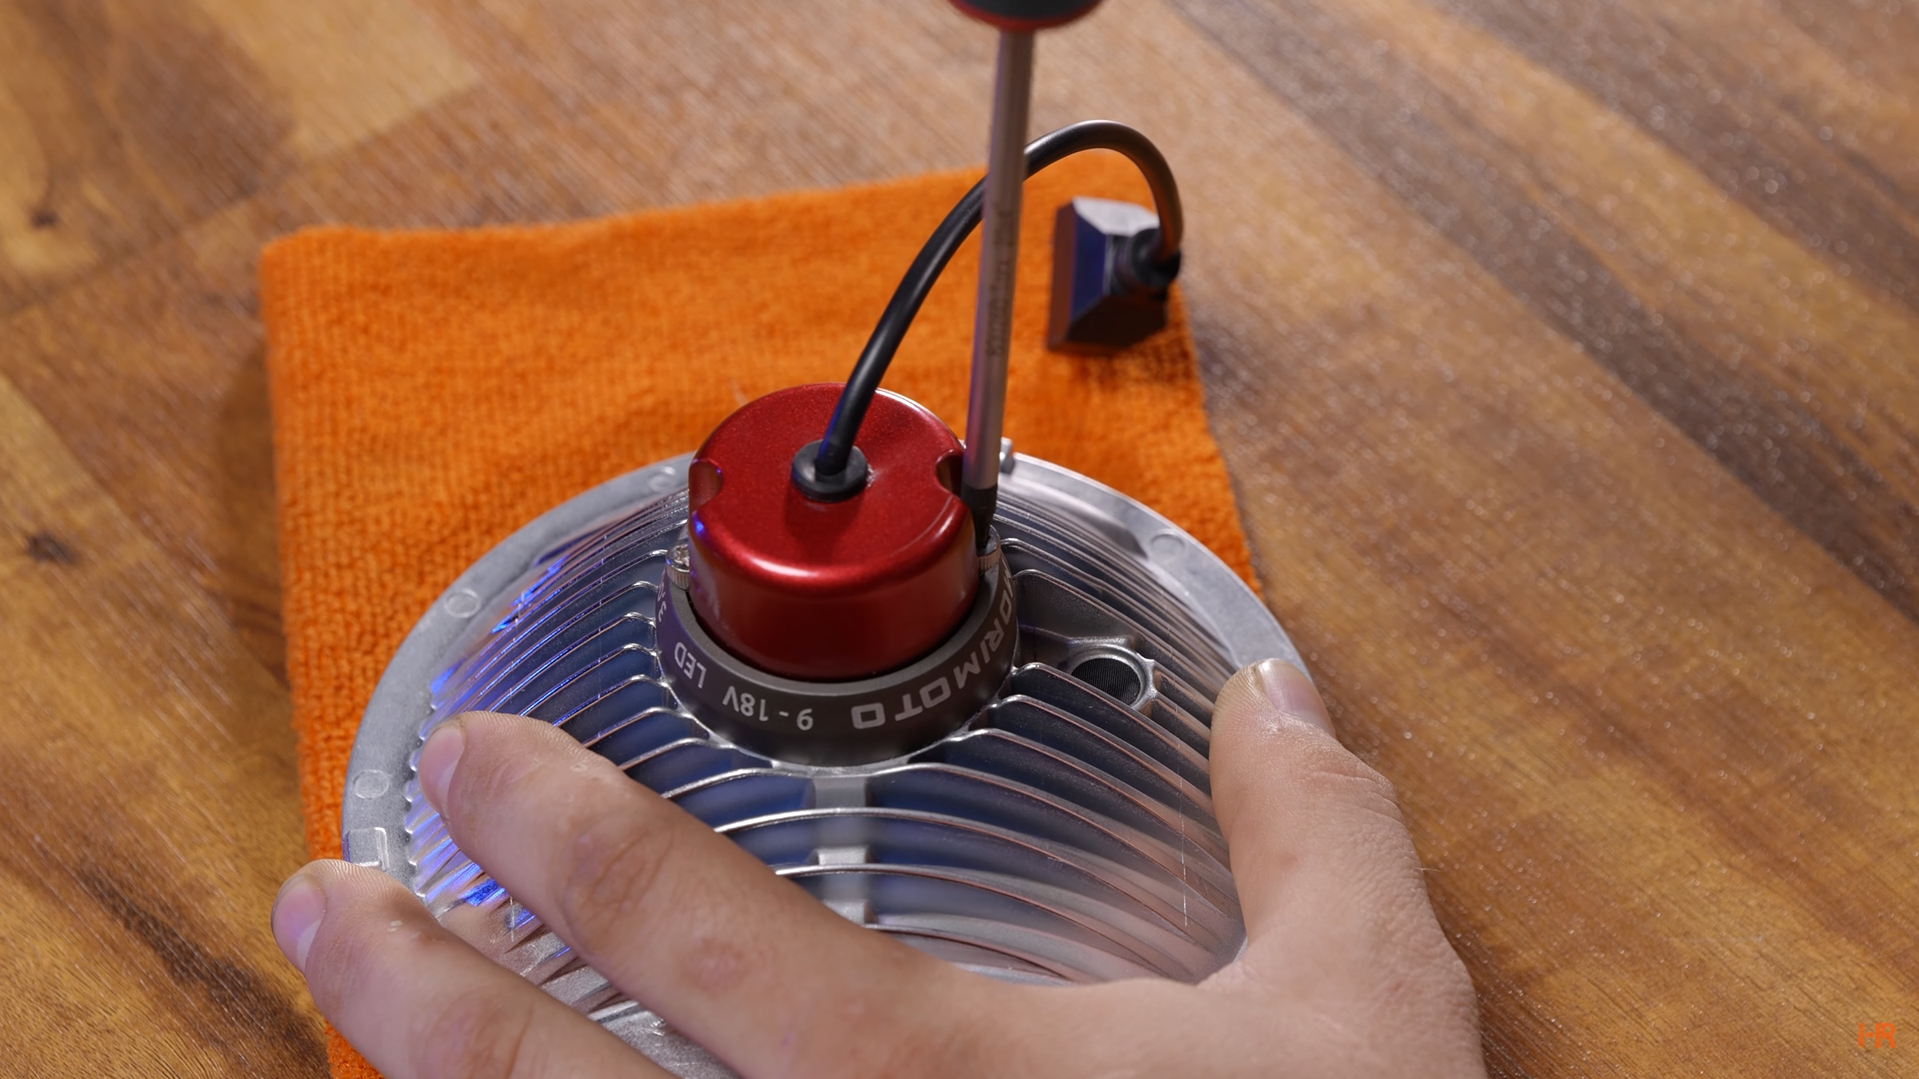
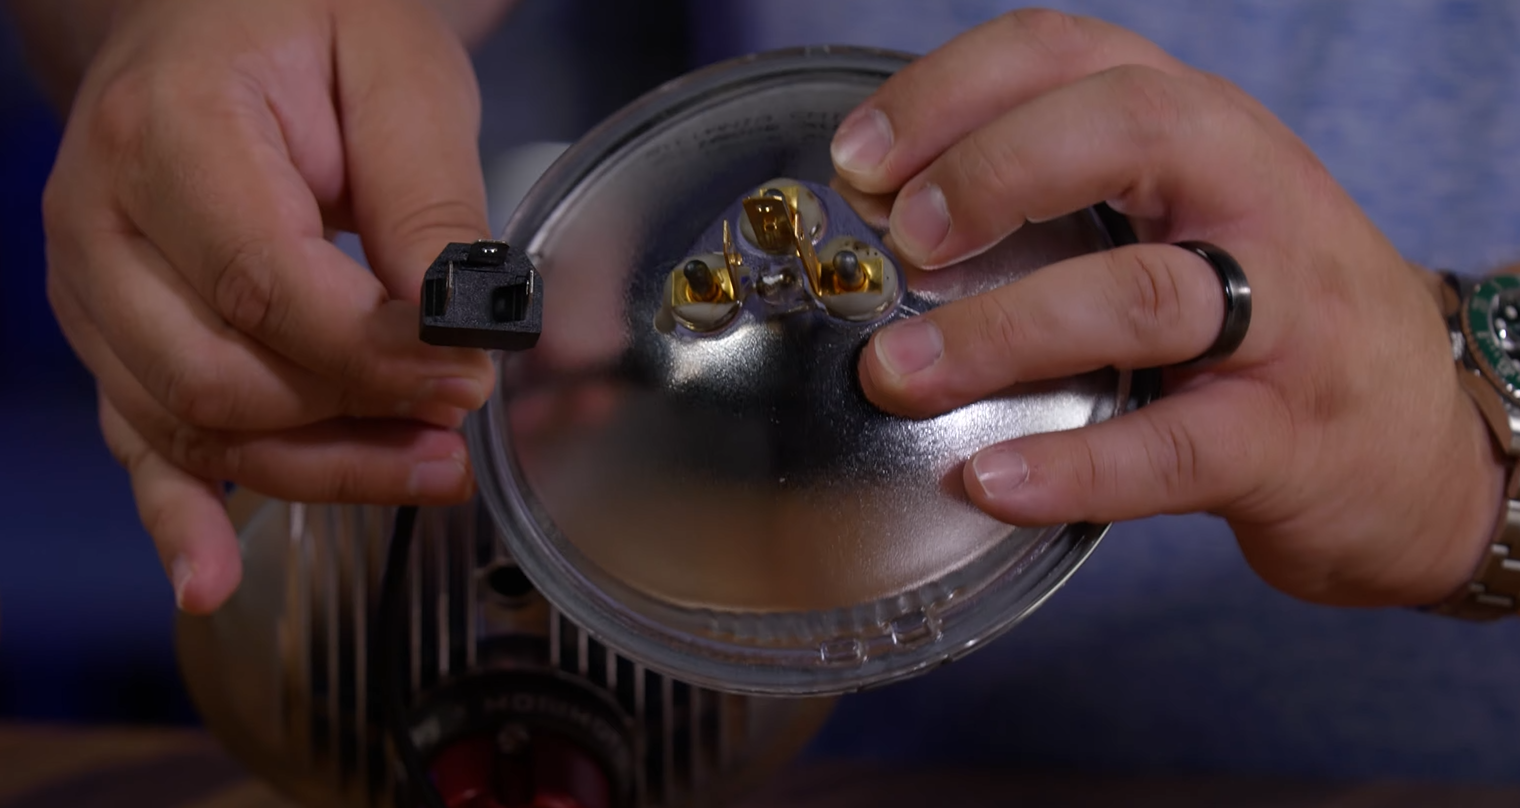
You also need not worry about beam pattern differences between the two as they are identical with the exception of the obvious color temperature difference. These cartridges are also easily changed out. All you need to do is unscrew the two Allen screws on the rear of the housing. From there, you can remove the cartridge.
INSTALL
Unlike several things on classic cars, these are super easy to install. Most often you will have a few exterior screws to remove a piece of bodywork holding in the headlight and its retainer ring.
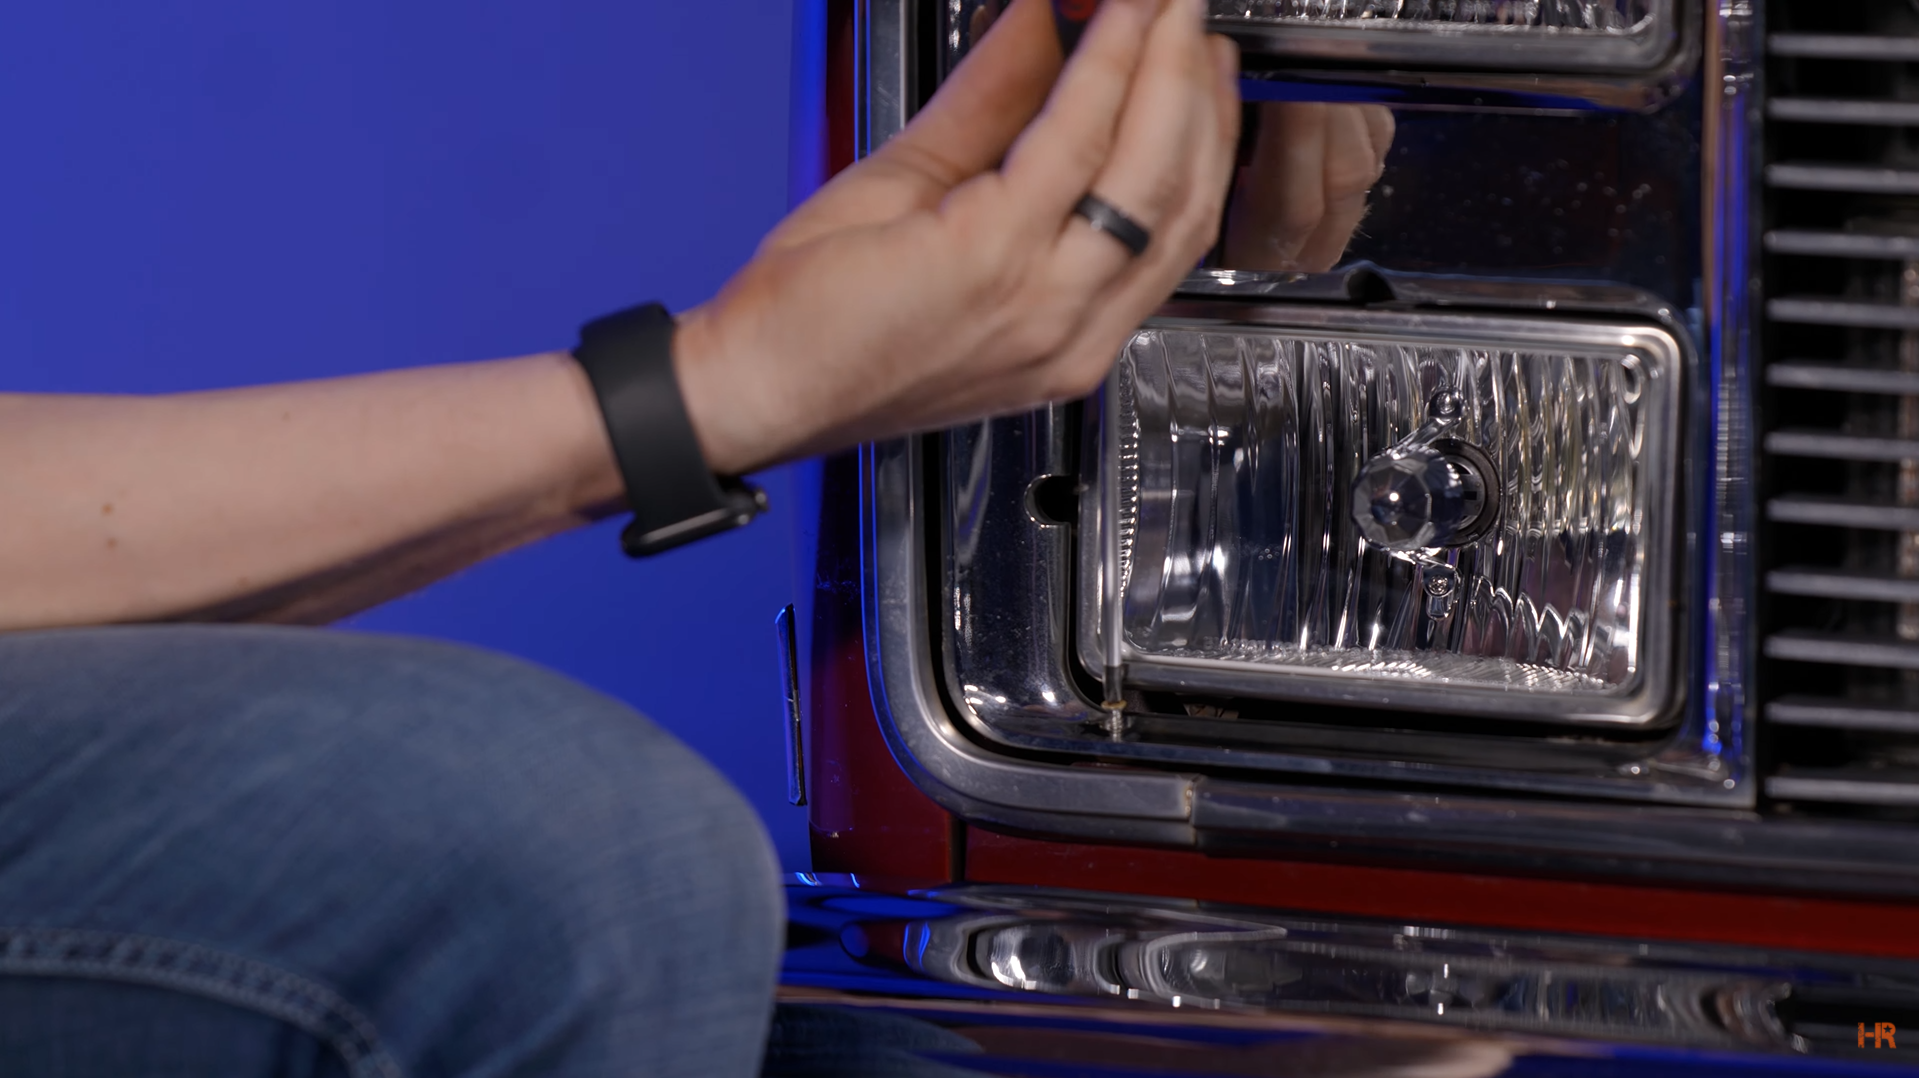
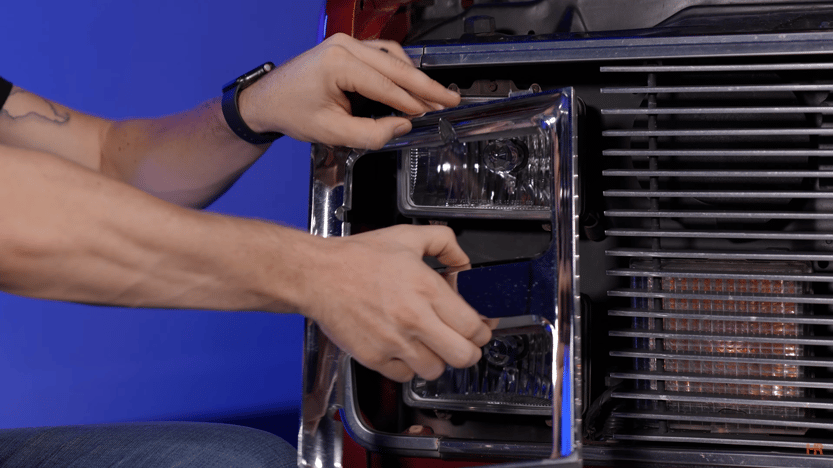
Once the body panel is removed, unscrew the retainer ring holding the Holley LED headlight in place. Be sure to have a hand on the actual headlight since the retainer is the only thing holding it in place.
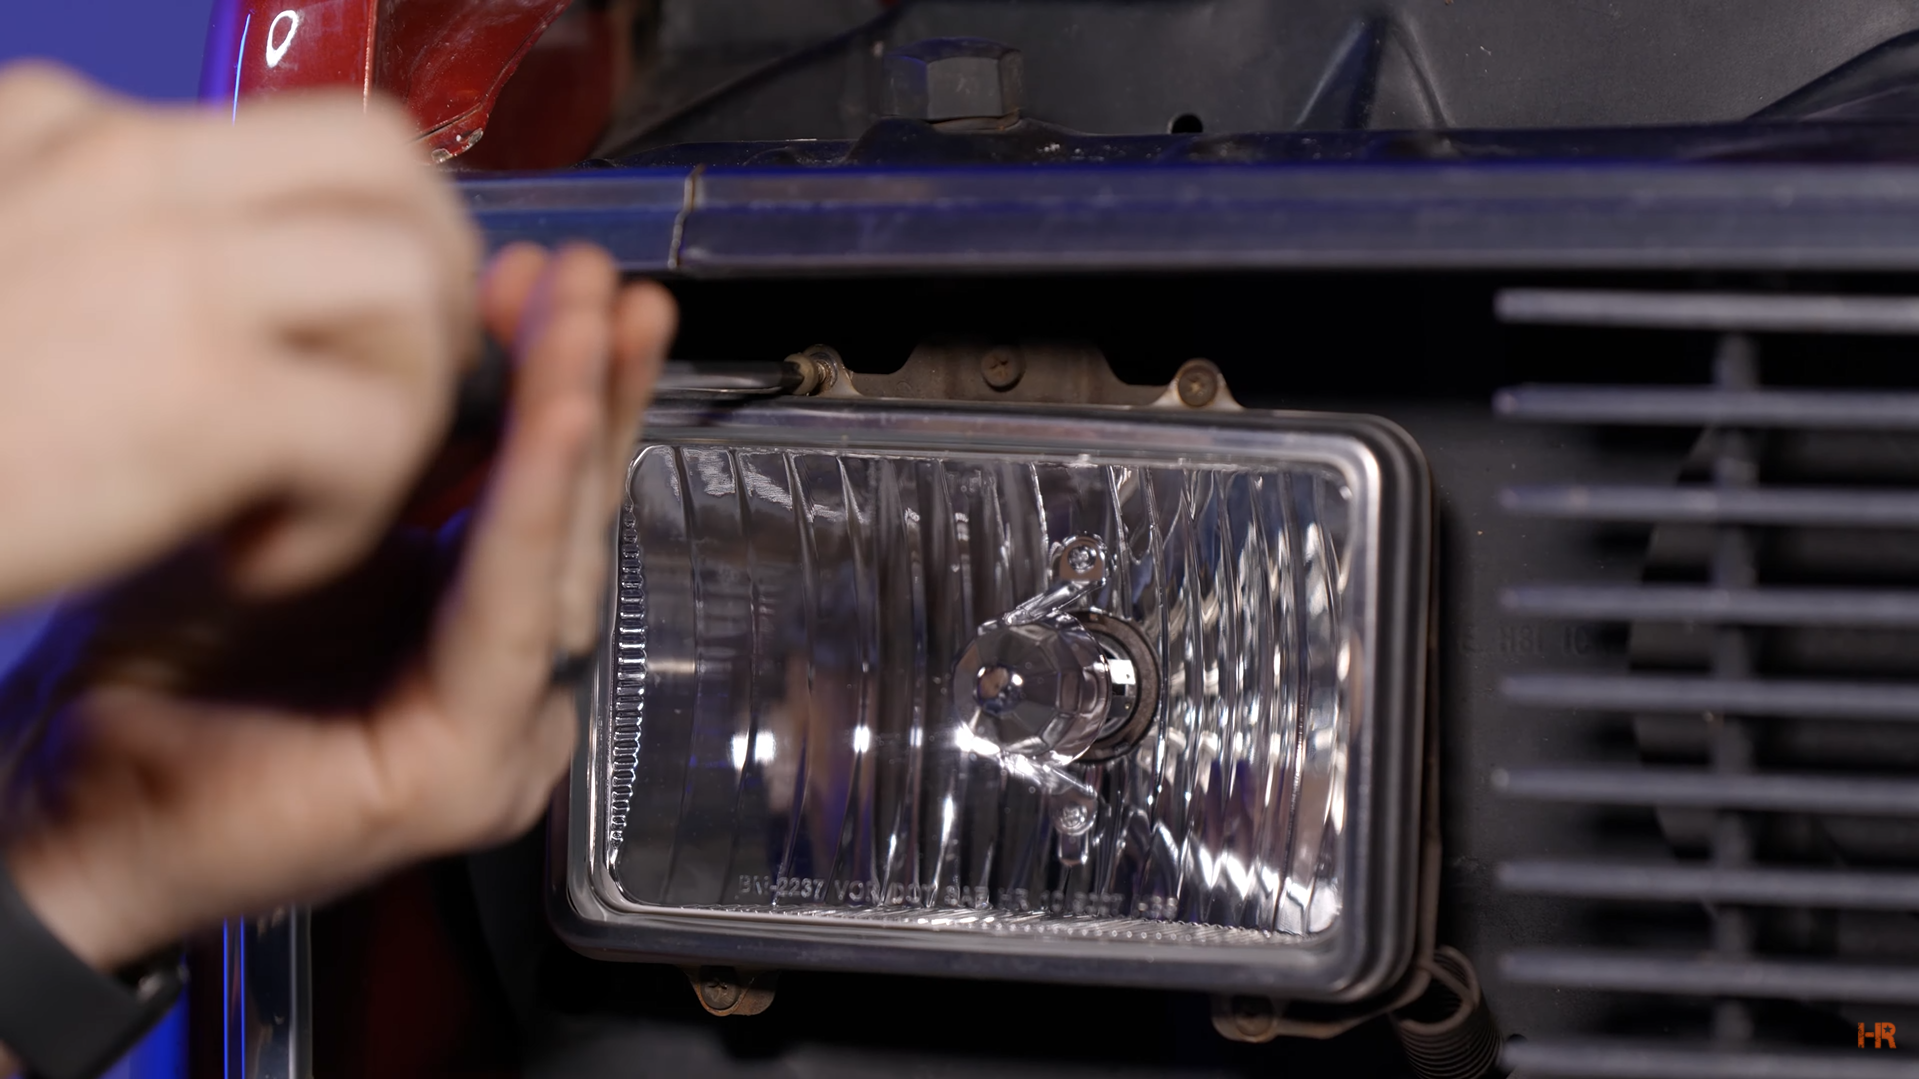
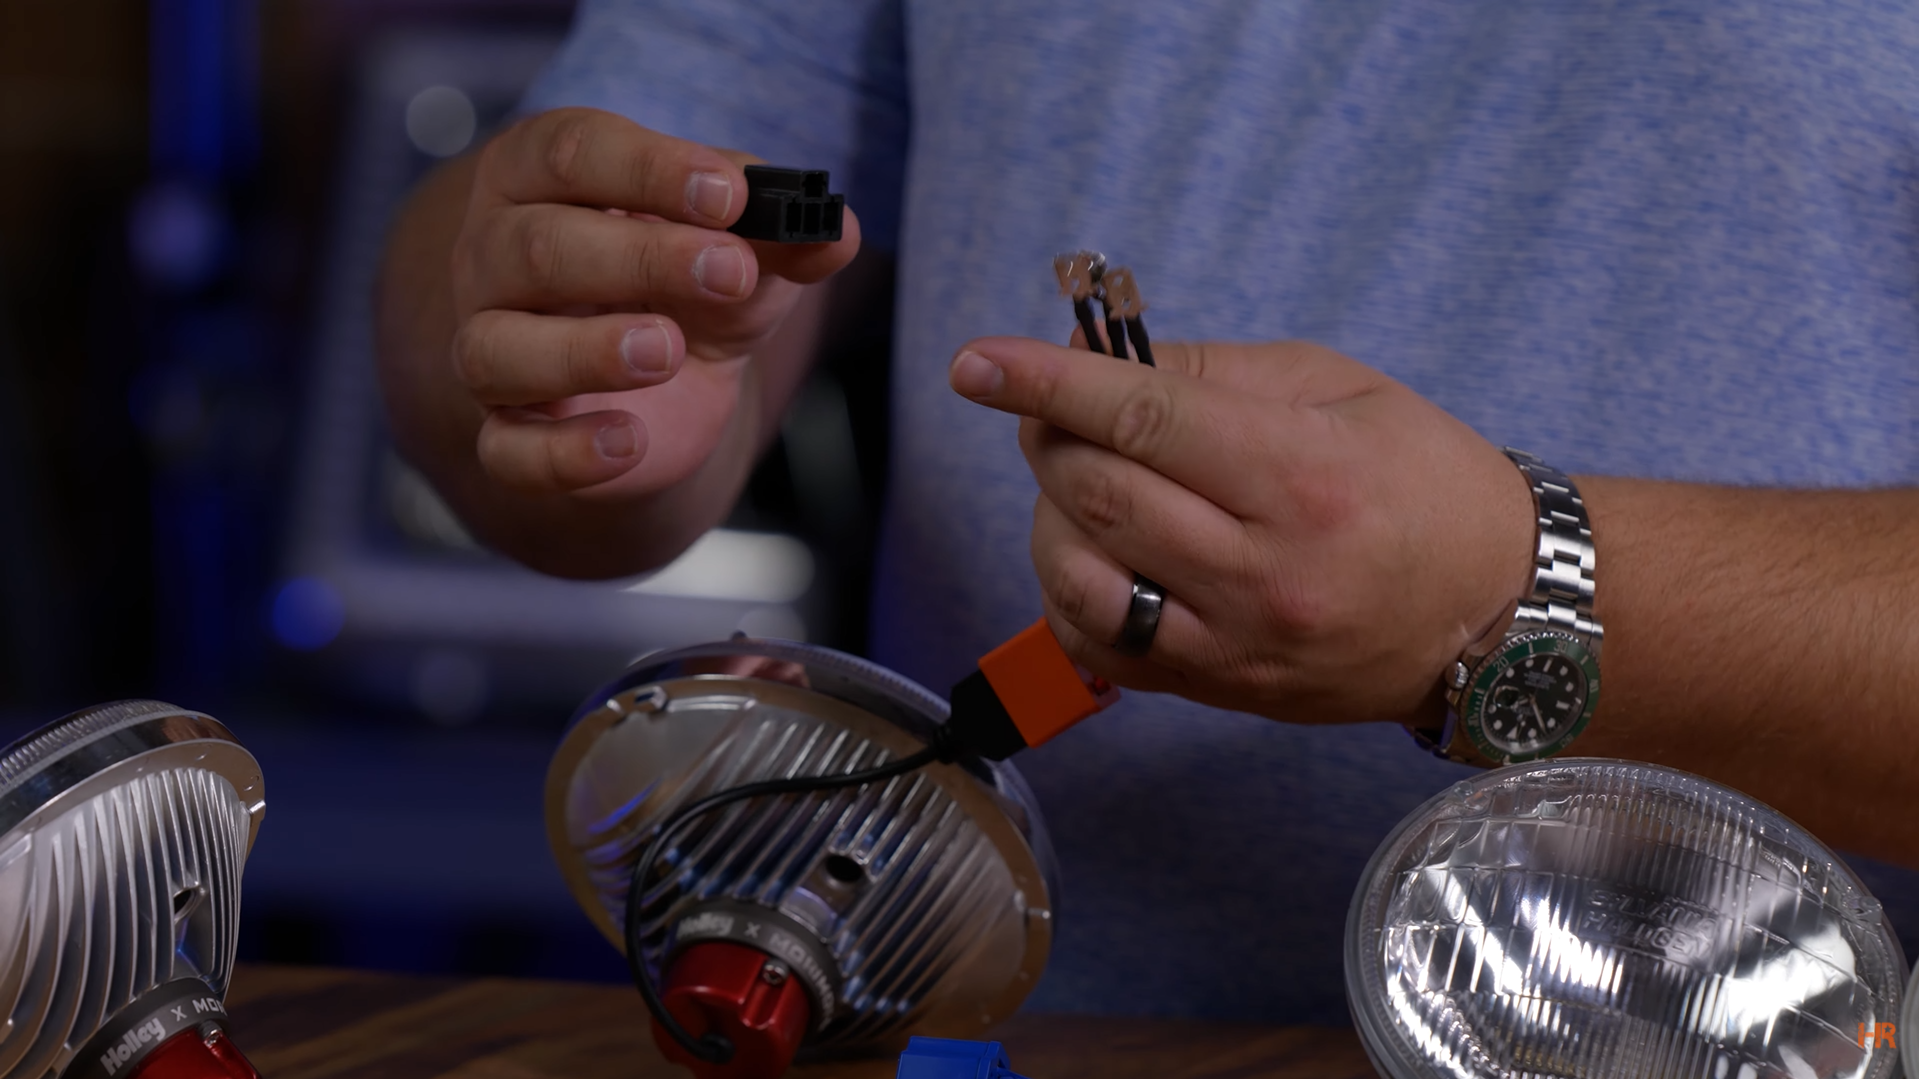
After you have the headlight out of the retainer ring, unplug the housing from the wiring.
You will notice here a big difference between the stock housing and the Holley RetroBright LED headlights. Where in the OEM housing, the plugs are built into the bulb, the RetroBright has a durable cable extending from the bulb. Fear not, the connectors are still the same and the next few steps are straightforward.
There are two ways you can install your light depending on your vehicle.
If your vehicle has only two headlights, one on either side of the vehicle, all you need to do is plug the light into the vehicle’s harness and then reinstall the retainer ring and bodywork if necessary.
If your vehicle has quad headlights, two on either side, then you may want to use the adapter. The adapter allows you to plug in both headlights into the adapter and have a total of four low beams and four high beams, as opposed to two low beams and two high beams.
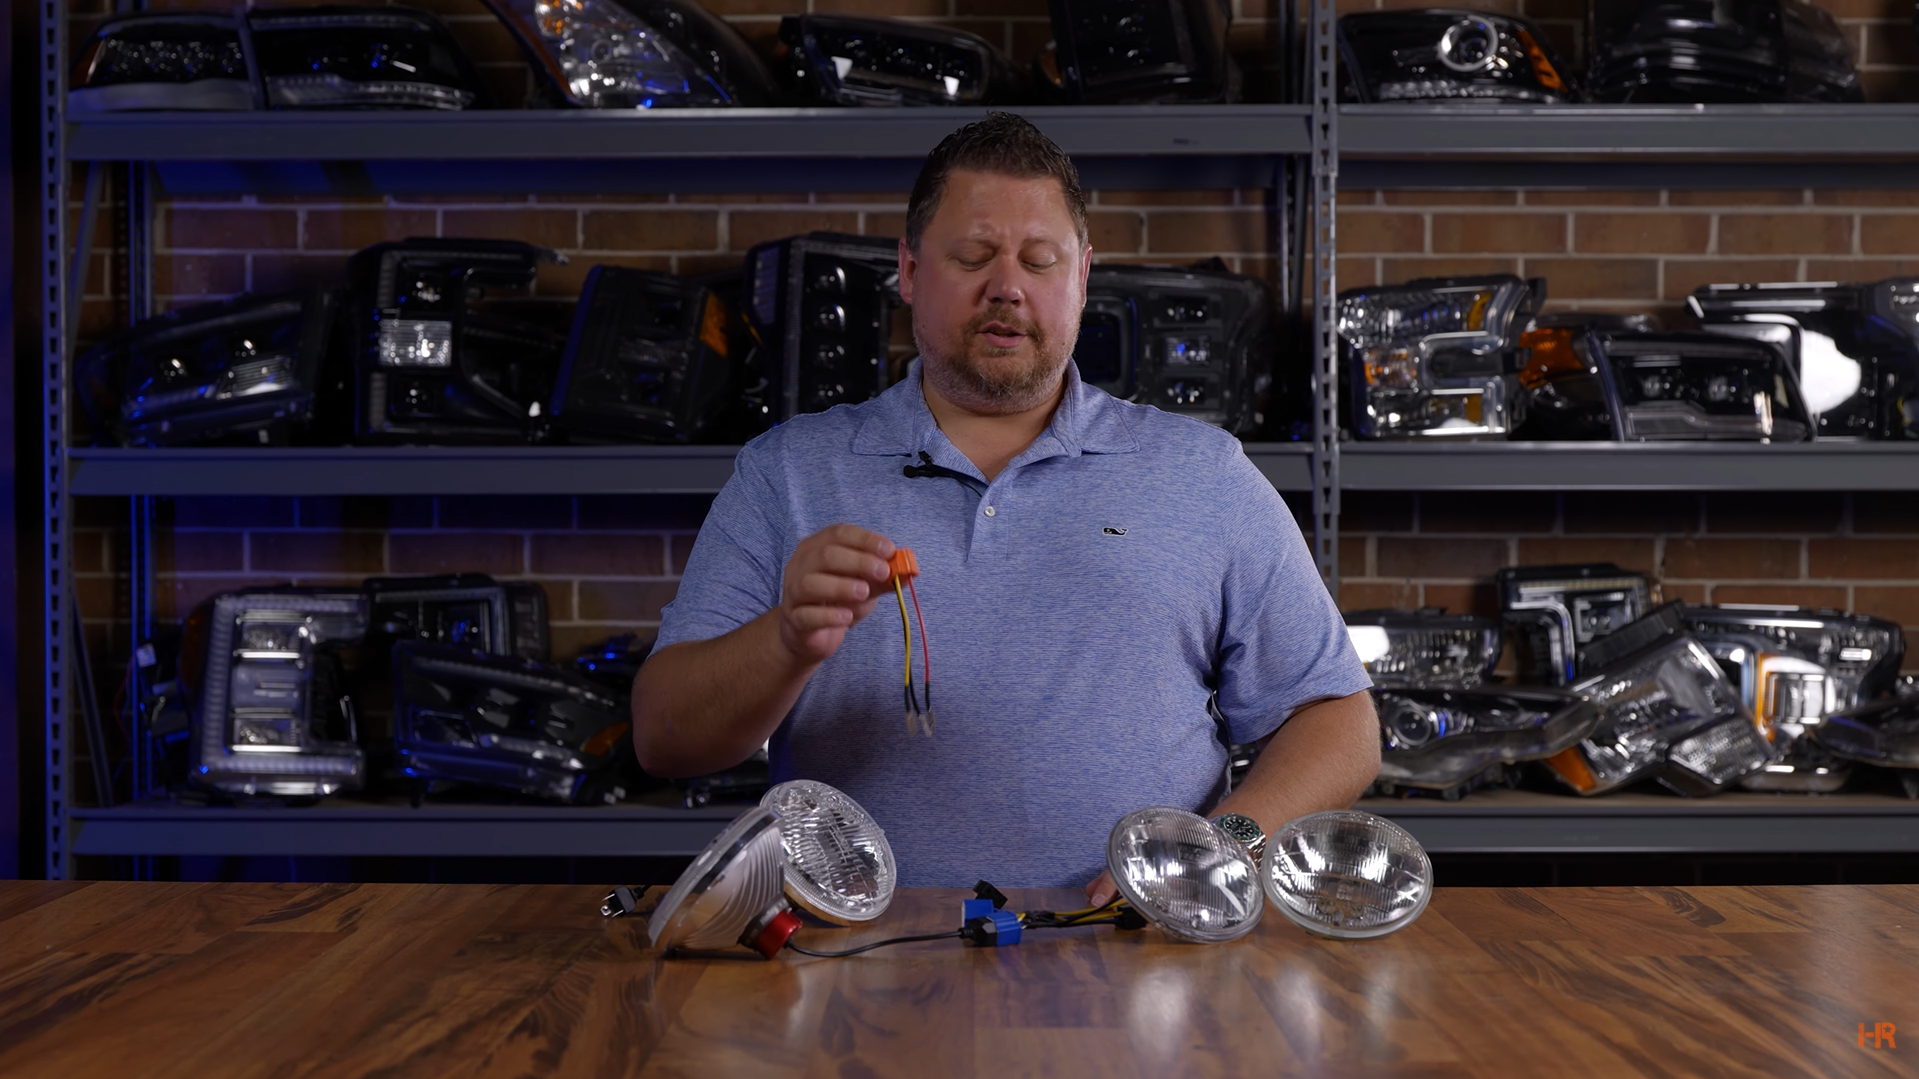
Once you have chosen your route, you could run into the issue of the lights not working. Fear not! This likely means that your classic has reverse polarity wiring. To get your RetroBright headlights working, take the extra adapter harness and plug them into the housing or relay. From there, plug the three terminals into the factory connector that comes in the kit.
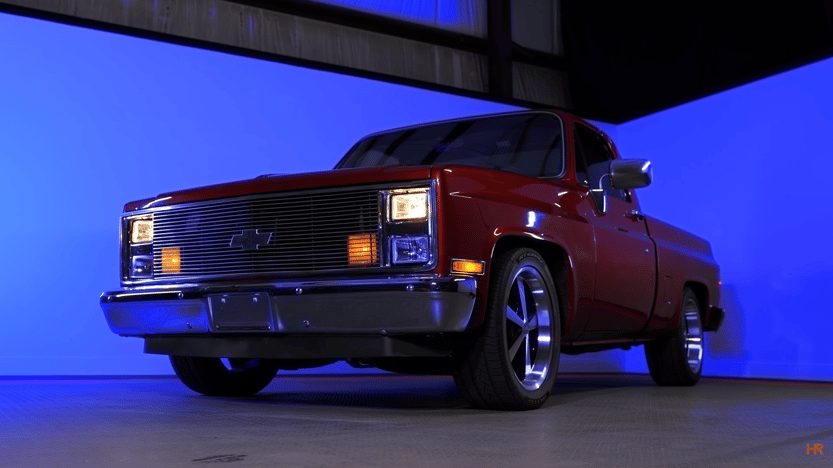
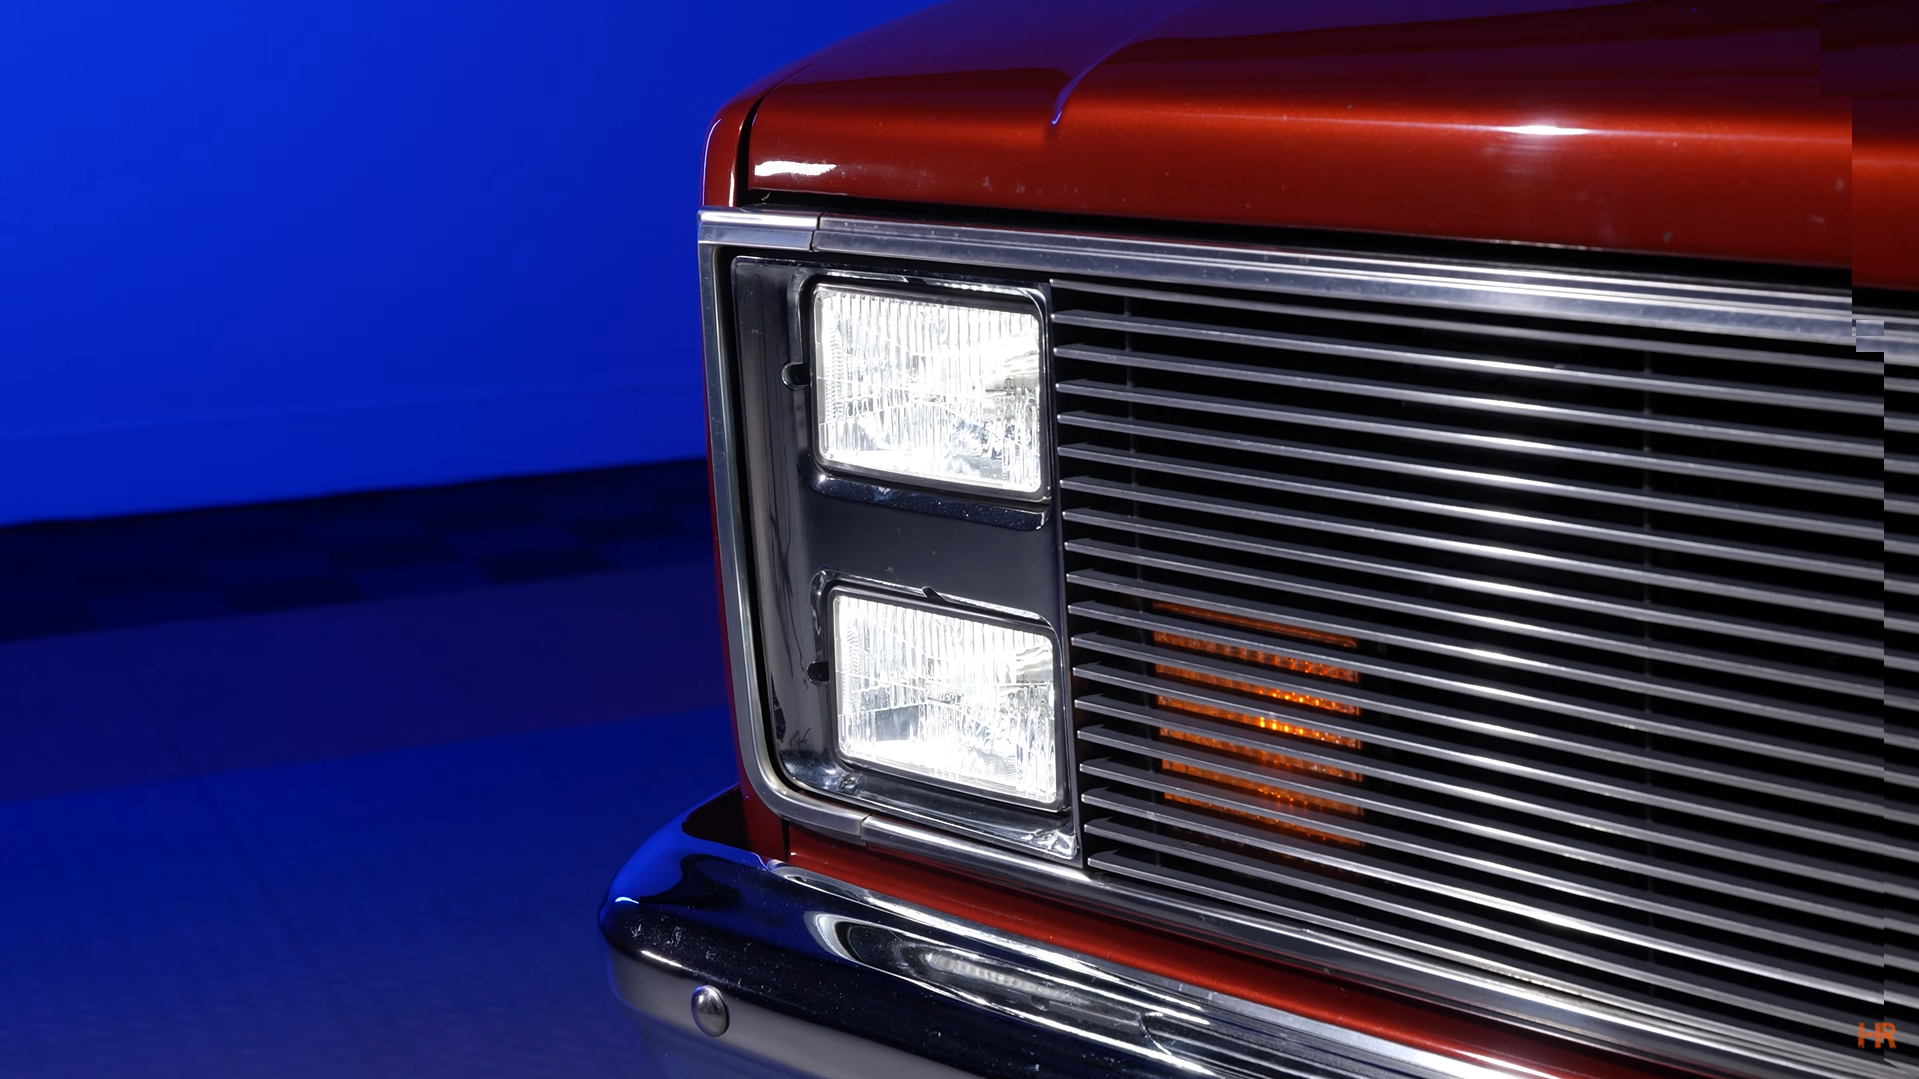
If you are wanting a more in-depth install guide, we installed a set of 4x6in Holley RetroBright headlights on a Chevrolet C10, check out our video here!
These lights are incredibly cool and we here at HeadlightRevolution.com have been excited to share these. Holley and Morimoto have done a great job with these, and you can pick up your own pair here.
If you are more of a visual learner, be sure to check out our video on the Holley RetroBright LED headlights. While you are there, make sure to like and subscribe to our channel for the latest lighting upgrades for your vehicle.
Have any questions about one of the products we mentioned? Contact us today, and our customer service team would be happy to help.