The Best New Upgrade for Your Truck: Morimoto XBG Grilles
At this point in your truck ownership, you have probably already seen most of the aftermarket upgrades available. This could be a performance package upgrade or even a stylistic upgrade - I am sure you have spent hours scrolling through the online catalog to find the perfect upgrades for you. What if I told you that Morimoto had a new upgrade that includes both performance and style? It is not the typical headlight or taillight unit either. Morimoto has broken into a new market of aftermarket LED Grilles – the first of its kind.
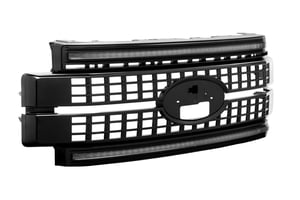
These grilles are available for both the 2018-2020 F-150s and the 2017-2019 Super Duty trucks. Morimoto already provides headlights, taillights, and off-road lights for the Ford truck platform, and adding the XBG Grilles to the line-up only made sense. The new XBG Grilles pair high-performance lighting with an OEM+ style. On top of that, they have made the XBG Grilles just as easy to install as the rest of their plug-and-play lineup. This is the perfect way to completely transform the front end of your truck with a more modern design. With the Morimoto lighting accessories, you will have an incredible road presence making your truck hard to miss.
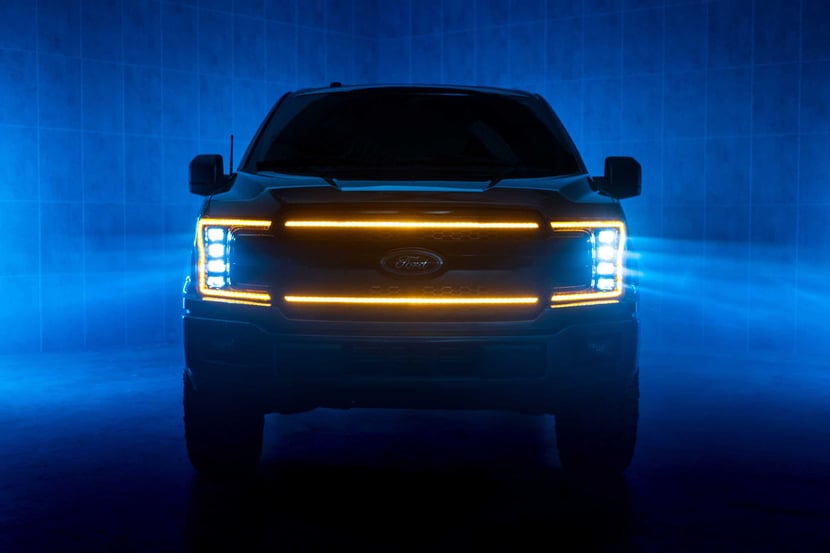
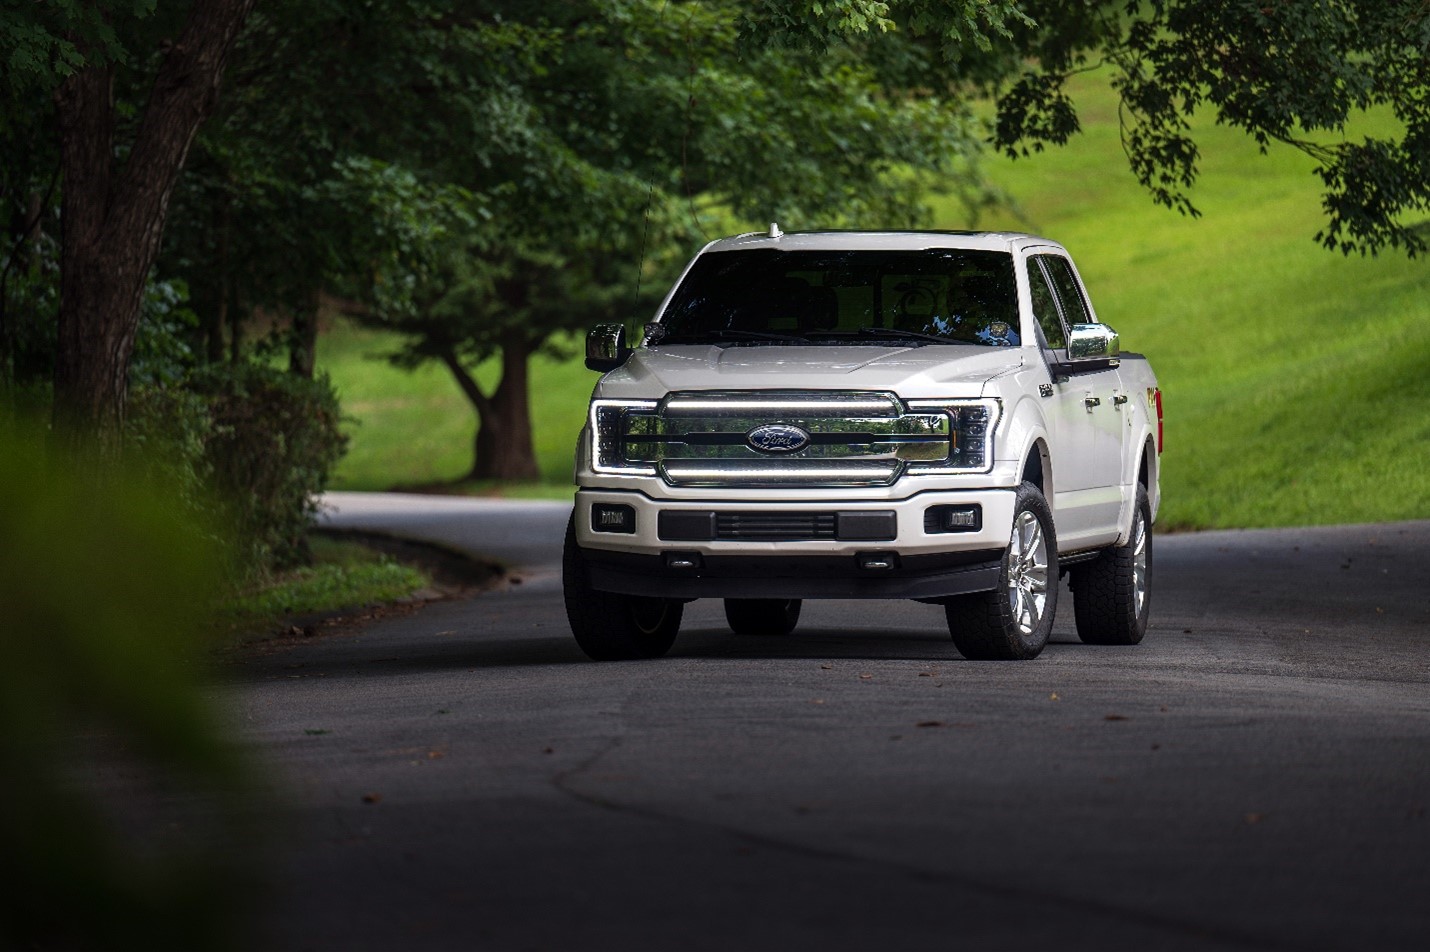
XBG Grille for 18-20 F-150
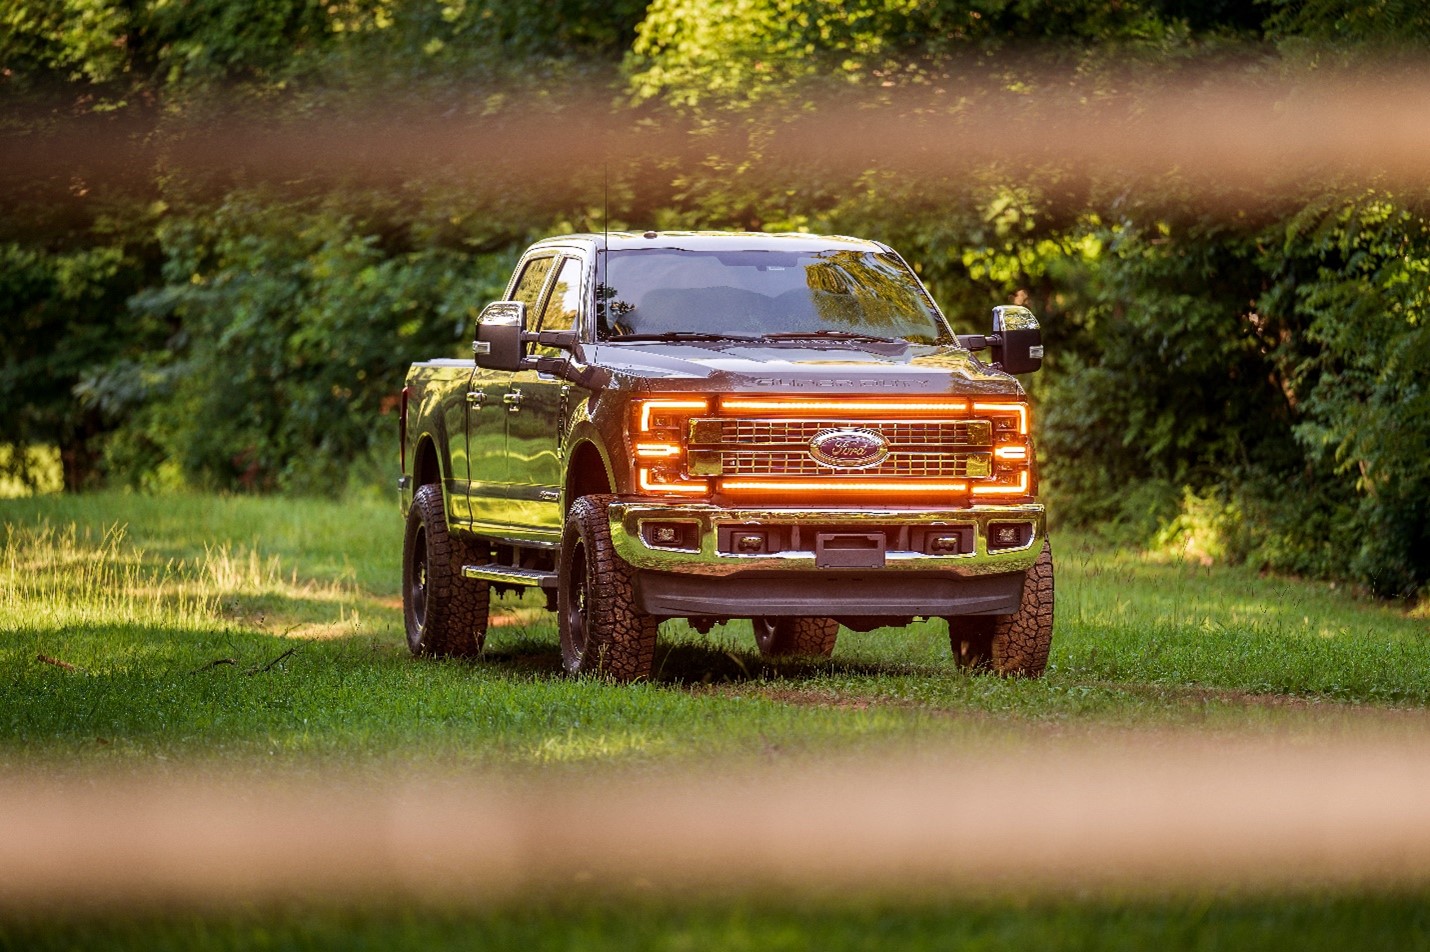
If you own a 2018-2020 F-150, you are probably already aware of the lack of lighting provided by the OEM headlights. The new XBG Grille paired with the Morimoto XB LED headlights are the perfect way to fill the performance gap that the stock headlights leave. The prominent DRL on the new XB Grille is promised to make your front end stand out from the rest. As standard for many of Morimoto’s top-of-the-line XB housings, the XBG Grille will also be offered in both amber and white color. These DRL colors match the XB LED headlights with the same color temperature, making sure you have the perfect match when paired together.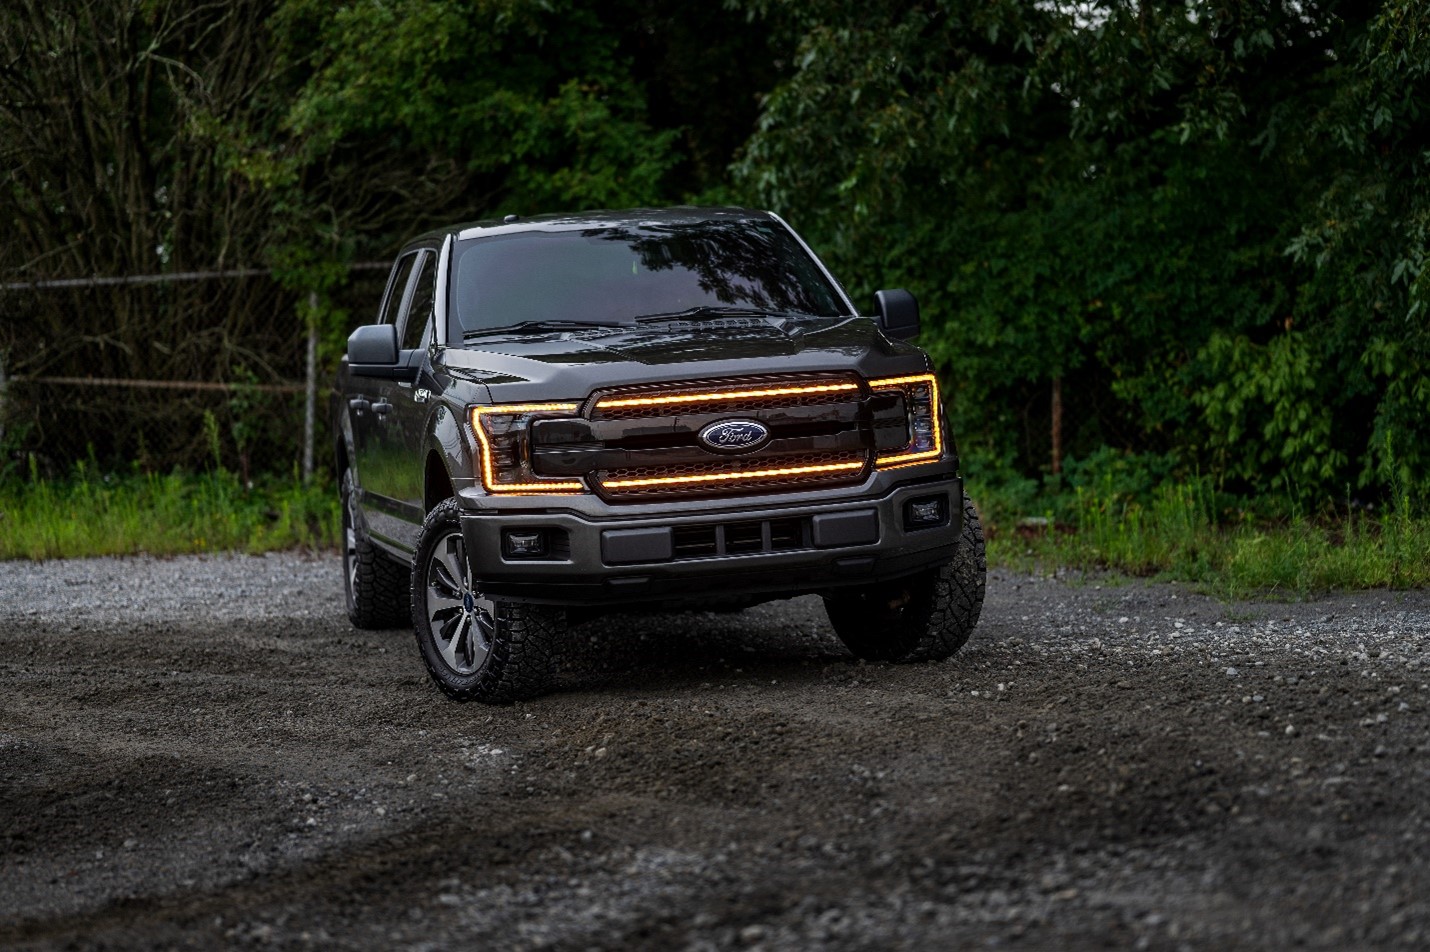
Another similarity they share with the XB LED Headlights are the automotive-grade optics. The XBG Grille uses the same Osram LEDs that come standard in the XB Headlights. Using the same optics means that your new DRL is insanely bright, even in broad daylight. Luckily, Morimoto also considered other drivers on the road once the sun goes down. The XBG Grille comes with an auto-dim feature that is activated during parking light, low beam, or high beam modes. This auto-dim feature reduces glare in the dark, so you do not have to be the one blinding other drivers. Morimoto also considered that some people may prefer a chrome grille over a painted grille, and some might prefer vice versa. Because of this, they’ve offered the grille in both chrome and unpainted so it can be paint matched to your truck. The grilles are compatible with all versions of the 2018-2020 F-150 truck so if you already have aftermarket lighting or a high-end trim with OEM LEDs, you do not have to worry about the XBG grilles being incompatible.

Ford F-150 (18-20): Morimoto XBG LED DRL Grille
$1,150.00

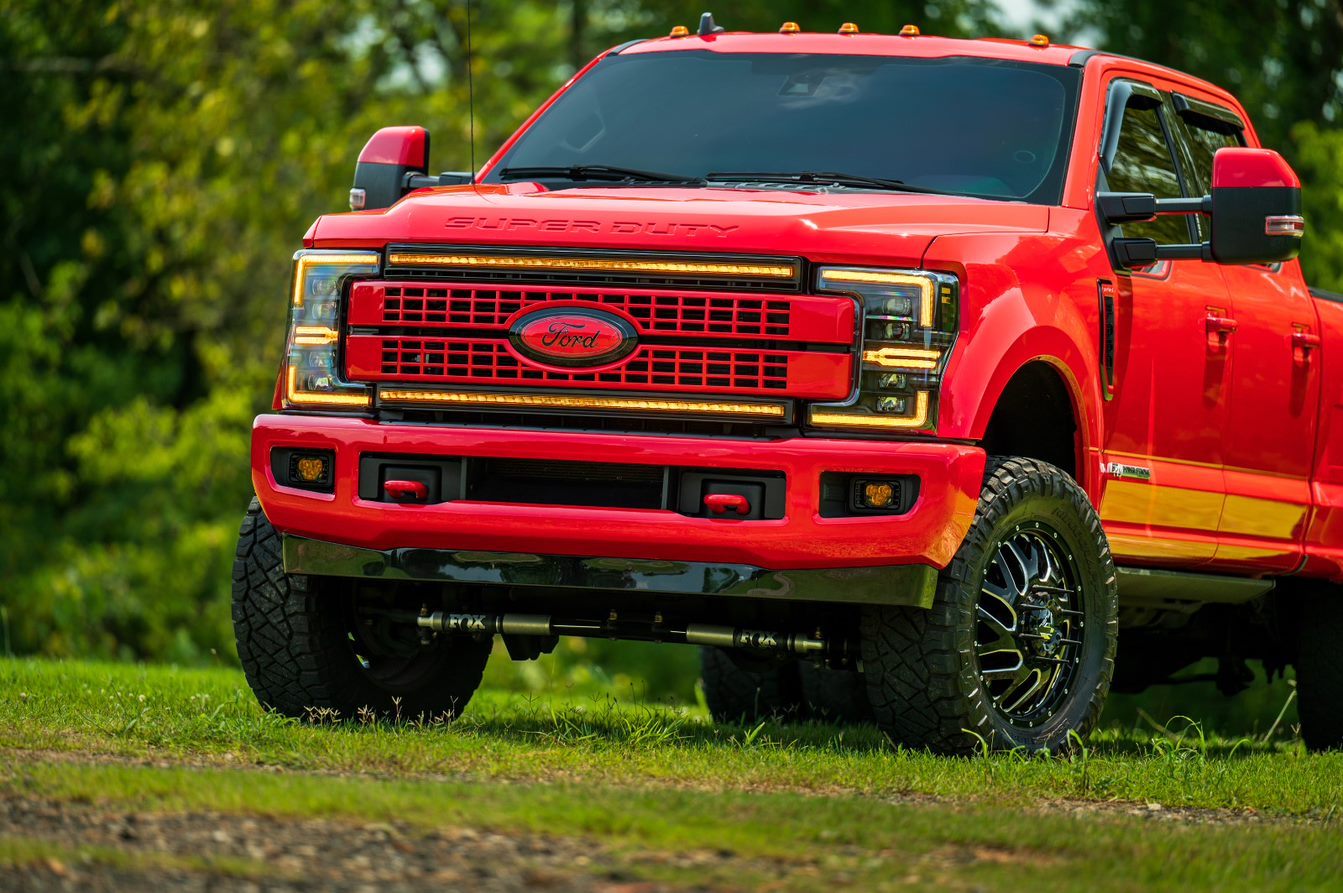
XBG Grille for 17-19 Super Duty
If you own a 2017-2019 Super Duty, you already have one of the most bad-ass trucks on the market. However, your stock lighting does absolutely no justice for that beast of a truck. Morimoto has known that the stock lighting leaves a lot to be desired which is why they have made so many products for the Super Duty trucks. The XB Headlights completely changed the game by modernizing the front end of the truck, but the XBG grilles will provide so much more.
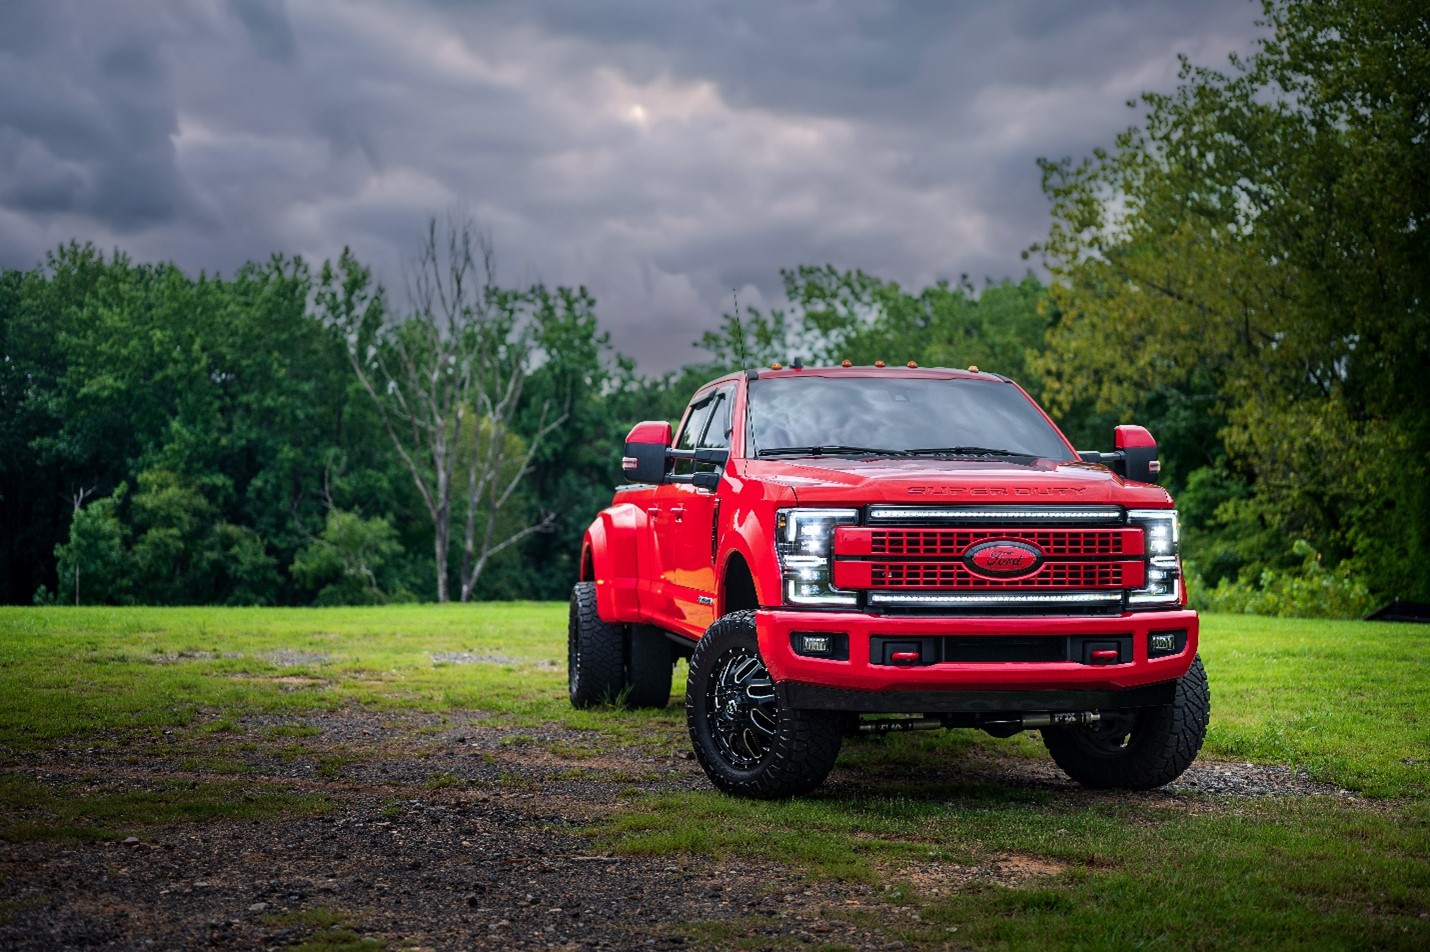
The 2017-2019 Super Duty XBG Grilles are set up exactly like the 2018-2020 F-150 Grilles. They also use the Osram LED chips to provide the maximum amount of DRL output. That being said, they also include the same auto-dim feature. Since the XBG Grilles are so bright, Morimoto did not want to be the reason you cause glare for other drivers at night. With the auto-dim feature included, the XBG will lower in intensity during parking light, low beam, or high beam modes. Lowering intensity reduces the amount of glare for oncoming traffic making it a safe driving experience for everyone on the road. If you were to compare the XBG grille to any DIY options, it would be clear that any DIY project is going to lack the quality, reliability, and intensity that Morimoto provides. Seeing as you own a Super Duty, you probably care a lot about the quality of the products you put on your truck. Considering the looks and performance of the XBG Grille, the decision to upgrade should be a no-brainer.
As mentioned with the 2018-2020 F-150 units, the Super Duty XBG Grille will also be offered in both white and amber. They will be a perfect match with the Gen 1 XB LED Headlights, Gen 2 XB LED Headlights or even your stock OEM headlights.
 Ford Super Duty (17-19): Morimoto XBG LED DRL Grille
$1,150.00

How to install the Morimoto XBG Grille
Parts Needed for Installation:
- Ratchet
- 7MM Socket
- 8MM Socket
- 10MM Socket
- Flat Head Screwdriver or Trim Removal Tool
- Philips Head Screwdriver
- Needle Nose Pliers
- Locking Pliers
- Wire Cutters
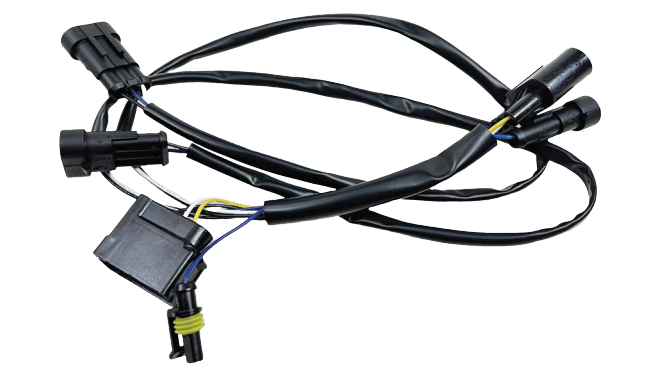
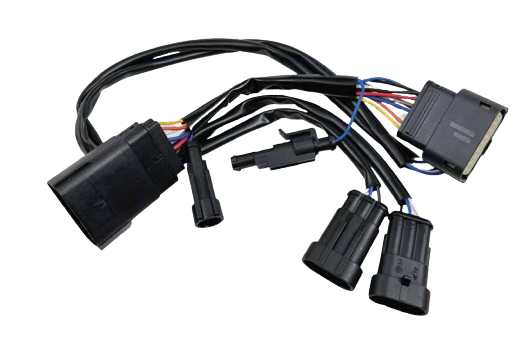
What’s Included:
- 1 x XBG Grille
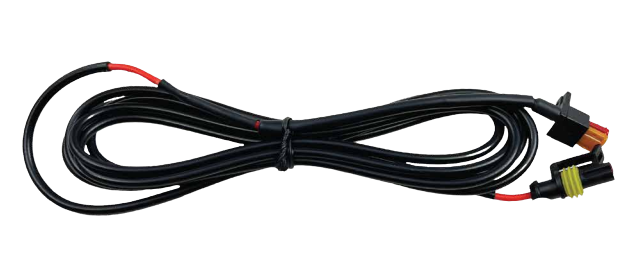
- 1 x Fuse Tap / DRL Harness
- 1 x Halogen Adapter Harness
- 1 x OEM LED Adapter Harness
| Halogen Adapter Harness | OEM LED Adapter Harness | Fuse Tap / DRL Harness |
 |
 |
|
If you are installing the 2018-2020 Ford F-150 XBG Grille, continue to read on.
If you are installing the 2017-2019 Ford Super Duty XBG Grille, click here to read the Super Duty instructions.
Install for 2018-2020 Ford F-150 XBG Grille
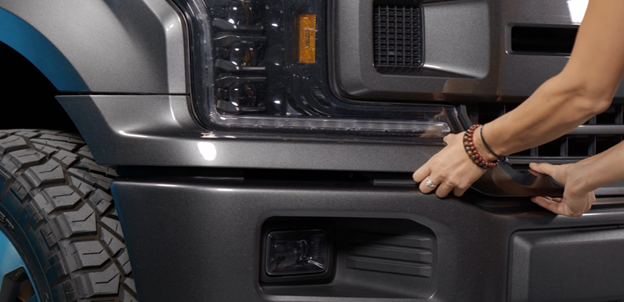
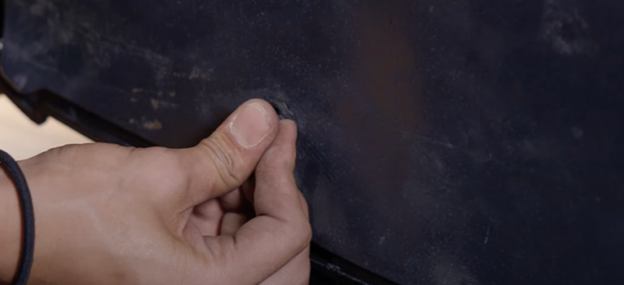
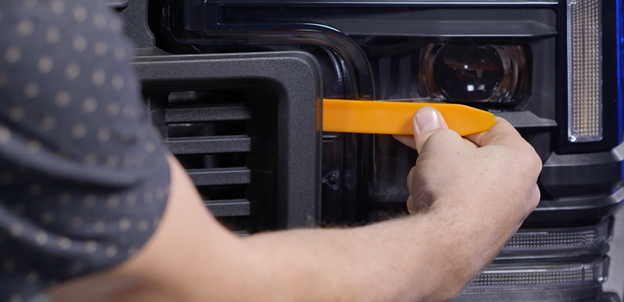
Remove Grille Cover
Remove the thirteen plastic clips holding on the grille cover. When removed, gently set to the side.
Remove Fender Trim
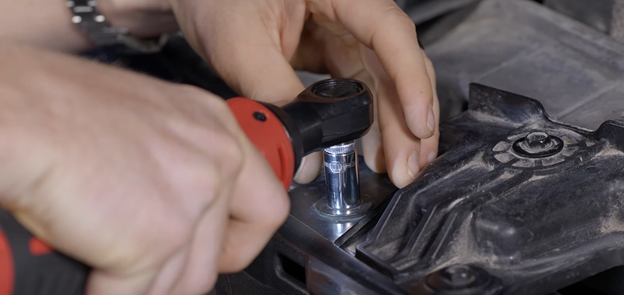
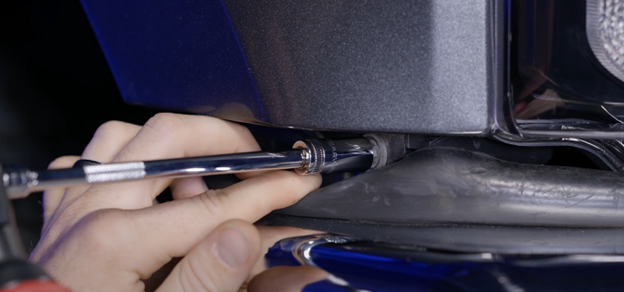
Remove the two 7MM bolts underneath the fender.
Once the bolts are removed, gently pull forward on the trim piece. This will remove it from the retaining clips so it can be removed later.
Repeat these steps on the other side.
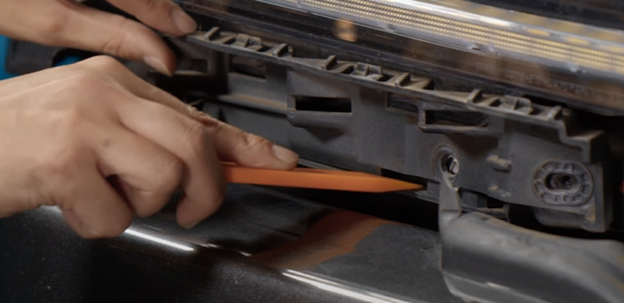
Starting at the front of the truck, gently pull up and forward on the trim piece. If you are having trouble, you can use a pry tool to help release the trim from the retaining clips.
Remove The Grille
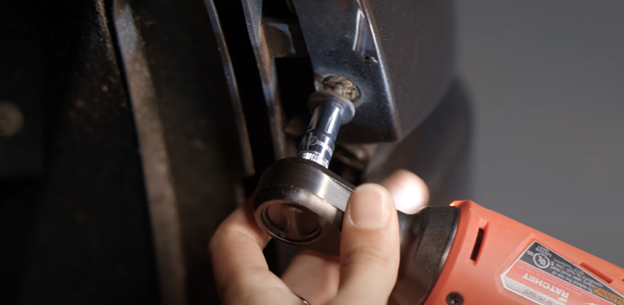
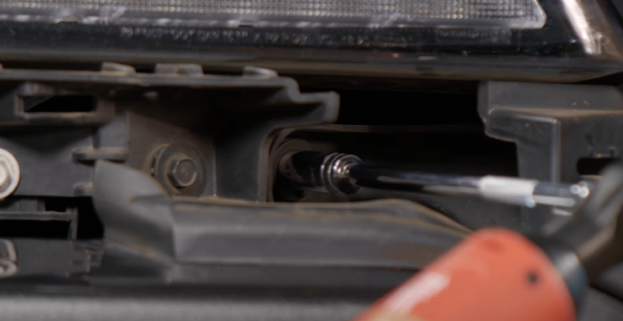
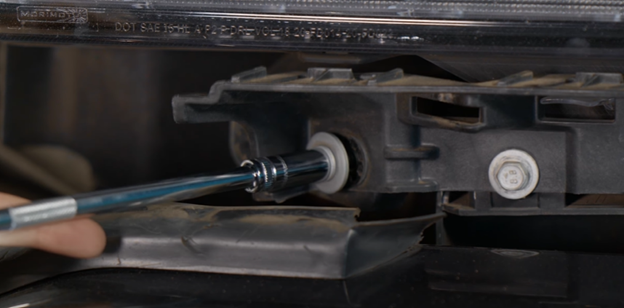
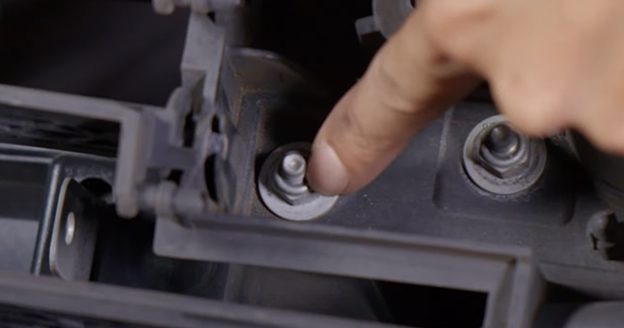
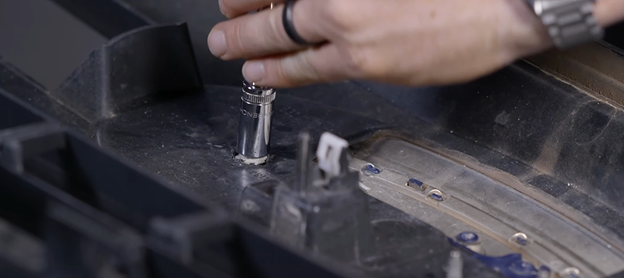
Remove the four 10MM bolts from the top of the grille.
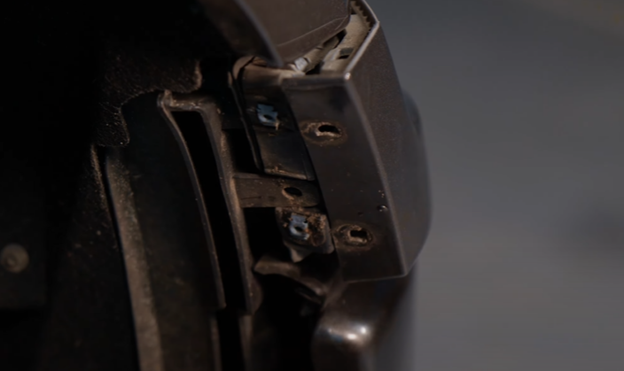
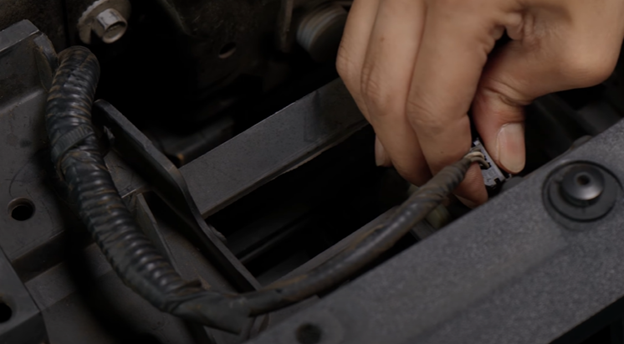
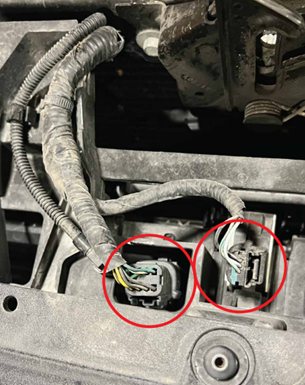
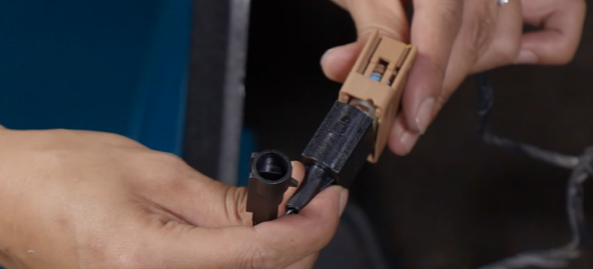
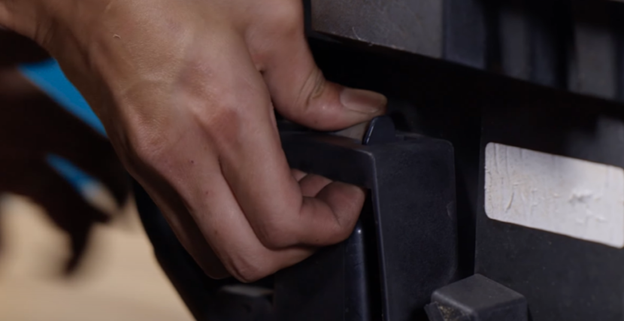
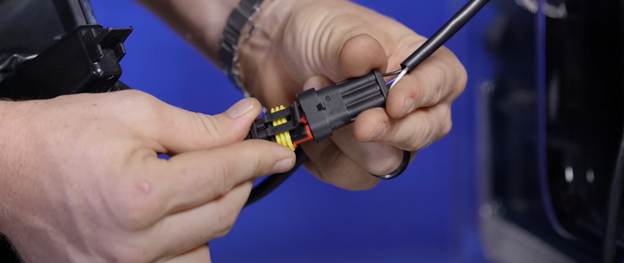
Remove the connector off the back of the grille by pressing the tab and sliding the connector up. Pry on the cable clip to release the wiring from the grille.
If your truck has a front camera, release the clamp holding the plastic hose. Next, disconnect the two electrical connectors.
Remove one 8MM bolt from the bottom of the grille. This step will be repeated on the other side.
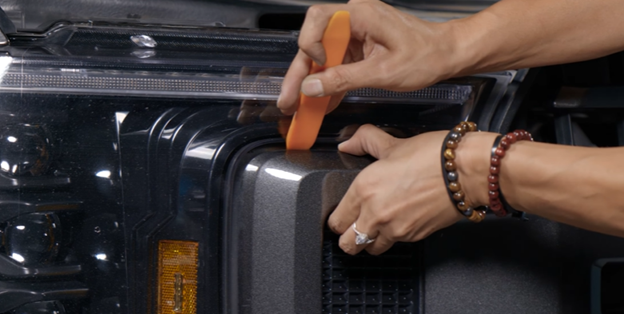
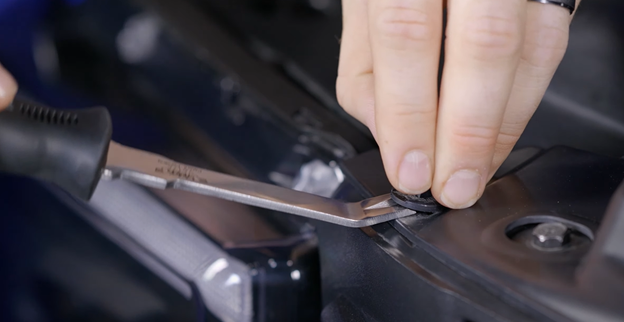
Pry on the backside of the grille to release from the retaining clips. This process will be repeated on the other side.
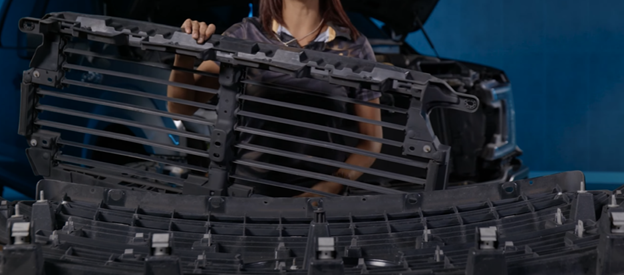
Gently pull the grille towards you to remove it from the truck. Set grille aside.
Remove The Headlights
Remove the three 10MM bolts and one 8MM bolt from the bottom of the passenger side headlight.
Using the pry tool, pry the air vent downwards, away from the headlight.
Remove the two 10MM bolts from the top of the passenger side headlight.
Gently pull the headlight towards you to remove it from the truck.
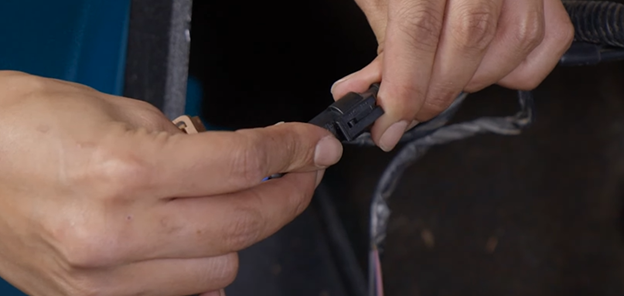
Now, disconnect all connectors from the back of the headlight.
Install fuse tap/DRL Harness
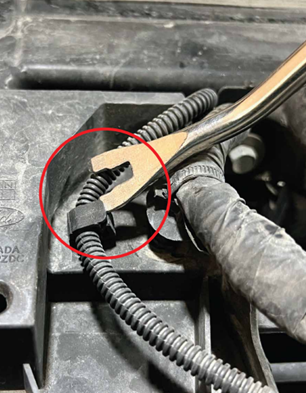
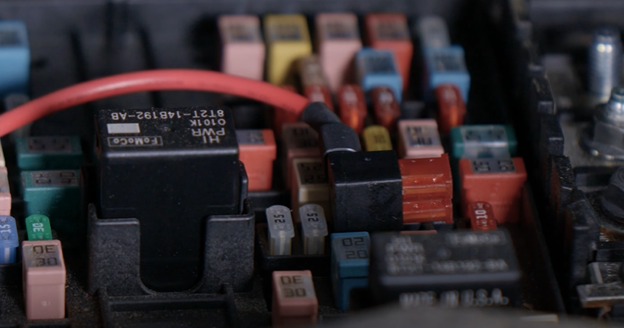
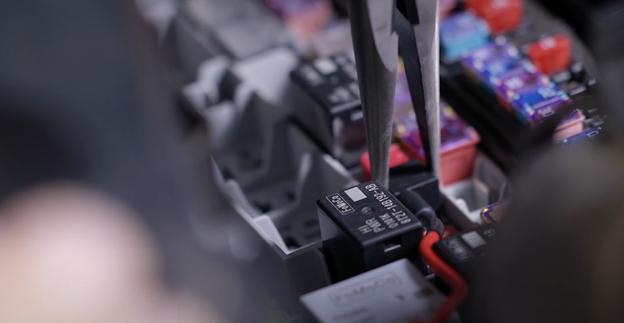
Locate the fuse box underneath the hood. Find fuse #36 and remove it with needle nose pliers. Replace the fuse with the fuse-tap harness.
Route the DRL harness down from the fuse box to the passenger headlight. Place the lid back on the fuse box and remember the DRL connector location for later.
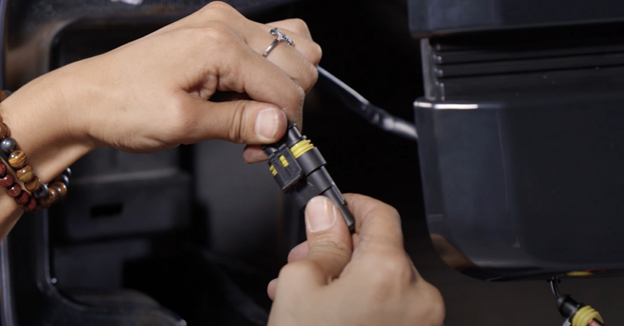
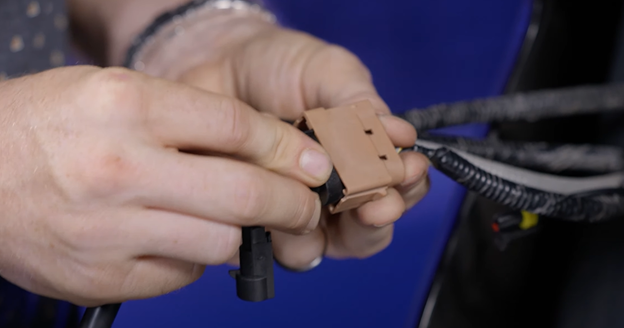
Install Adapter harness
If you have OEM LED headlights, you will need to use the LED adapter harness. If you have OEM Halogen headlights, you will need to use the halogen adapter harness. Begin by plugging in this harness to the OEM wiring.
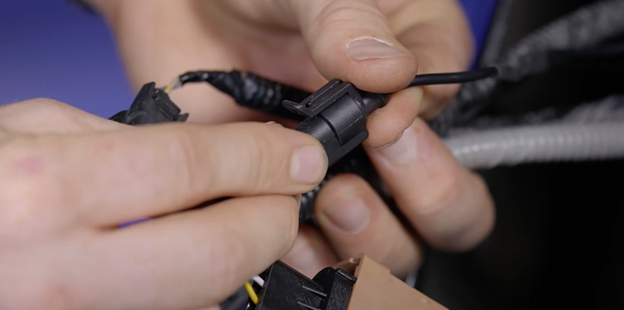
Connect the DRL harness to the adapter harness.
Route the wiring with the two connectors for the grille towards the center grille area. Now you can re-install the passenger side headlight.
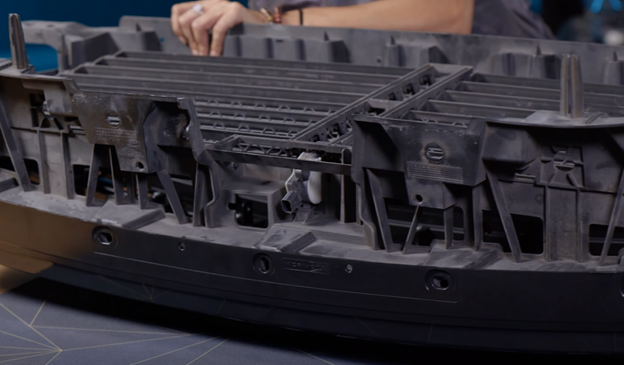
Transfer parts to the new grille
Using a pry tool, remove the five plastic clips from the top.
Using the same pry tool, remove the eight plastic clips from the bottom of the grille. Place the plastic shield to the side for now.
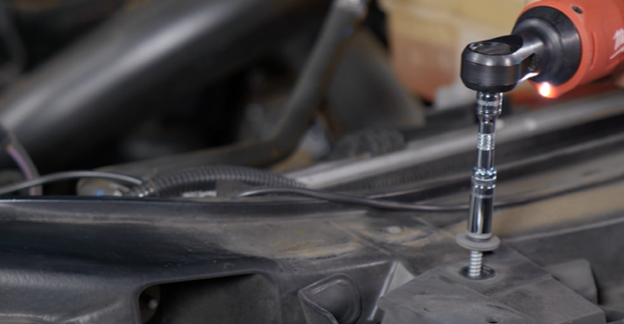
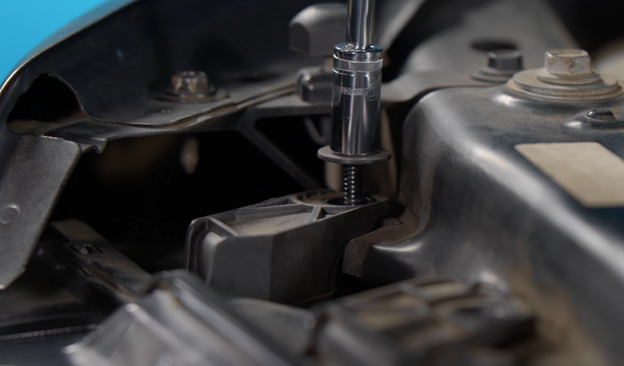
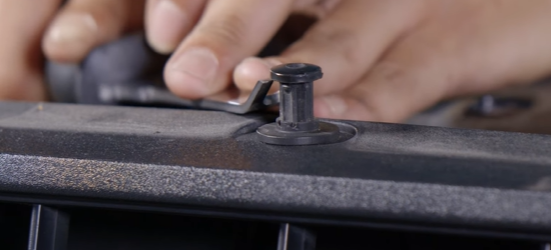
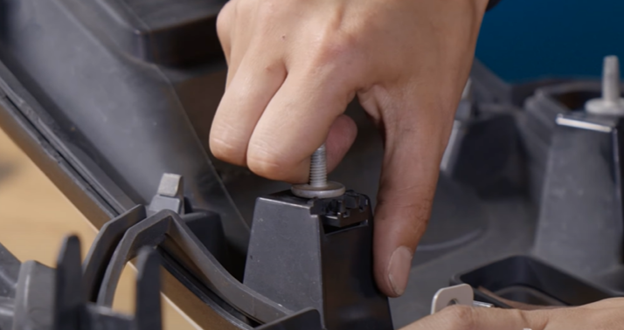
Remove the four 10MM nuts off of the threaded shaft on the backside of the grille.
On the bottom of the grille, press down on the lip of the five clips to release them from the retainer.
Separate the two grille pieces and set the top aside.
Note: If you have a front camera you will need to unplug the connector before completely separating the two pieces.
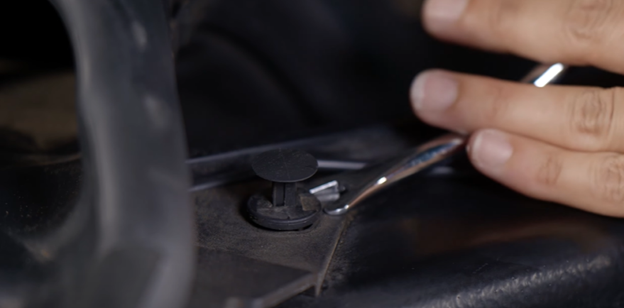
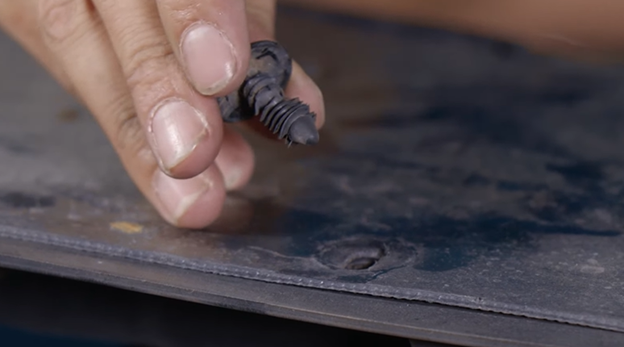
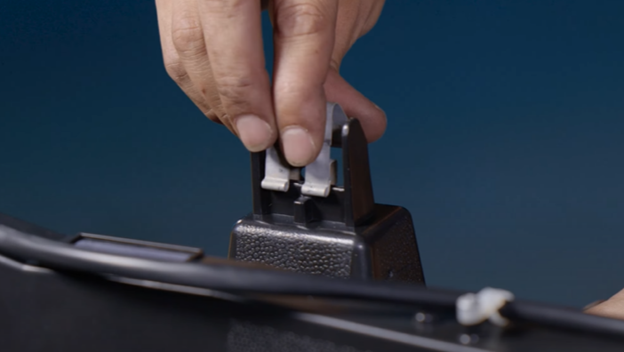
Remove the five metal clips using a pry tool. These will be used on the new bumper.
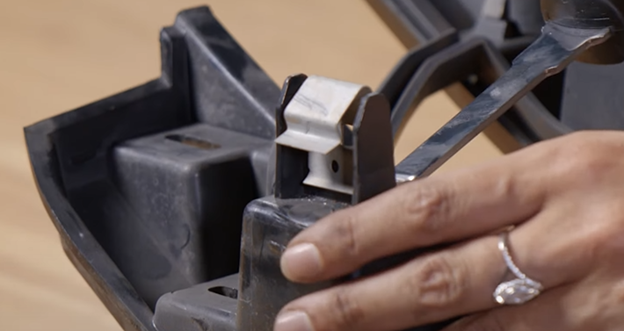
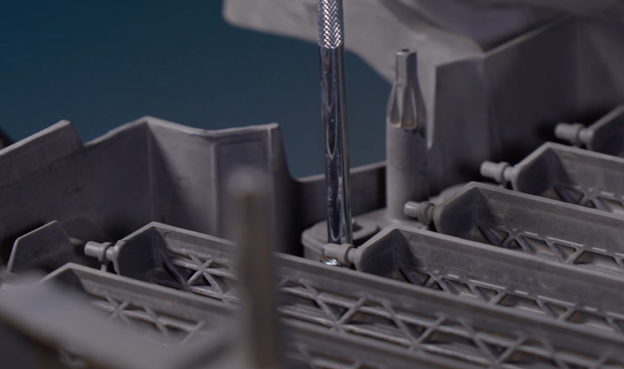
Remove the three 10MM nuts on the back of the Ford emblem. This can be installed into the new Morimoto grille; we suggest hand tightening only.
Remove the clips with the installed studs from the grille. These are the last 4 remaining pieces of hardware to transfer to the new grille.
Set the old grille to the side. Now it is time to re-install this hardware into the new XBG Grille. Start by putting the four threaded shafts back into place on the new grille. Next, reinstall the 5 metal clips by simply pushing them down on the tab.
If you have not done so already, re-install the Ford emblem on the new XBG grille.
Take the top portion of the grille that you separated earlier and re-install it onto the XBG Grille. Using the five push-clips on the top of the grille, secure the two pieces together.
Screw the four nuts onto the threaded shaft studs that we’ve already re-installed.
On the bottom of the grille, it is time to re-install the plastic shield cover with the eight push clips.
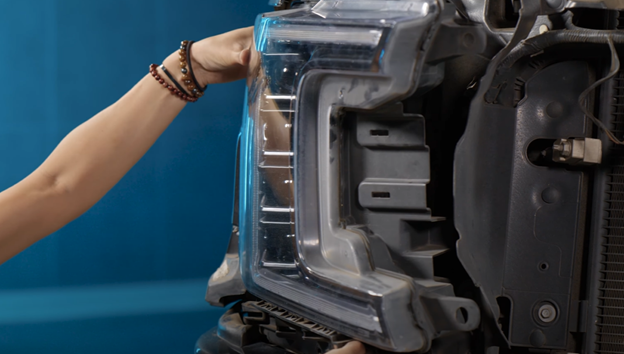
Install new XBG Grille
Set the grille into the bumper and connect the two plugs on the XBG grille to the two plugs that we left behind the passenger headlight. Since you routed those plugs to the grille area, they should be easy to access. Tuck any excess wiring behind the headlight so it does not interfere with the grille.
Re-connect the OEM wiring at the top of the grille. Turn the truck on and test all of the functions.
Reassemble the truck in the opposite order of removal.
Install for 2017-2019 Super Duty XBG Grille
Remove Grille Cover
Remove the fourteen plastic clips holding on the grille cover. When removed, gently set to the side.
Remove The Grille
Remove the seven 10MM bolts from the top of the grille. If you have a front camera, you will need to unplug the two connectors by the hood.
Pry on the backside of the grille to release from the retaining clips. This process will be repeated on the other side.
Gently pull the grille towards you to remove it from the truck. Set grille aside.
Note: If this is the first time removing the front grille, you might have a hard time with the clips. With the grille tilted forward, you can use a long flathead screwdriver to press down on the metal clips to release them.
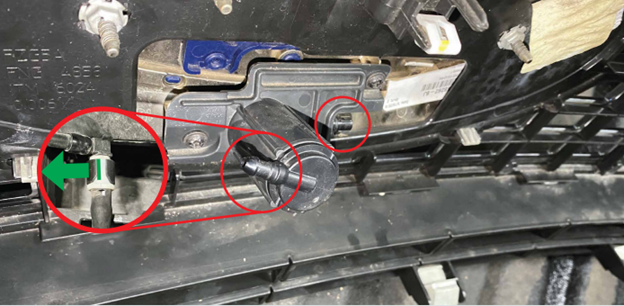
If you have a front camera, unplug the connector by pressing the release tab and sliding the connector off. The same needs to be repeated for the washer fluid hose. Once removed, the grille can be pulled off the truck and set aside.
Remove The Headlight
Remove one 10MM bolt from the passenger side headlight located between the fender and the bumper.
Remove two 10MM bolts from the inner side of the passenger headlight.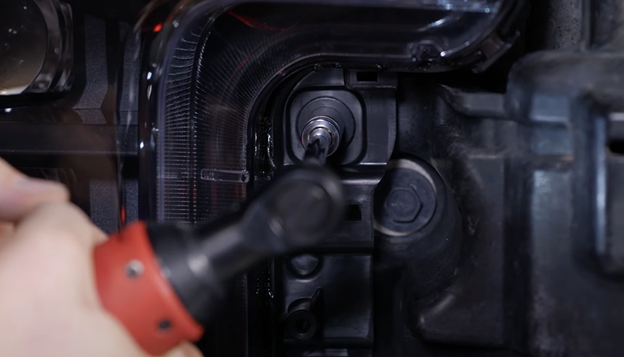
Remove one 10MM bolt from the top of the passenger headlight. You can now pull forward to release the headlight from the truck. Make sure to disconnect all connectors on the back of the headlight before completely pulling away.
Install Fuse Tap / DRL Harness
Locate the fuse box on the passenger side by the firewall. Find fuse location #35. Install the provided fuse tap into this fuse location.
Route the ends of the DRL harness to the passenger side headlight area.
Install Adapter harness
If you have OEM LED headlights, you will need to use the LED adapter harness. If you have OEM Halogen headlights, you will need to use the halogen adapter harness. Begin by plugging in this harness to the OEM wiring.
Connect the DRL harness to the adapter harness.
Route the wiring with the two connectors for the grille towards the center grille area. Now you can re-install the passenger side headlight.
Transfer parts to the new grille
Laying your grille down on a flat, soft surface – remove the three 10MM nuts on the back of the Ford emblem. Install into the new Morimoto grille, hand tight only.
Install new XBG Grille
Set the grille into the bumper and connect the two plugs on the XBG grille to the two plugs that we left behind the passenger headlight. Since you routed those plugs to the grille area, they should be easy to access. Tuck any excess wiring behind the headlight so it does not interfere with the grille.
Re-connect the OEM wiring at the top of the grille. Turn the truck on and test all of the functions.
Reassemble the truck in the opposite order of removal.
Conclusion
If these beautiful Morimoto XBG Grille LEDs do not quite quench your lighting thirst, we also carry the Morimoto XB LED headlights for the 2018-2020 Ford F150 and 2017-2019 Ford Super Duty.
If you are more of a visual learner or would like to see these lights in action. Check out our video below covering these both installs for the 2018-2020 Ford F150 and 2017-2019 Ford Super Duty trucks.
While you are there, do not forget to like and subscribe to our channel for the latest lighting upgrades for your vehicle.
Have any questions about any products we mentioned? Contact us today, and our customer support team will be happy to help.