Learn How To Be A Safer Driver by Aiming your HEadlights
I don't care what kind of headlights you have - projector or reflector, car or truck - if you replace your original halogen headlight with an LED bulb, chances are you're blinding everybody else on the road, and you still can't see as good as you wish you could.
This video will discuss how to aim your headlights with LED headlight bulbs and why some work better than others.
If you know anything about our channel already, you know that we do lighting better because we test. We test a lot. I'm not saying I don't like LED headlight bulbs; I'm saying most of them don't work right. Go check out our other videos where we explain why.
But what you need to know is that for an LED headlight bulb to work correctly in your vehicle, you need a specific type of design. You have to have a certain kind of LED chip and a certain kind of width and placement inside the headlight. It also needs to be adjusted to the right spot.
Many things go into which LED headlight bulbs will work for your vehicle - they are not one-size-fits-all. If you replace your halogen bulb with the type that makes a weird beam pattern, you're never going to be able to aim your headlights. So first, let me show you what a lousy beam pattern looks like and why it will never actually work, regardless of how much you aim it.
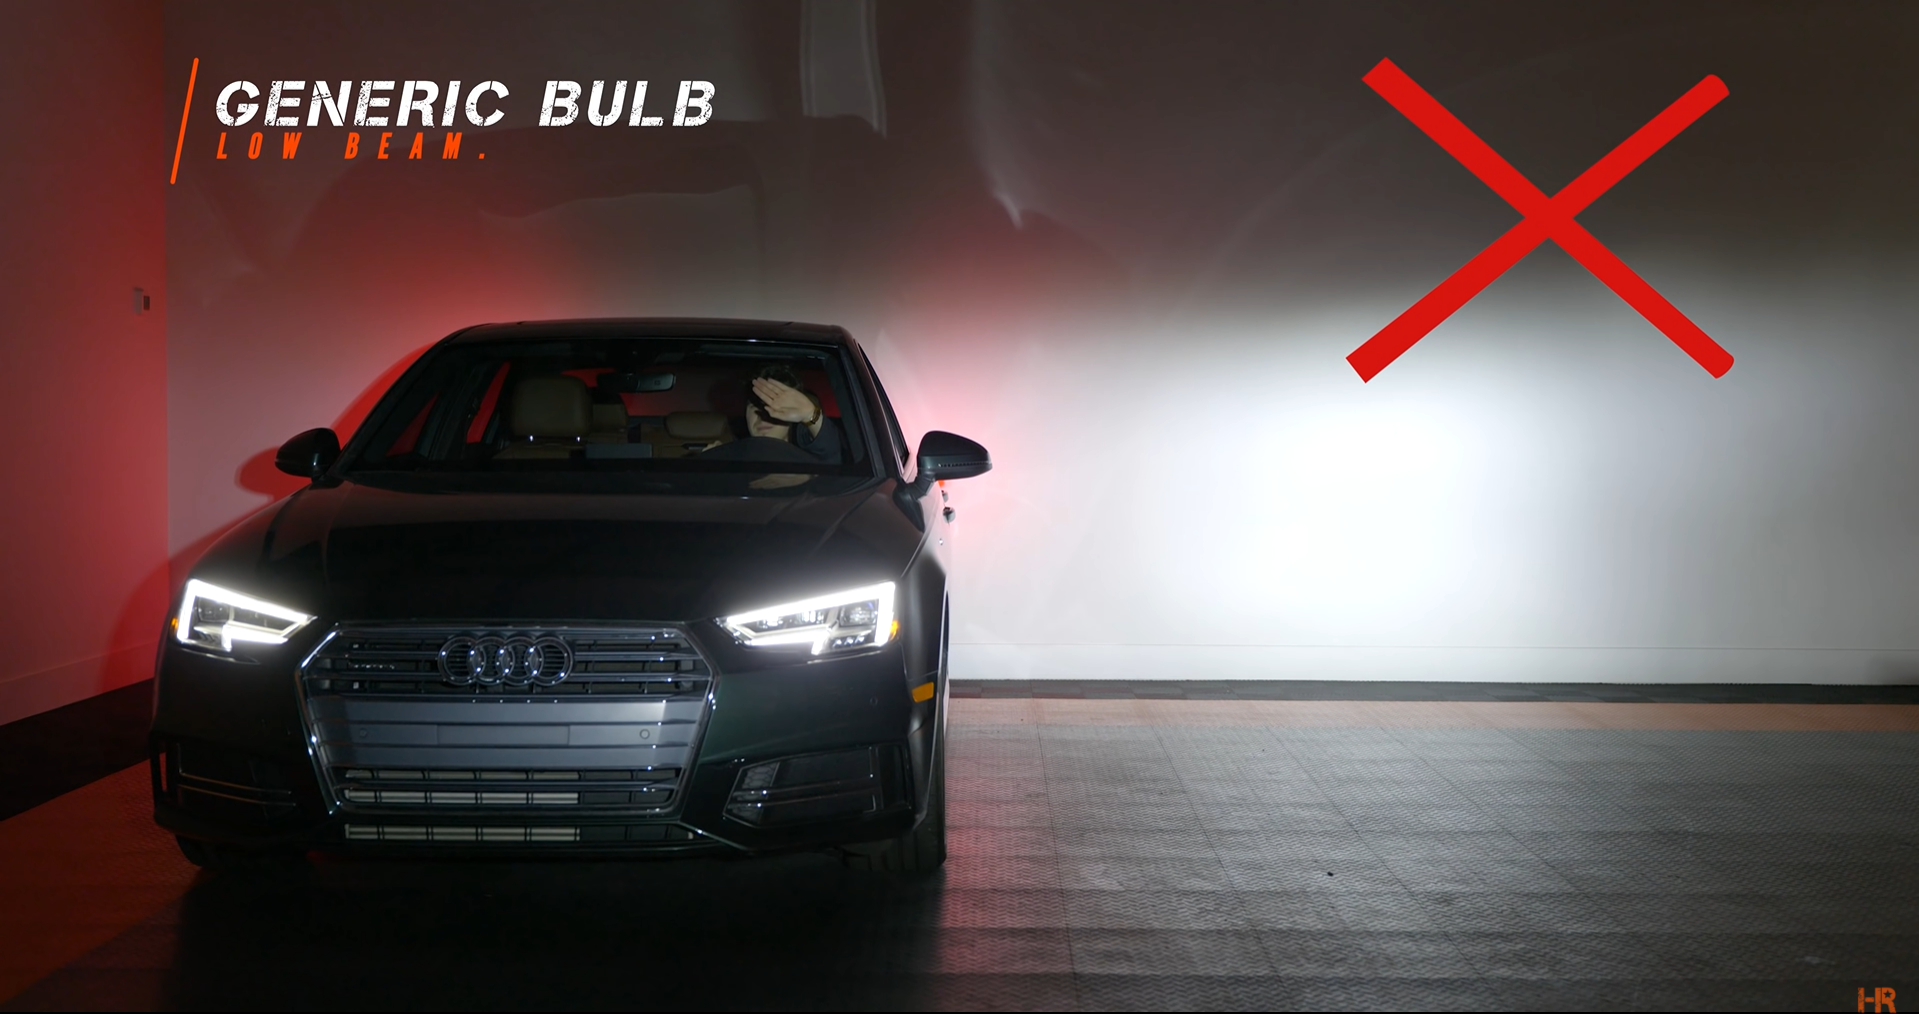
You see in this example now our beam pattern is blown all out of proportion. Look at how tall it is and look at where the top of the beam is. If you take the brightest portion of this beam pattern and put it where you need it on the road, look how high up it goes. It blinds everybody else. That's why bulbs that make this kind of beam pattern don't work.
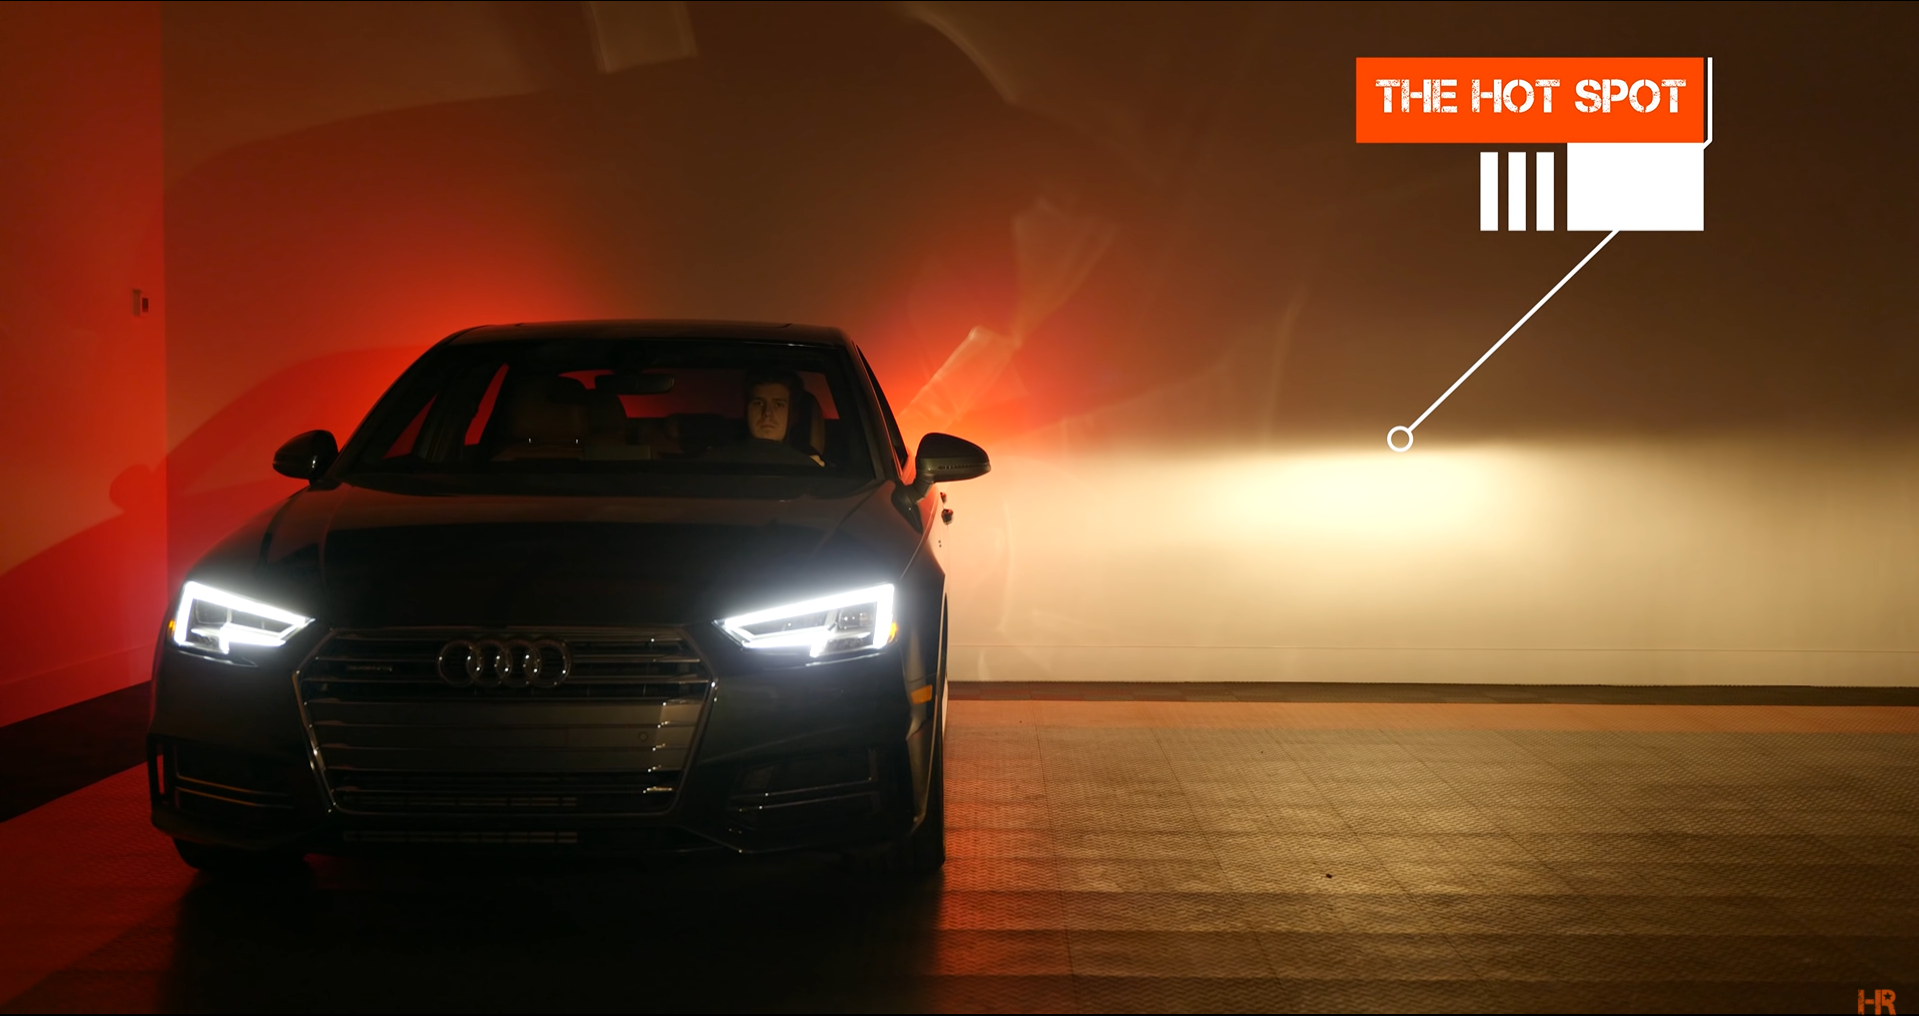
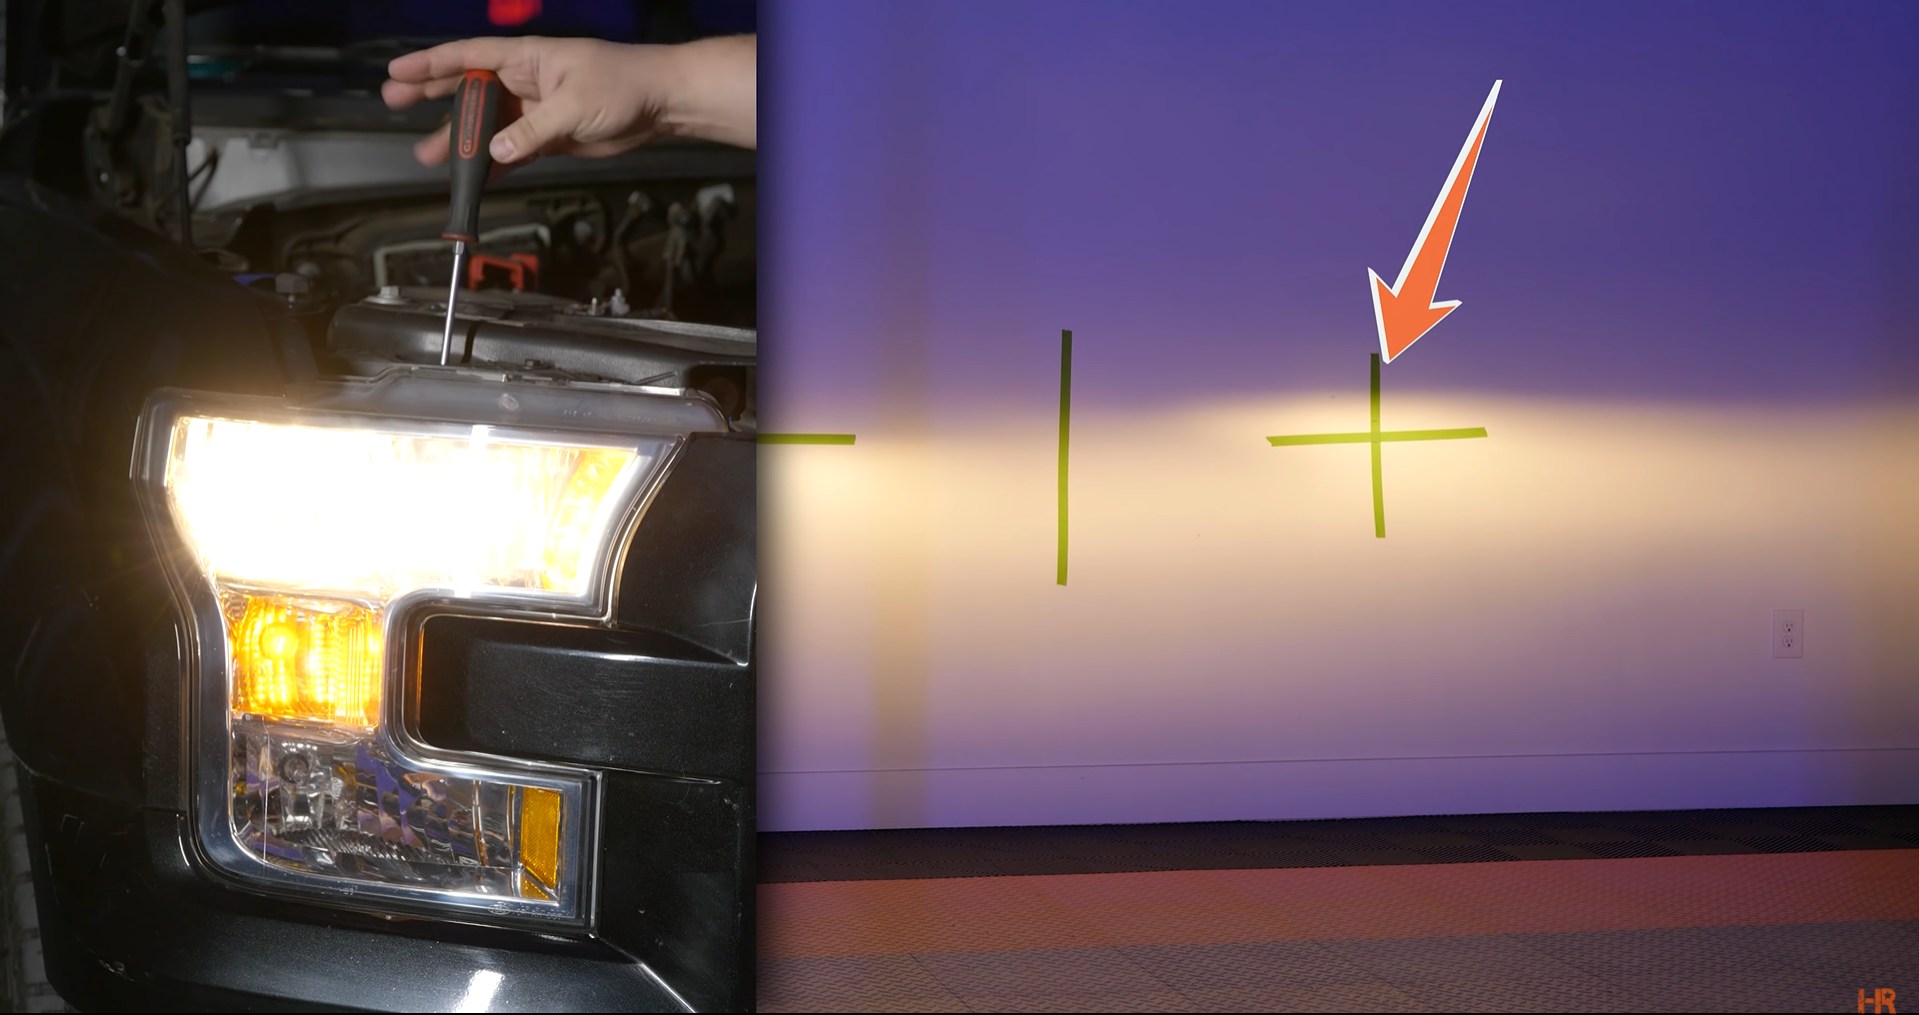
Imagine this is your vehicle driving on any road with your original halogen headlights. You can see that there's a distinct cutoff line, and near the center, at the top of the beam, you have the brightest portion. That's what we call the hotspot. The headlights have the hotspot near the top of the beam so the beam can be aimed underneath the oncoming driver's point of view.
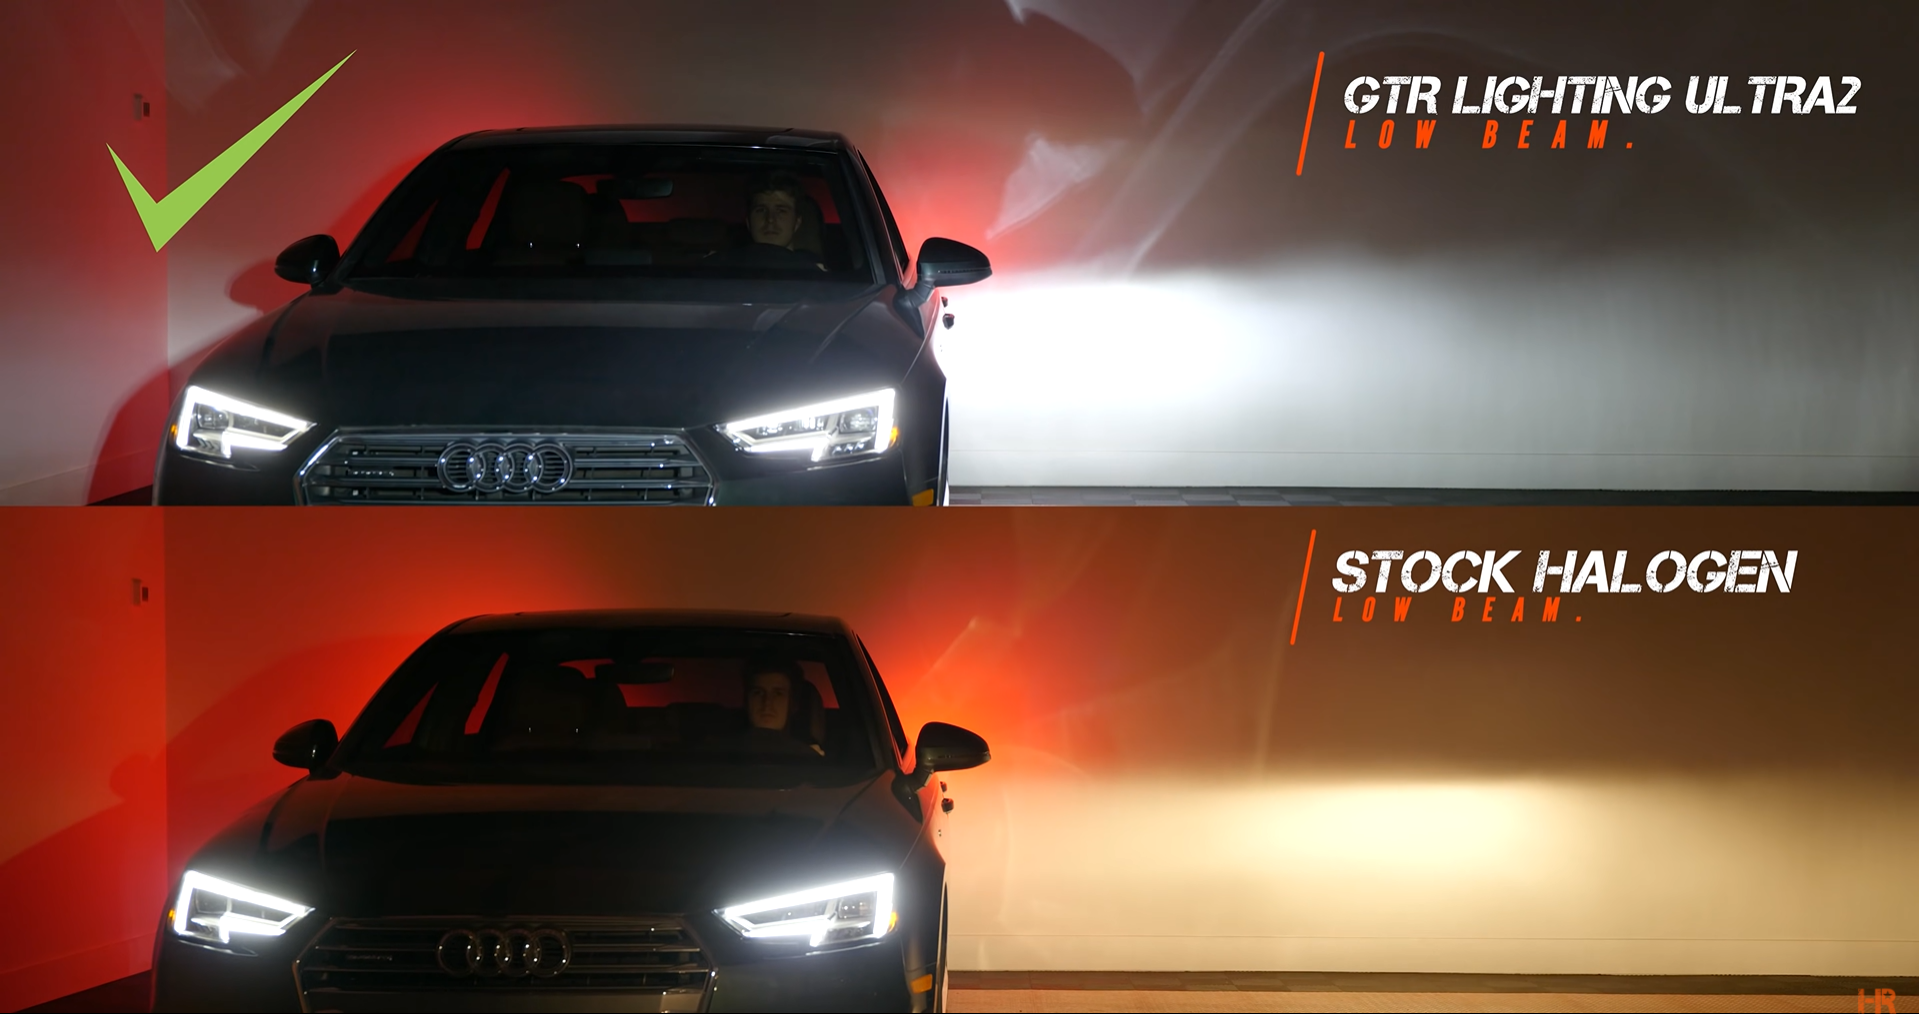
Now let's take the halogen bulb out and put in an LED bulb that works well, like the GTR Lighting Ultra 2 - watch our other videos if you want to see why this one works better than others. The reality is, it does.
With this headlight bulb, you can see that the beam pattern is very similar to the original halogen, and that's important. We've got the same cutoff line, we've got the same hotspot near the top center - and look at that, you can adjust it correctly so that it's giving you maximum brightness, without blinding the eyes of the other drivers on the road.
On our videos, we get comments every day from people complaining about how blinding and bright LED headlights are, and then other people chime in saying, "As long as you have them aimed correctly, it's fine," and the reality is that's only half the story. You still have to get the correct bulbs to begin with.
How to Properly Aim Your Headlights
So let's talk about what it takes to aim your headlights after you've chosen the correct bulbs. On your headlight, you're going to find two things: First thing, pull your vehicle up to the wall about three feet away, so you've got some space between your front bumper and the wall itself.
You're going to want to make sure that if one person typically drives your vehicle, you want to have somebody sitting in the driver's seat while you're doing the aiming. If you usually have a car with a lot of construction equipment or other types of equipment, or anything that might weigh down the vehicle, you're going to want to simulate that for this also.
The last thing you want to do is change the weight of what you're carrying in your vehicle and then aim your headlights. You are going to want to make sure you've got about half a tank of gas to get to that average level, and you are going to want to make sure that your tires are aired up correctly. Any of these things can throw off the alignment when you're doing this work yourself.
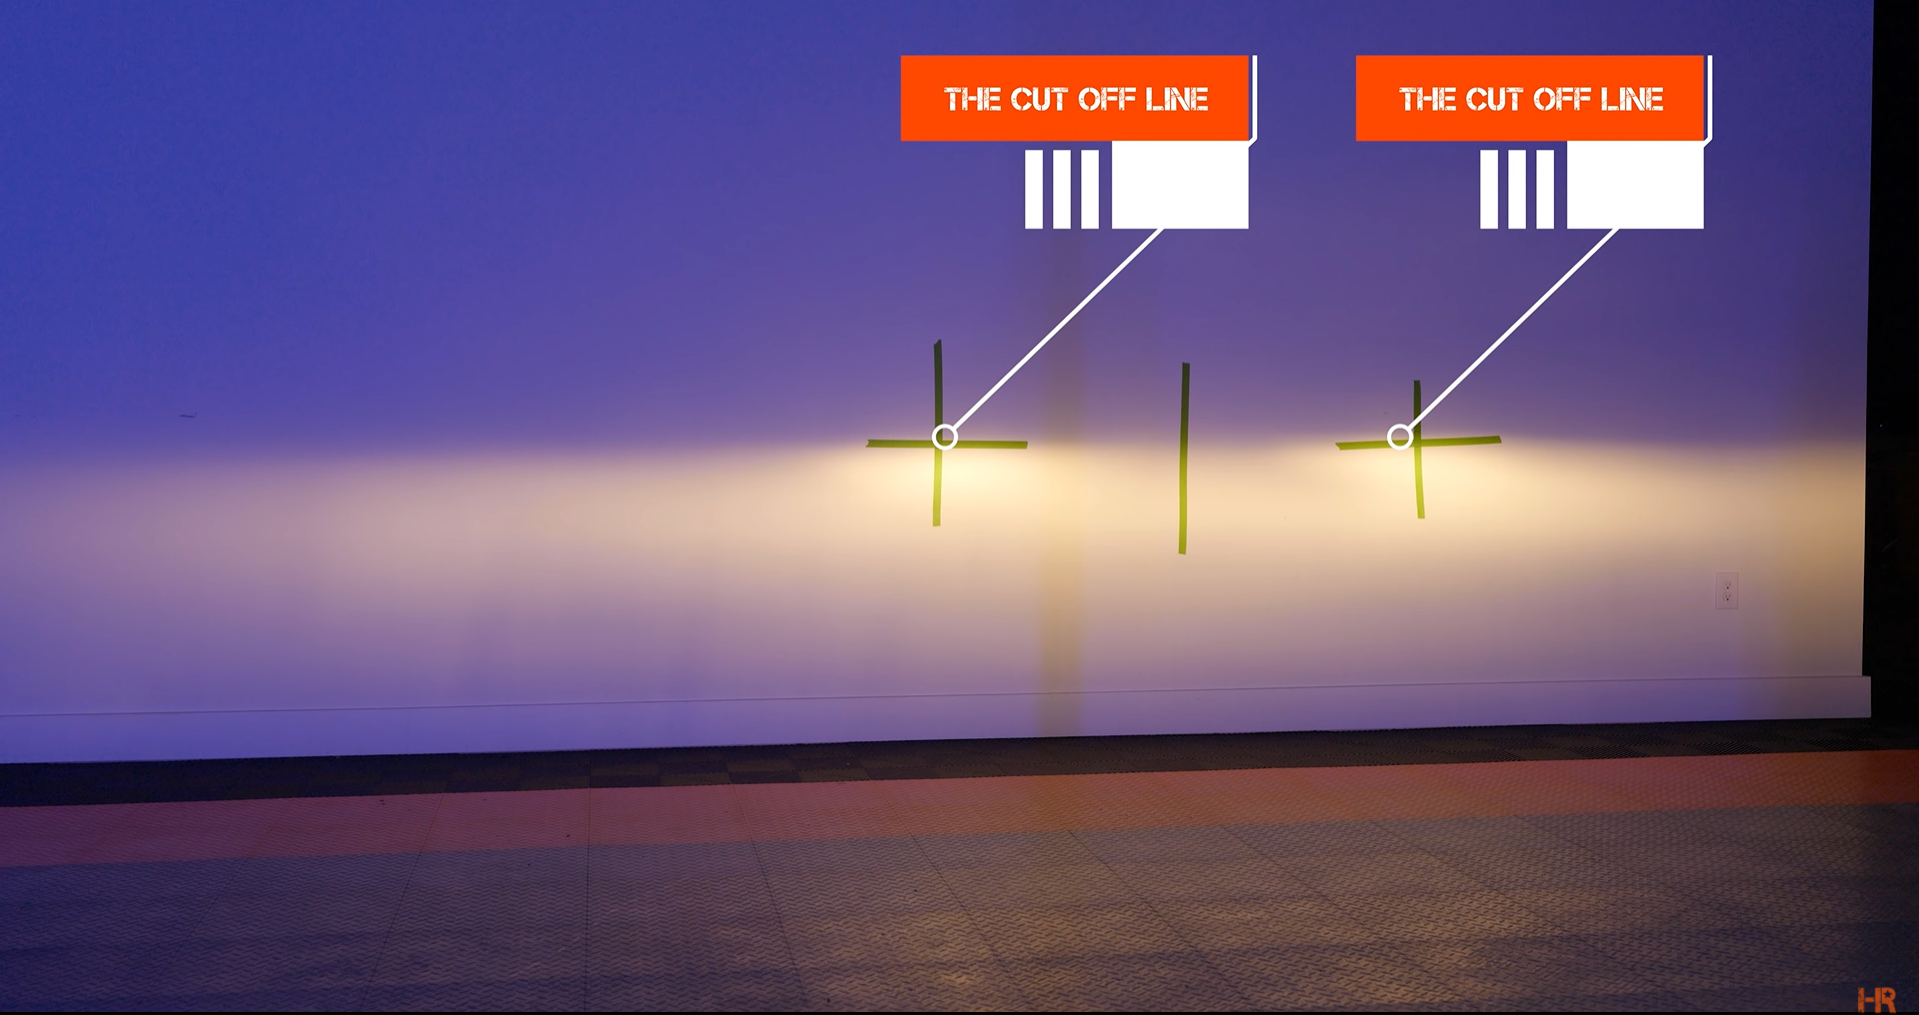
Once you have your vehicle squared up to the wall, three feet away, identify the vehicle's center and add a vertical piece of painter's tape or something to indicate the center. Then, identify the center of each headlight and add another vertical piece of tape on either side.

You're going to want to make sure that the distance between the center and your headlight marking is the same on the wall. You can identify the center of your headlight by that little dimple that's in the plastic.
Now, take a tape measure and measure from the ground to the height of the center of your headlight. This measurement is the height of the dimple on your headlight from the floor up. Measure that distance up to the tape on the wall and make a mark on your piece of tape. That should identify precisely the center of your headlight on the wall.
Then measure two inches down and make a mark. You should have two marks on the tape for both headlights.
Between those two marks that measure the center of your headlight and a two-inch drop, put a horizontal piece of tape on the wall to give yourself a cross-section where to aim.
The bottom of this horizontal measurement at that 2-inch mark should be where the top of your beam pattern sits when you're 25 feet away. Now that you have all your markings correct on the wall, go ahead and pull the vehicle back 25 feet, and then we'll look at the aiming.
Twenty-five feet is a generic rule of thumb for any vehicle; however, some manufacturers specify different distances closer or farther away. So before doing this yourself, check your owner's manual to make sure you're doing it right.
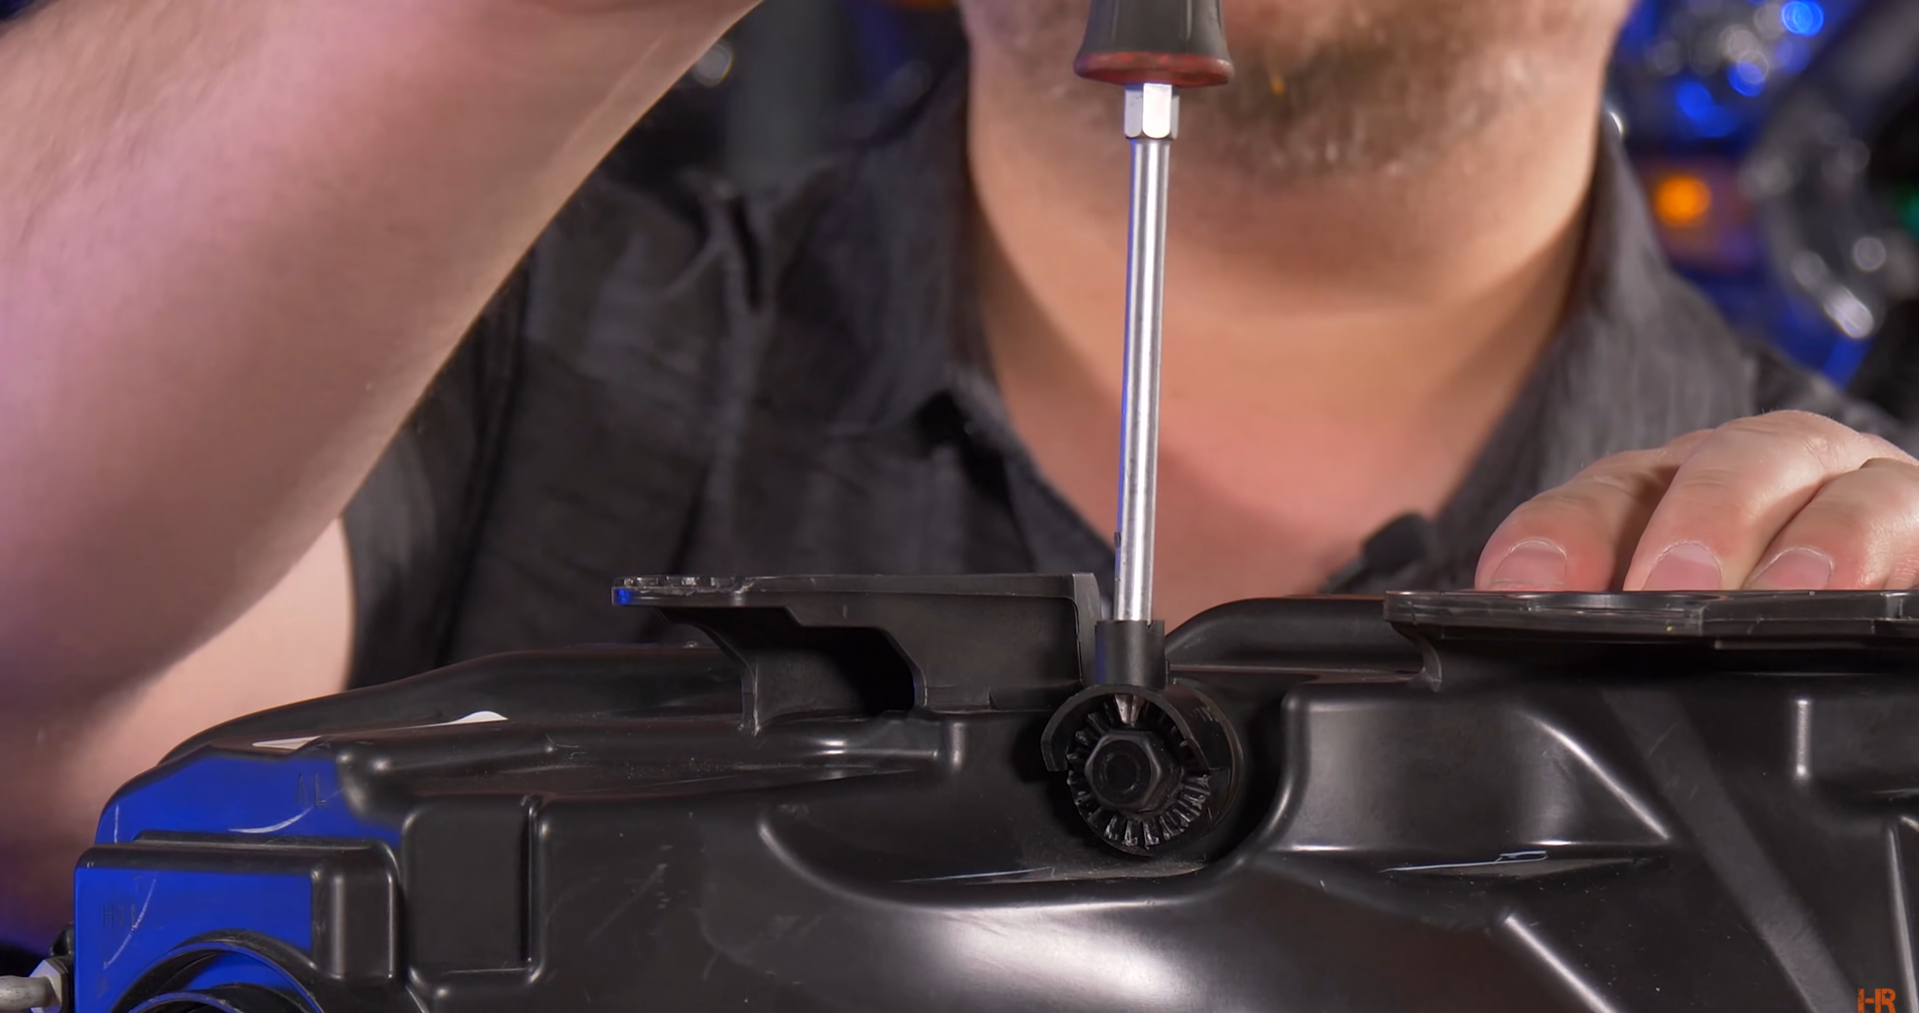
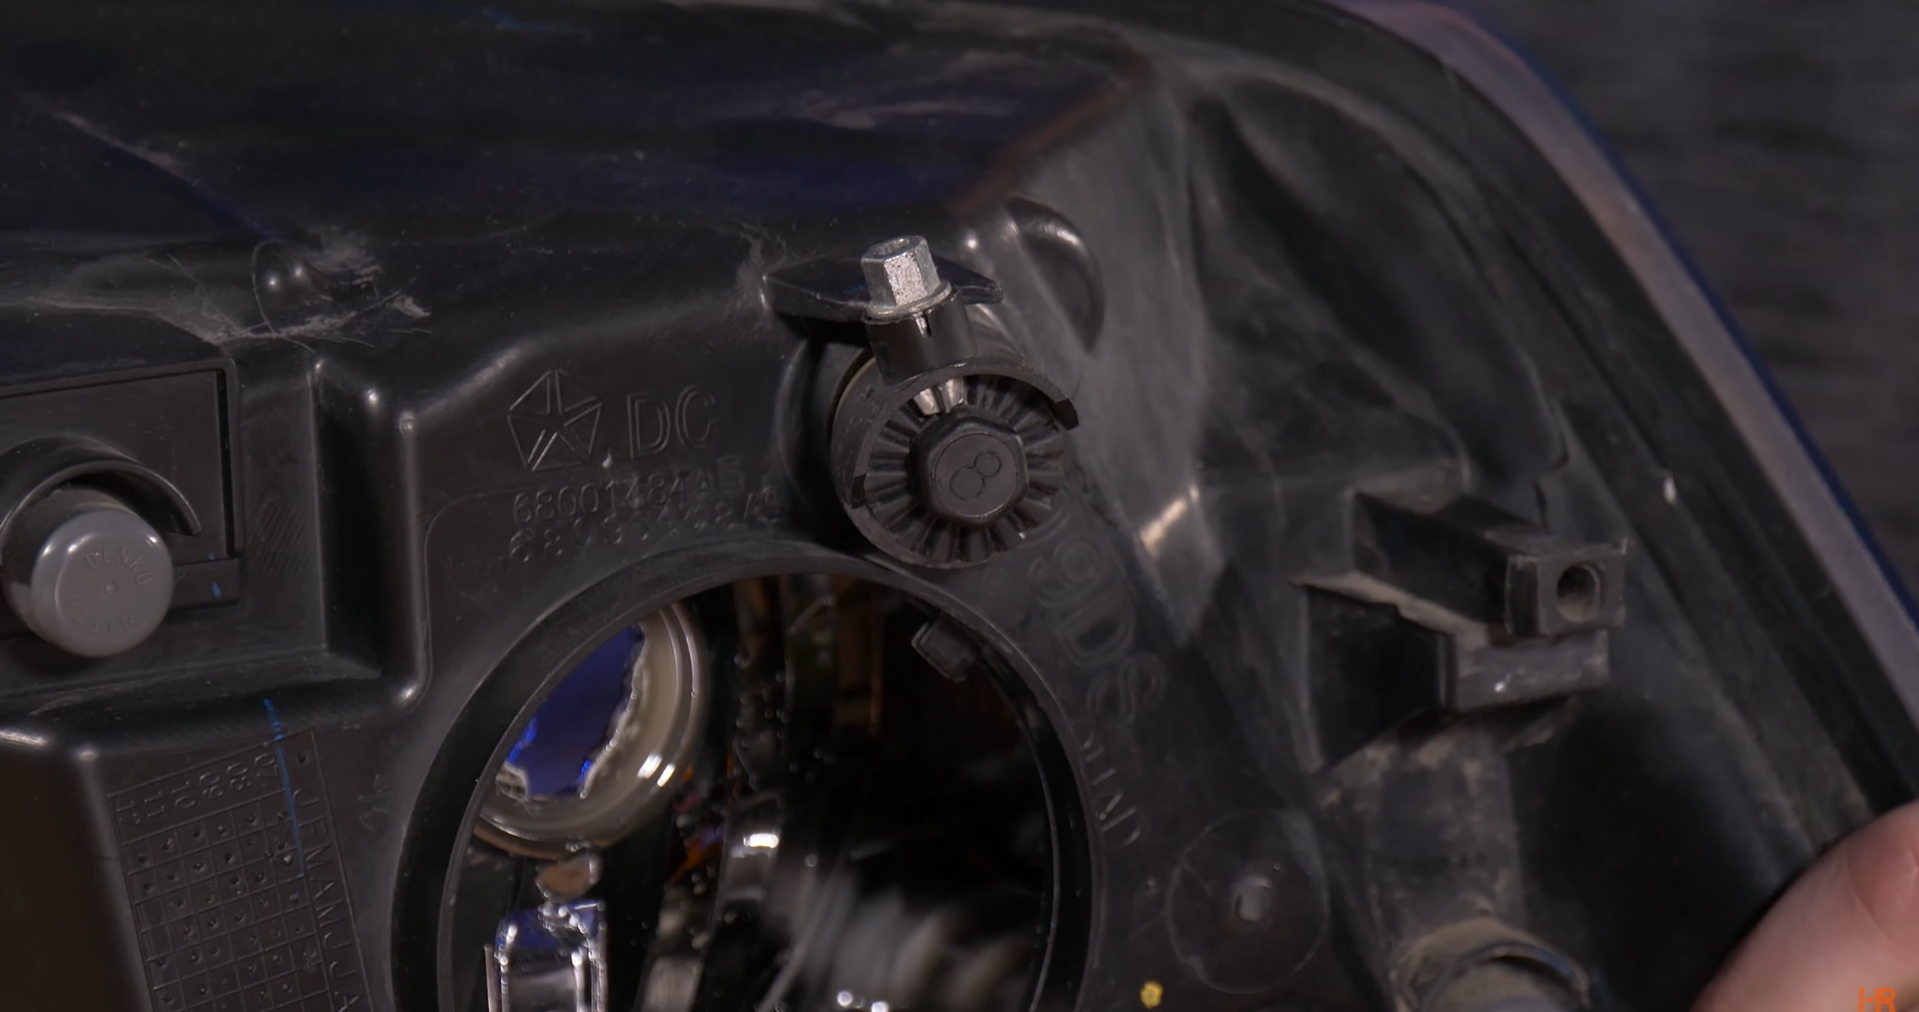
Now that you have your vehicle 25 feet away from the wall, it's time to use a screwdriver or other tool to align the headlights up and down. All headlights have different alignment adjusters; they all pretty much act the same way, but sometimes they can be a little bit different.
Most of the time, you're going to see something that needs a Phillips screwdriver. You open the hood, look down, and find where the headlight adjustments section is on your headlight. Then you're going to be able to see if it is a socket, if you need a Torx bit, or if a Phillips screwdriver does the trick.
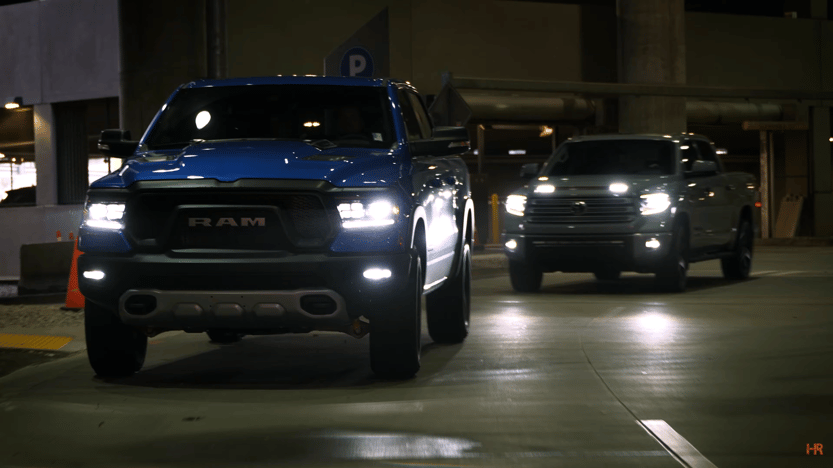
Adjusting the Beam: Ford F150 vs. Dodge Ram
On this F150, you can see an enclosed assembly with a little tube on top. From the top of your engine bay, to move your headlight's inside mechanism, you will turn your screwdriver clockwise or counterclockwise. Turning this mechanism will make the projector or the reflector move up or down.
On the back of this Dodge headlight, we have a similar thing, but it's not sticking out of the top. As you can see, it's way down here near the middle of the headlight, but luckily they made it easy for us with a guide that goes into that same gear drive.
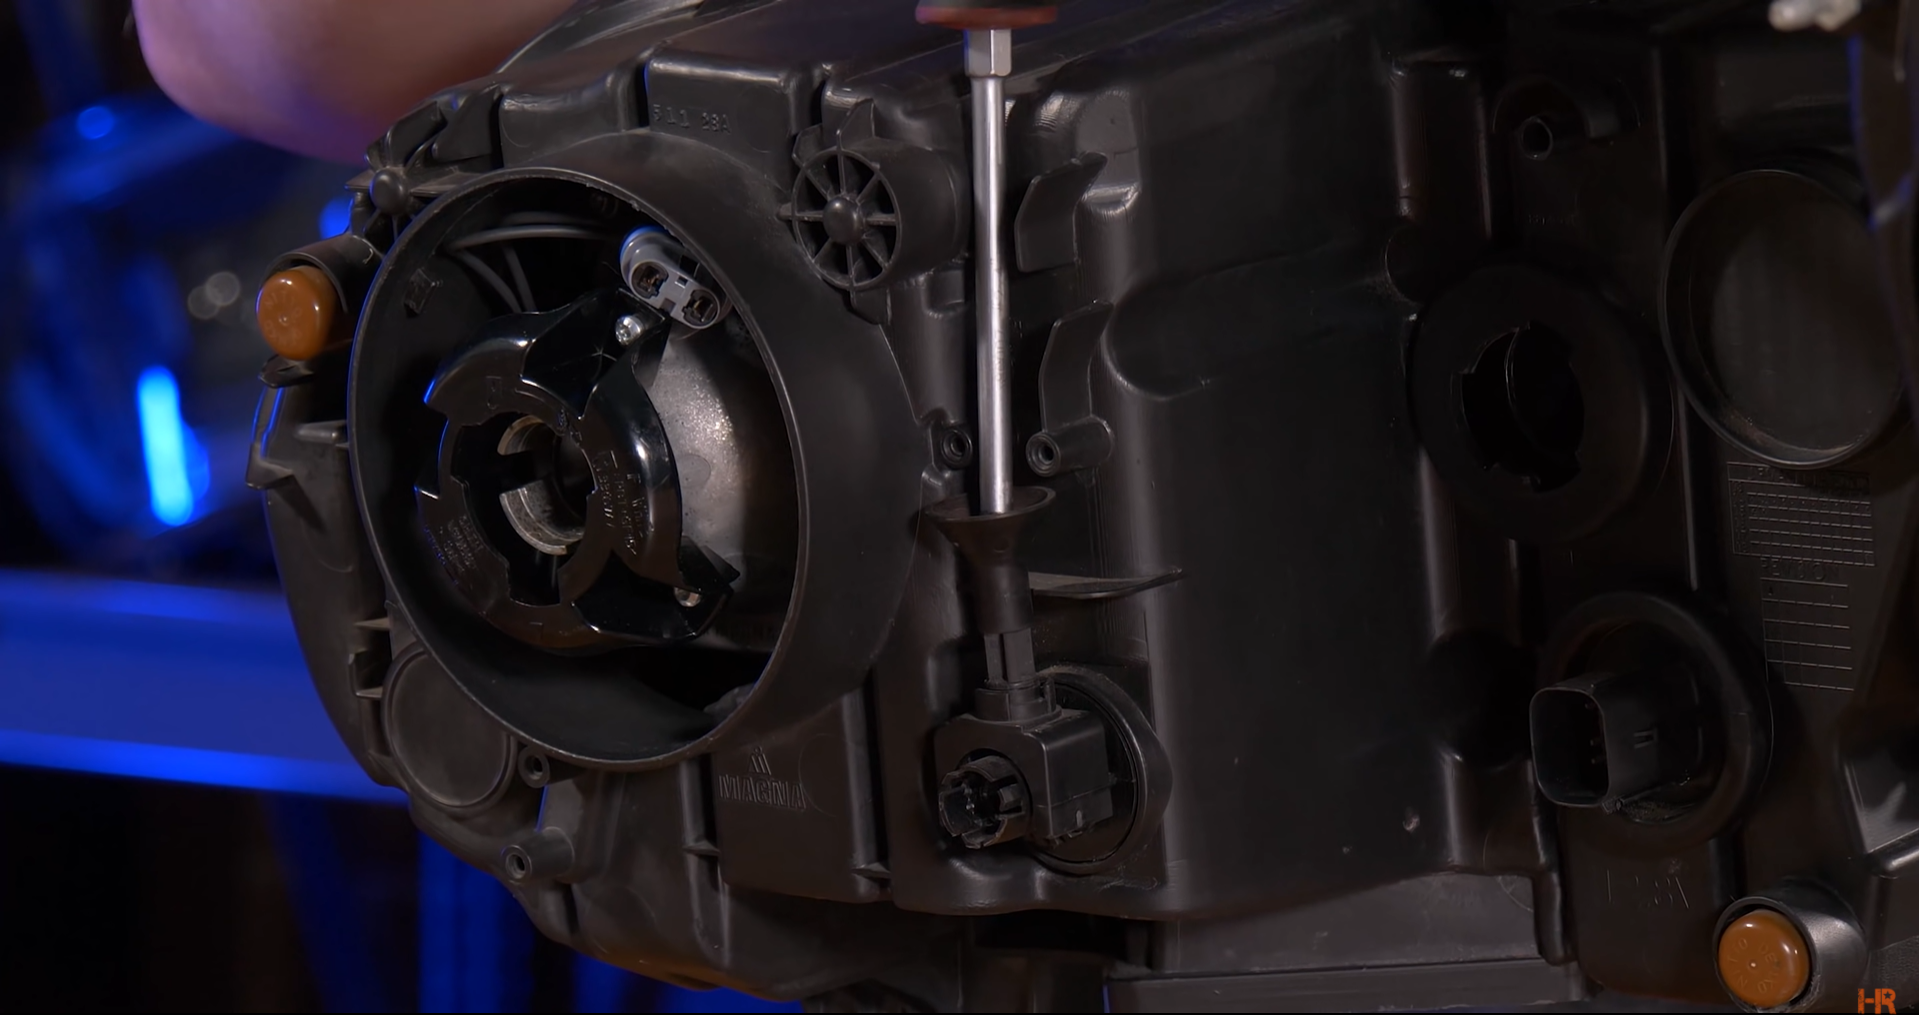
It's the same mechanism on this Ram headlight, but you don't use a Phillips screwdriver. In this case, you can either use a socket or a Torx driver.
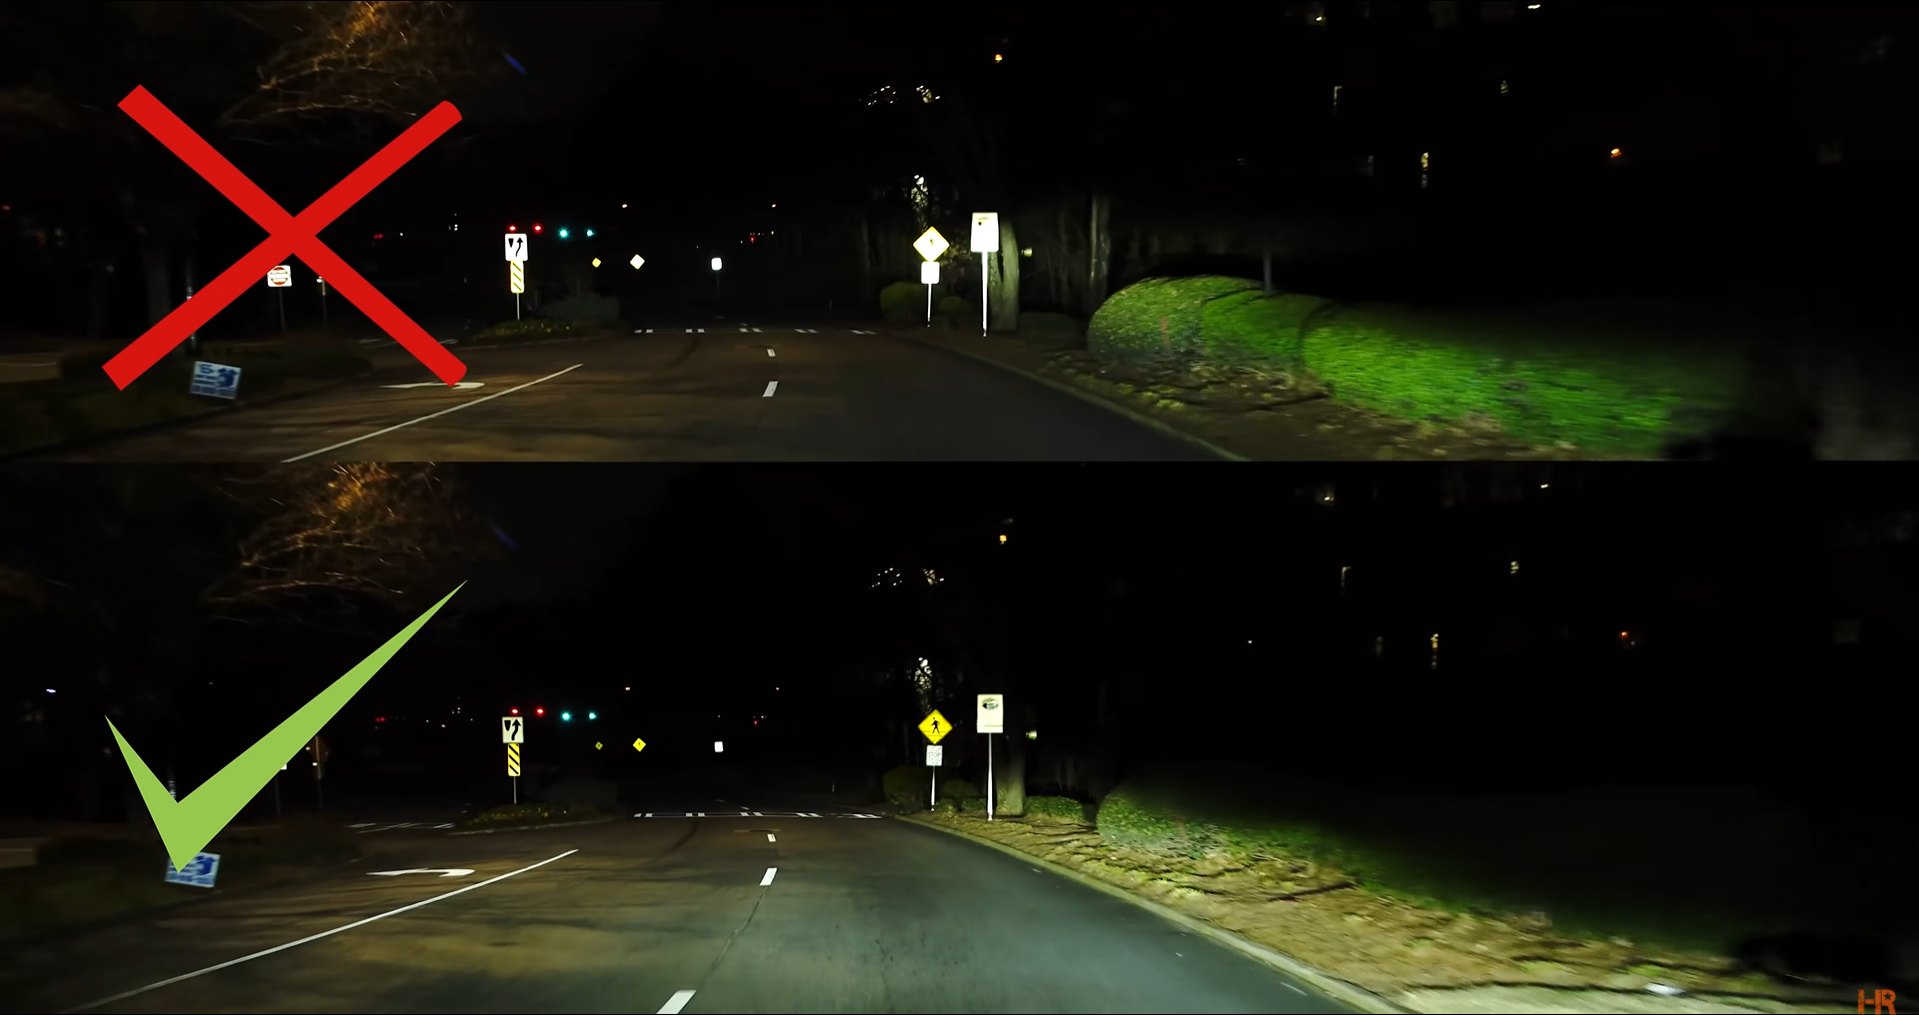
Now take a look at where your headlight aims. The top of your headlight - the cutoff line right where the brightest part of the beam is - should not be going over that 2-inch drop mark. As you can see here, we've got one that's higher than the other, so we want to bring them both down to hit that spot.
The idea here is the farther you go away from something, the bigger your beam pattern is. So we want a 2-inch drop over 25 feet, which communicates to a much more significant drop further in front of the vehicle for everyday highway driving.
Test It On The Street
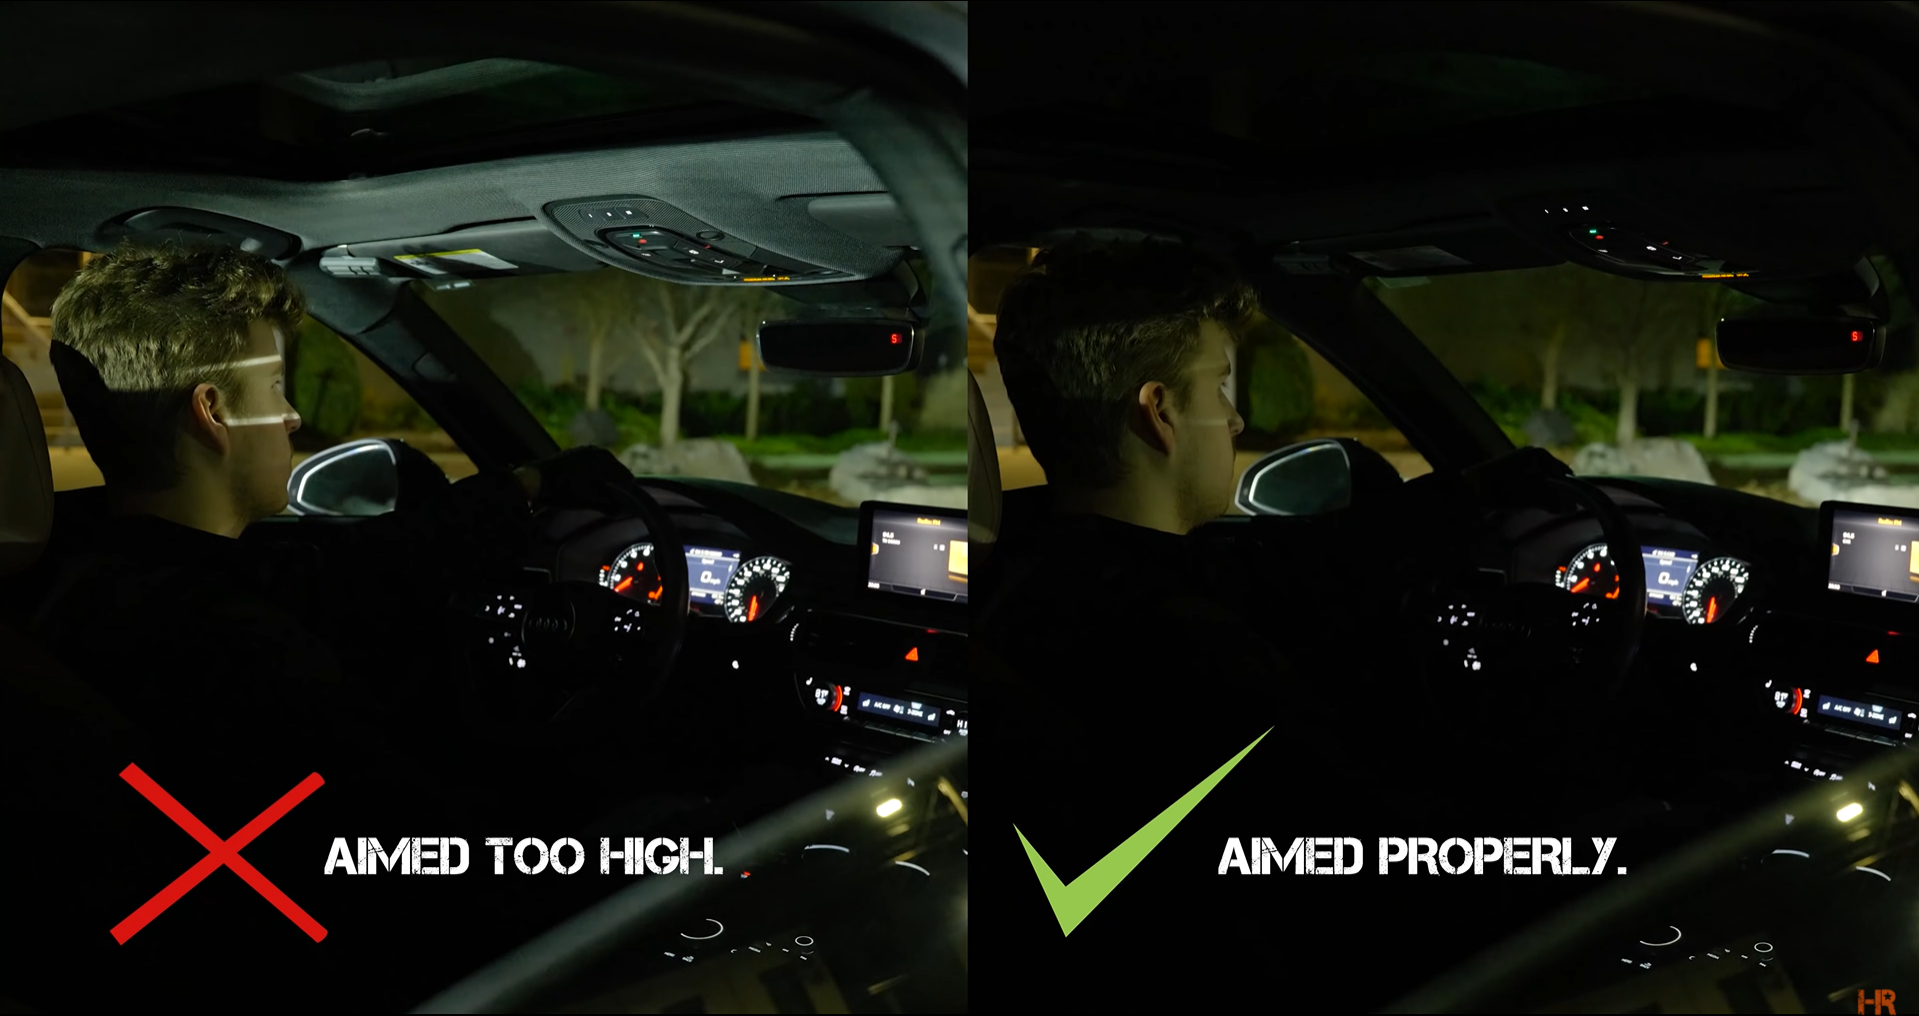
When you're driving, I like to make sure that my headlights are just barely bouncing off the bottom of different street signs. To me, this is a good indicator that they're not going to be getting in anybody's eyes, and it lines up with the step-by-step instructions we just went through.
Suppose you're driving around and all the street signs constantly light up, or you can see the back of somebody's head in the vehicle in front of you, or you see somebody adjusting their mirrors because you're blinding them. In that case, those are examples of either a poorly aligned headlight or the wrong LED headlight bulbs.
What you just learned from this video can be applied to any vehicle with any light bulb product out there. It doesn't matter what brand it is or if it's LED or HID or halogen - it's all the same. At the end of the day, you want a beam pattern that looks like the original halogen, that's brighter hopefully, and you aim them correctly, so you're not blinding people. It's that simple.
If you want to learn more about which LED headlight bulbs or HIDs, or halogen are best suited for your vehicle, go check out the other videos on our channel. And of course, subscribe if you want to learn more about how to do lighting better!